Mobile app user manual
Log in, grant permissions, read the dashboard and navigation bar, add registrations with NID capture, work through follow-ups, track microplanning areas, and check status and settings.
Introduction
The ComMicPlan mobile app (CMPCollect) is the field companion to the web platform. Data collectors log in, download assigned forms, register respondents, follow up on scheduled visits, track their assigned microplanning area, and monitor submission status, all from the phone.
- 1Log in and grant device permissions
- 2Read the app bar and bottom navigation bar
- 3Review the dashboard: downloads, quick actions, recent activity
- 4Add a registration and capture identity documents
- 5Work through the Follow-up list
- 6Track movement inside the assigned Microplanning area
- 7Check submission Status and adjust Settings
Log in
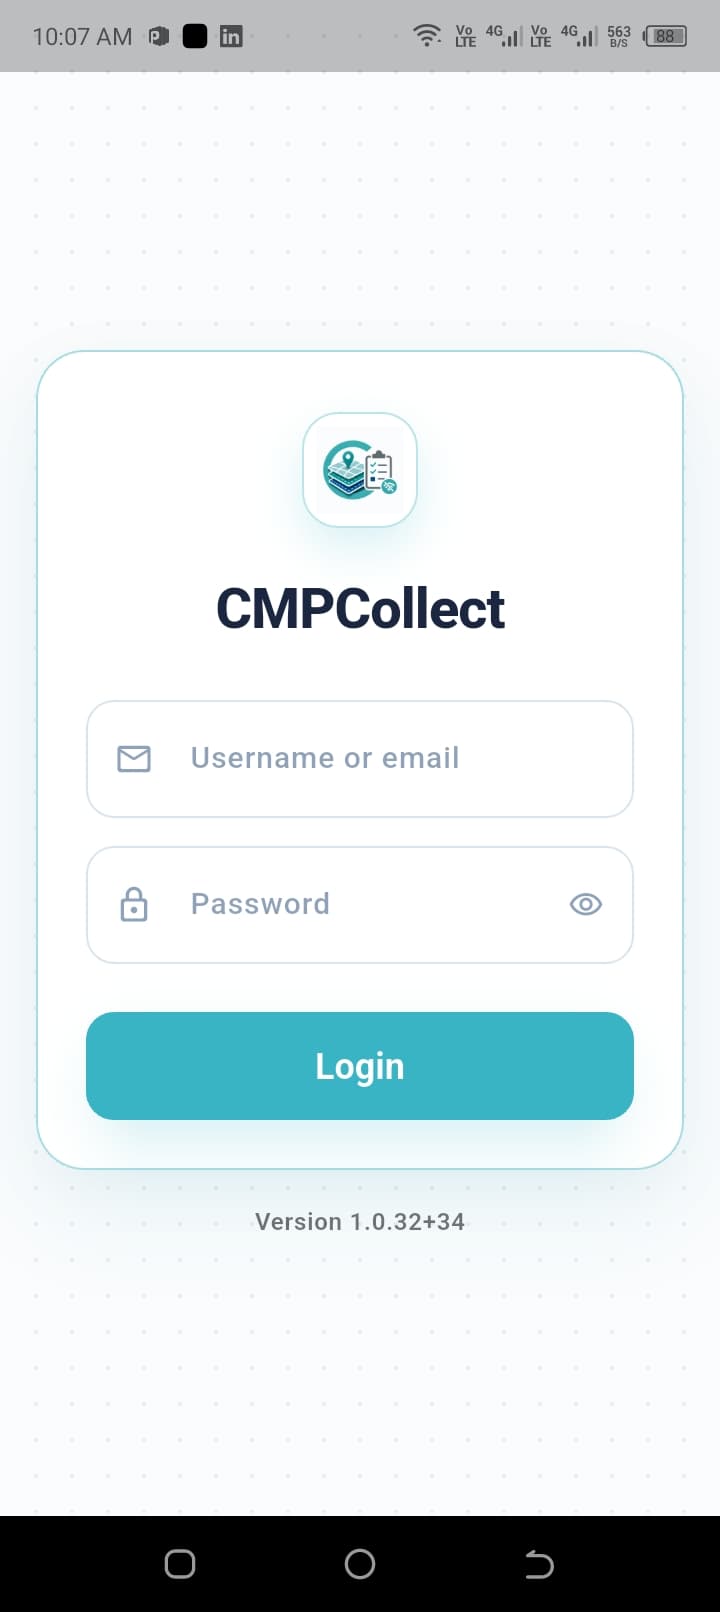
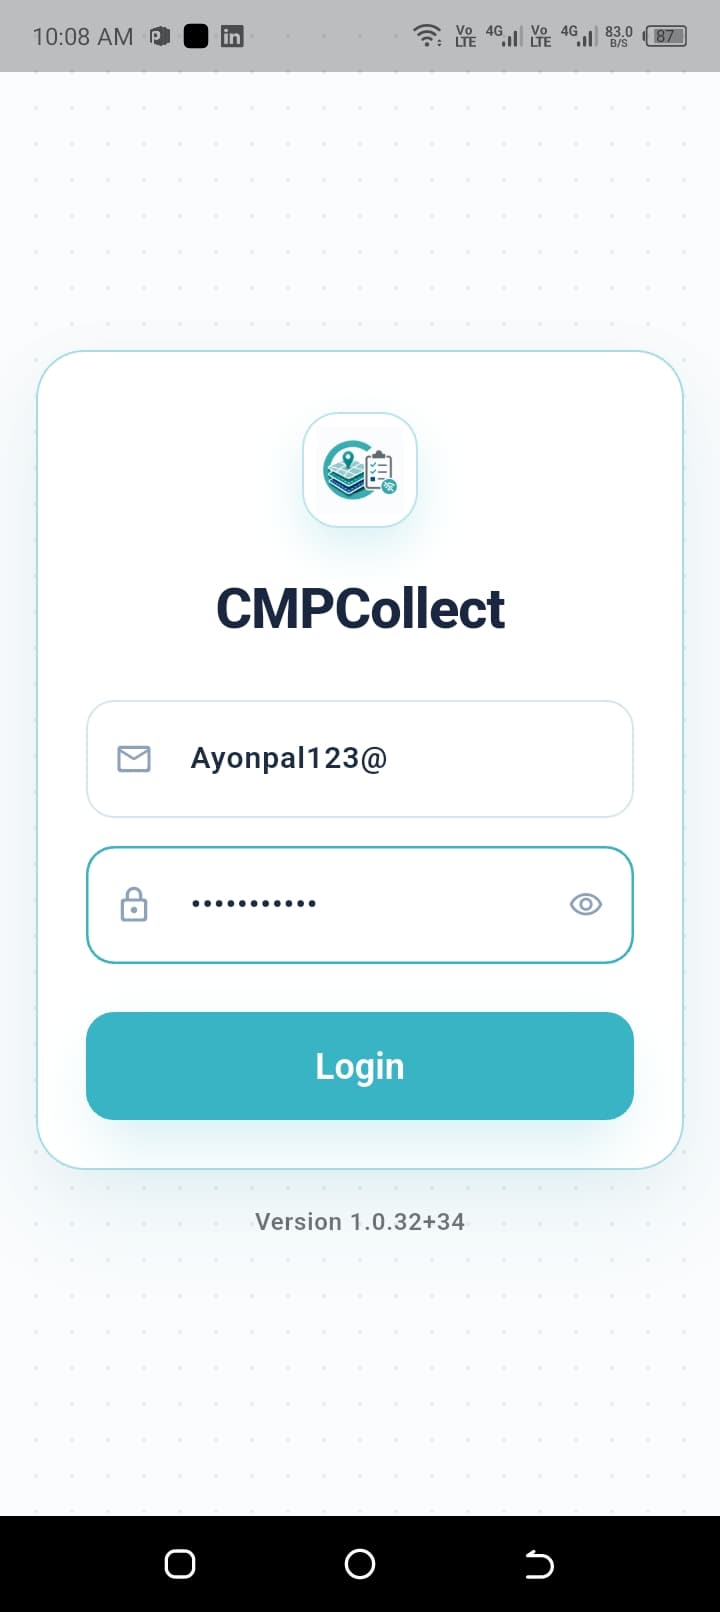
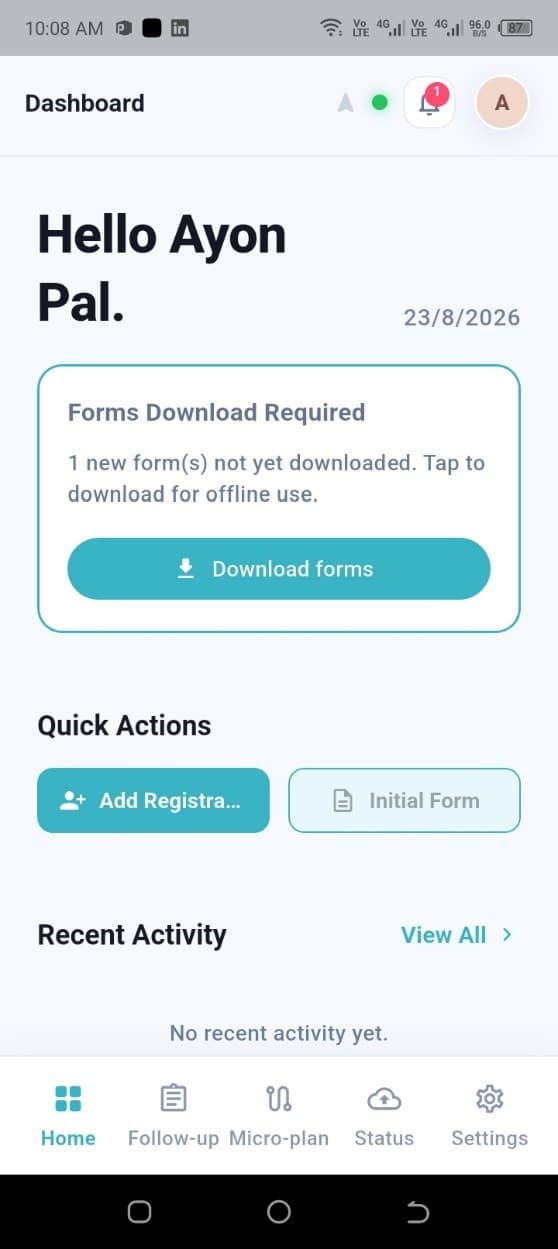
Log in with your Username and Password. After a successful login, the app redirects to the Dashboard, which provides access to profile management, notifications, connection status, microplanning path tracking, form downloads, quick actions, and recent activity.
Grant device permissions
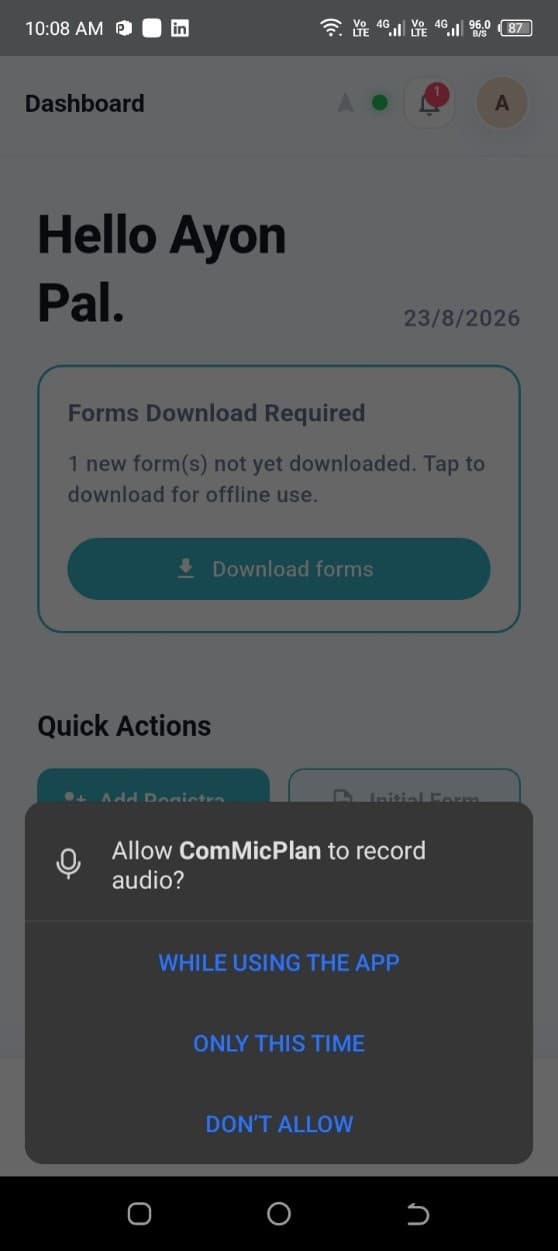
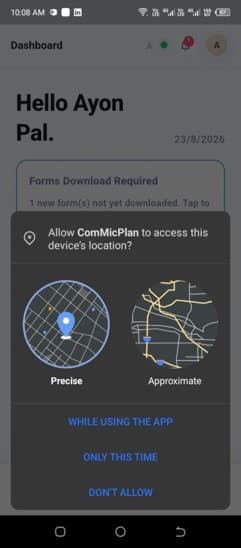
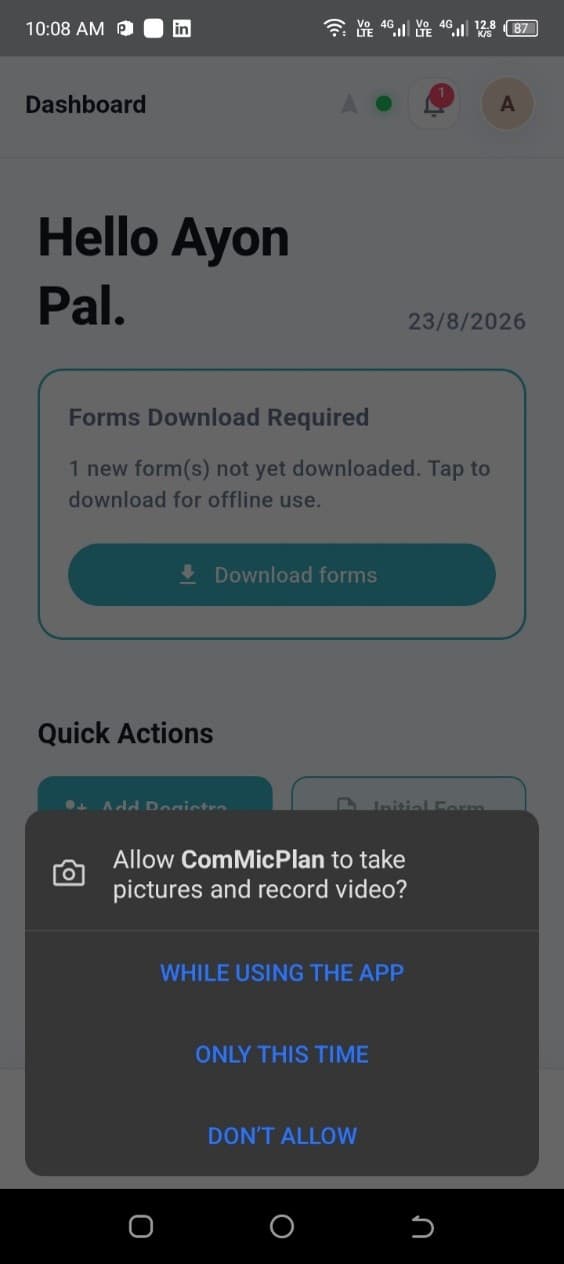
After the first login, ComMicPlan requests access to the microphone, location, and camera. These permissions are required for audio recording, location-based and microplanning features, and photo or video capture. Grant them one by one as they appear.
Microphone permission
The microphone is needed when a form or field activity includes an audio recording question. Without it, audio-related questions may not work.
Location permission
Location access supports ComMicPlan's GIS and microplanning features, including collecting geographic coordinates and recording the user's path when Microplanning Path Tracking is enabled. If location is denied, location-dependent features may not work correctly.
Camera permission
The camera is used for photo and video questions in a form submission, capturing document images such as the NID card, and collecting photographic evidence during field activities.
Profile and logout
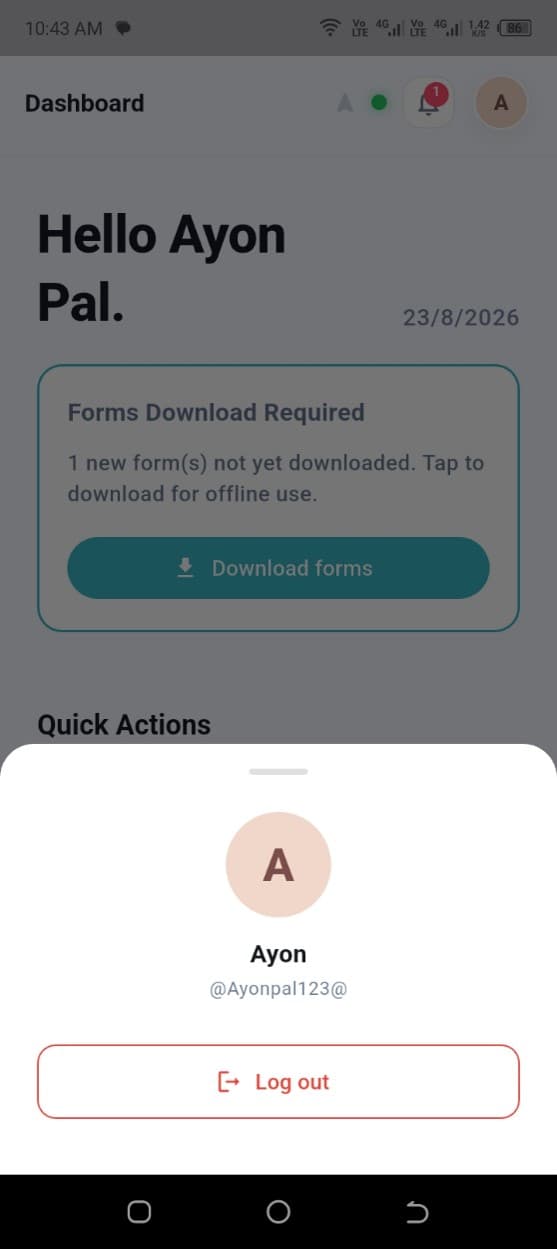
The Profile icon sits at the top-left of the Dashboard app bar. Tap it to open a menu with the Logout option, then tap Logout to securely sign out of the app.
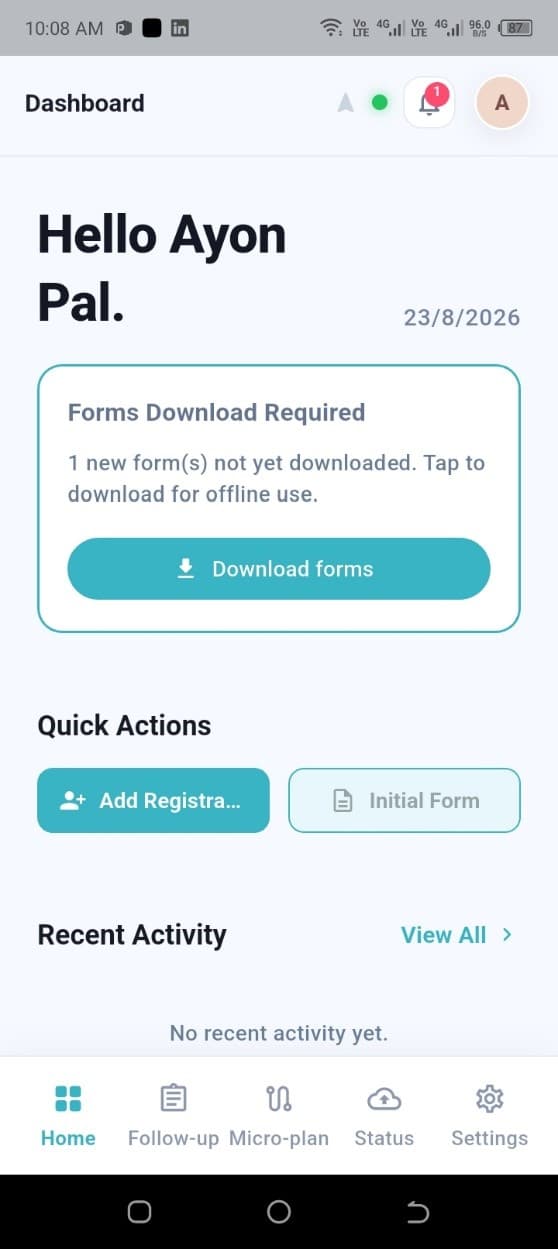
Notifications
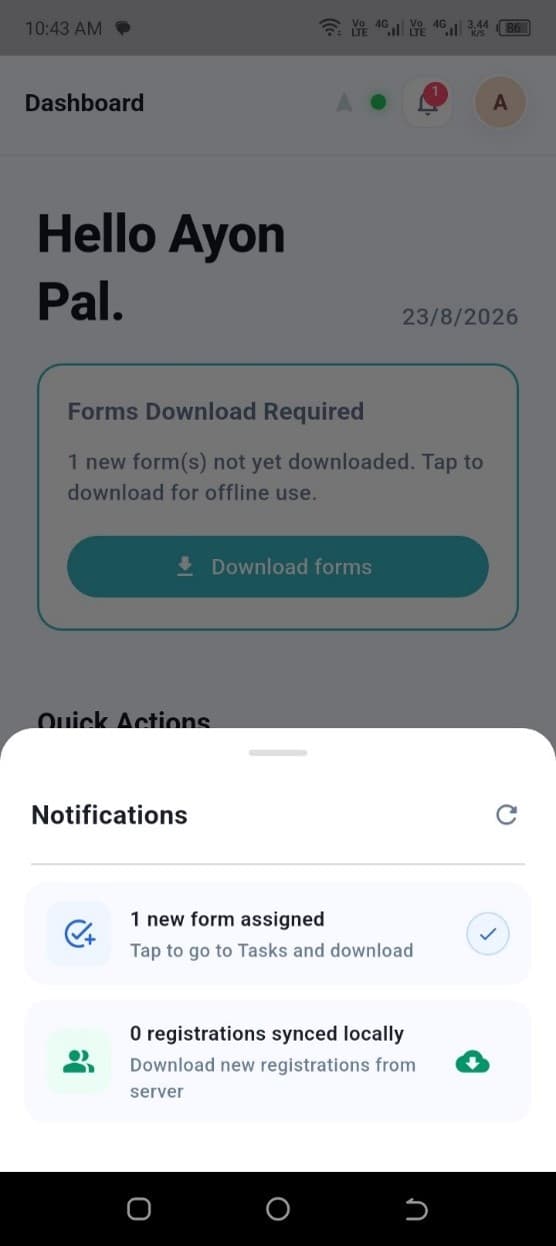
Tap the Notification (bell) icon in the app bar to check the notifications available in the system, such as newly assigned forms or registrations synced from the server. Tap a notification to expand its full detail.
Connection status
A status dot next to the Notification icon shows the device's current internet connection. A green dot means the device is online and submissions can sync; a red dot means the internet connection is currently unavailable and completed forms stay pending until a connection returns.
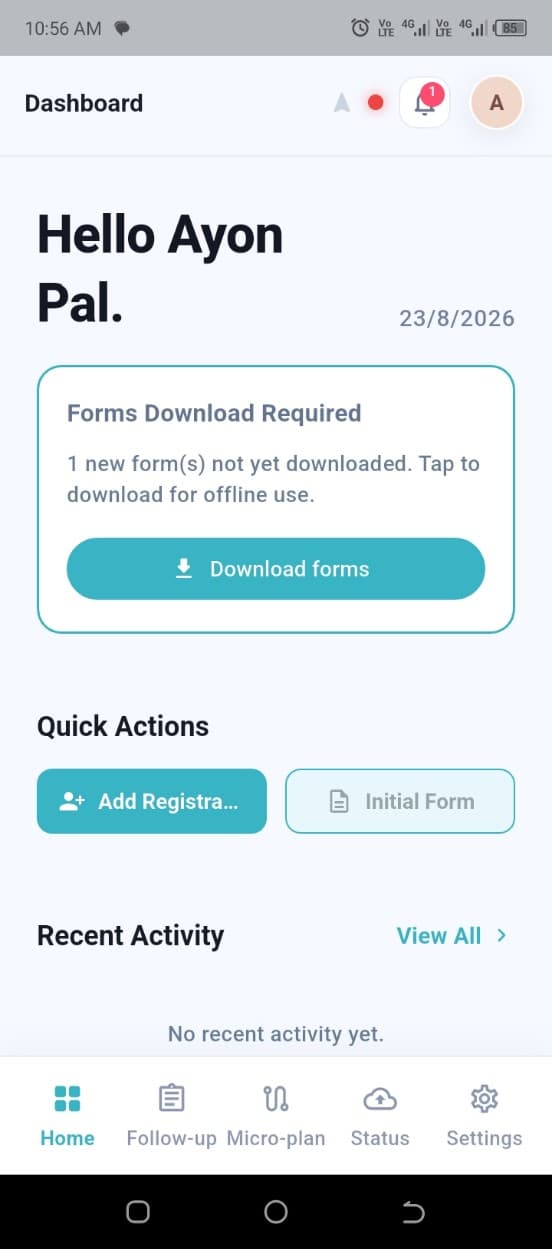
Microplanning path tracking arrow
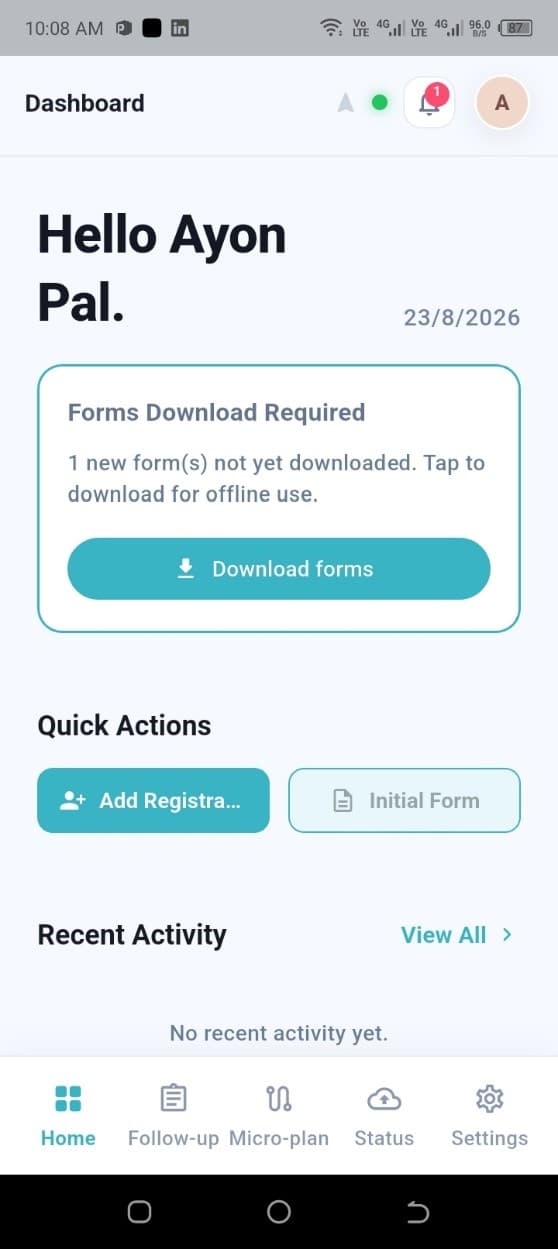
The Arrow icon next to the connection status opens Microplanning Path Tracking. A solid, colored arrow means path tracking for the ongoing microplanning activity is on; a faint outline arrow means tracking is currently off and path information will not be available until it is enabled.
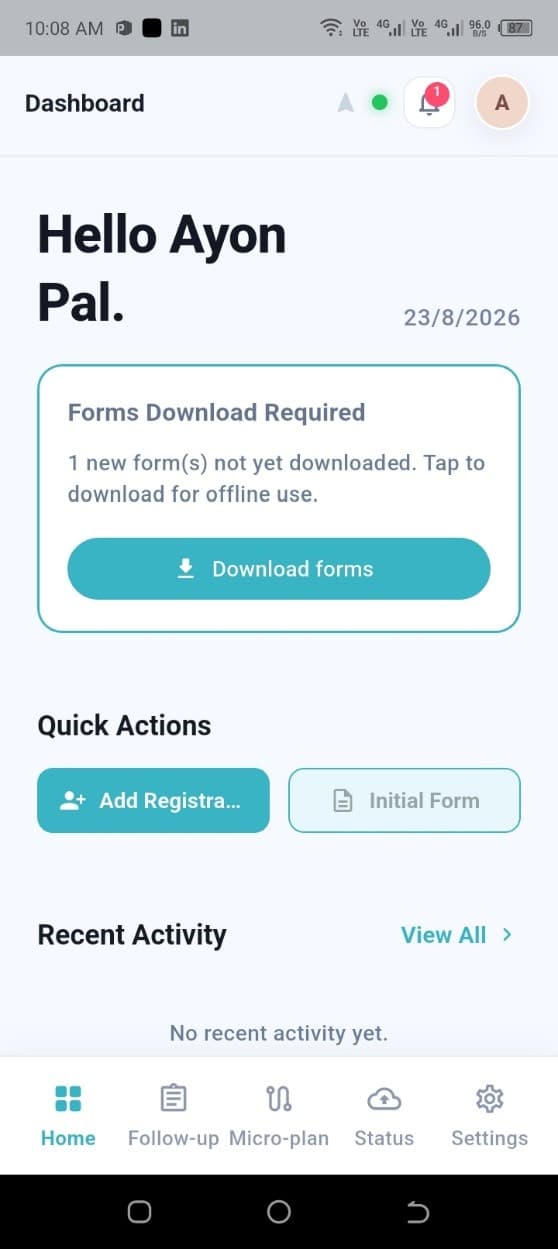
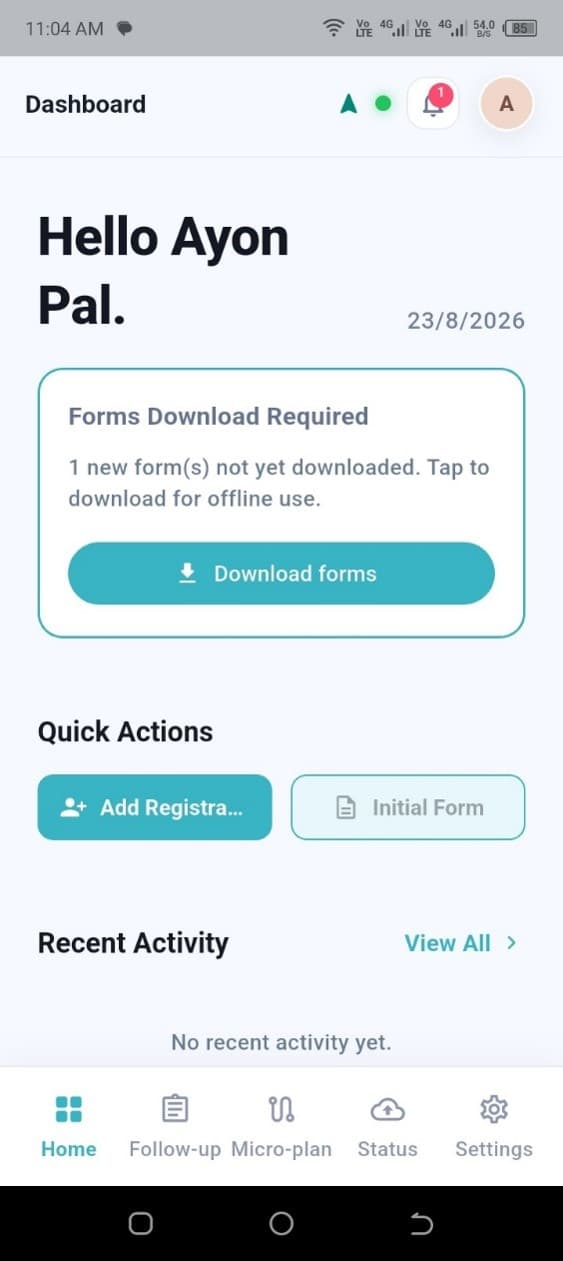
Bottom navigation bar
The bottom navigation bar lets users move between the main sections of the app without returning to the Dashboard each time.
- 1.Home – returns to the Dashboard.
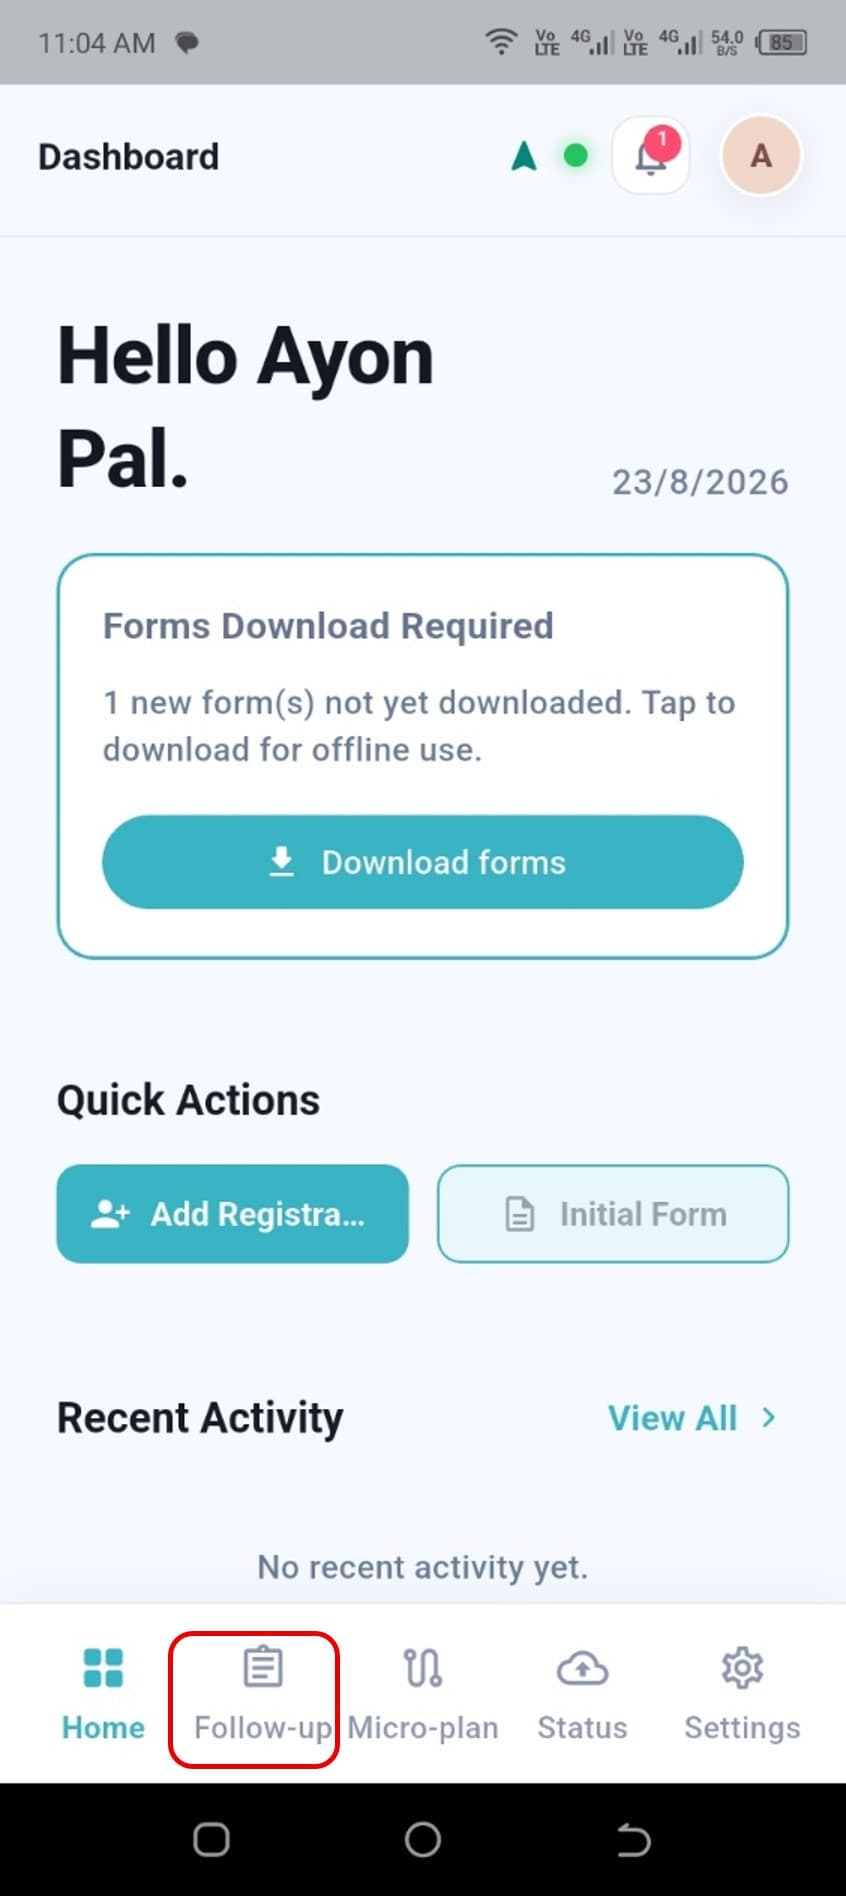
- 2.Follow-up – opens the Follow-up page to perform required follow-up activities.
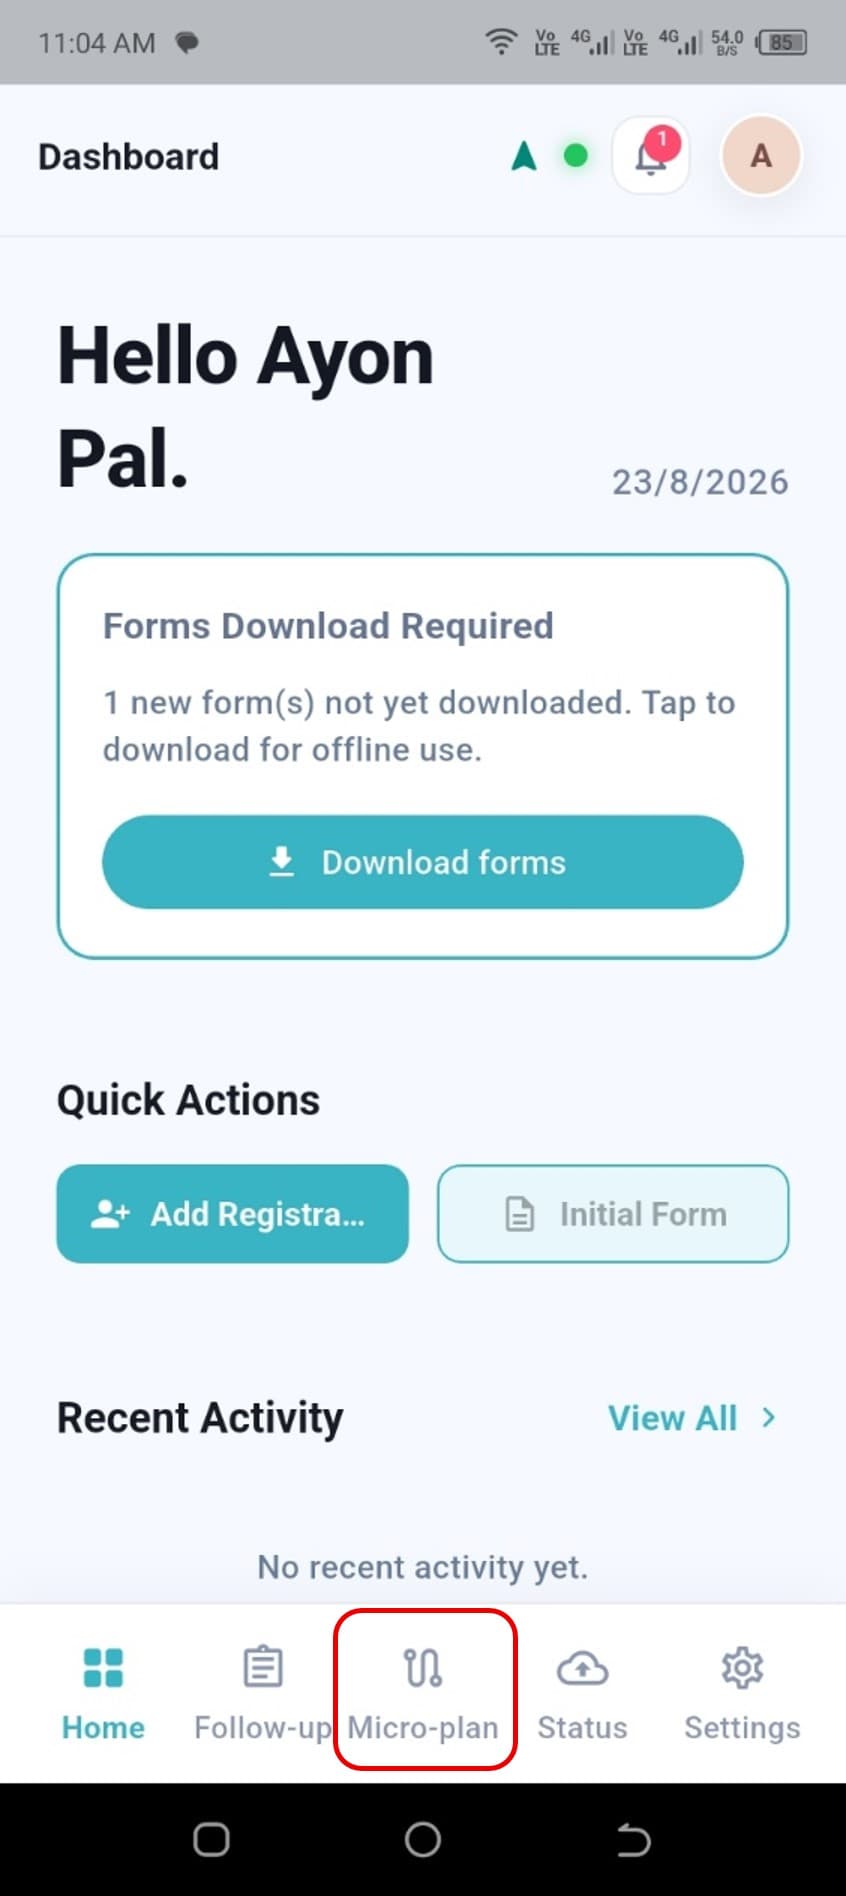
- 3.Micro-plan – opens the Microplanning page to manage microplanning activities and tasks.
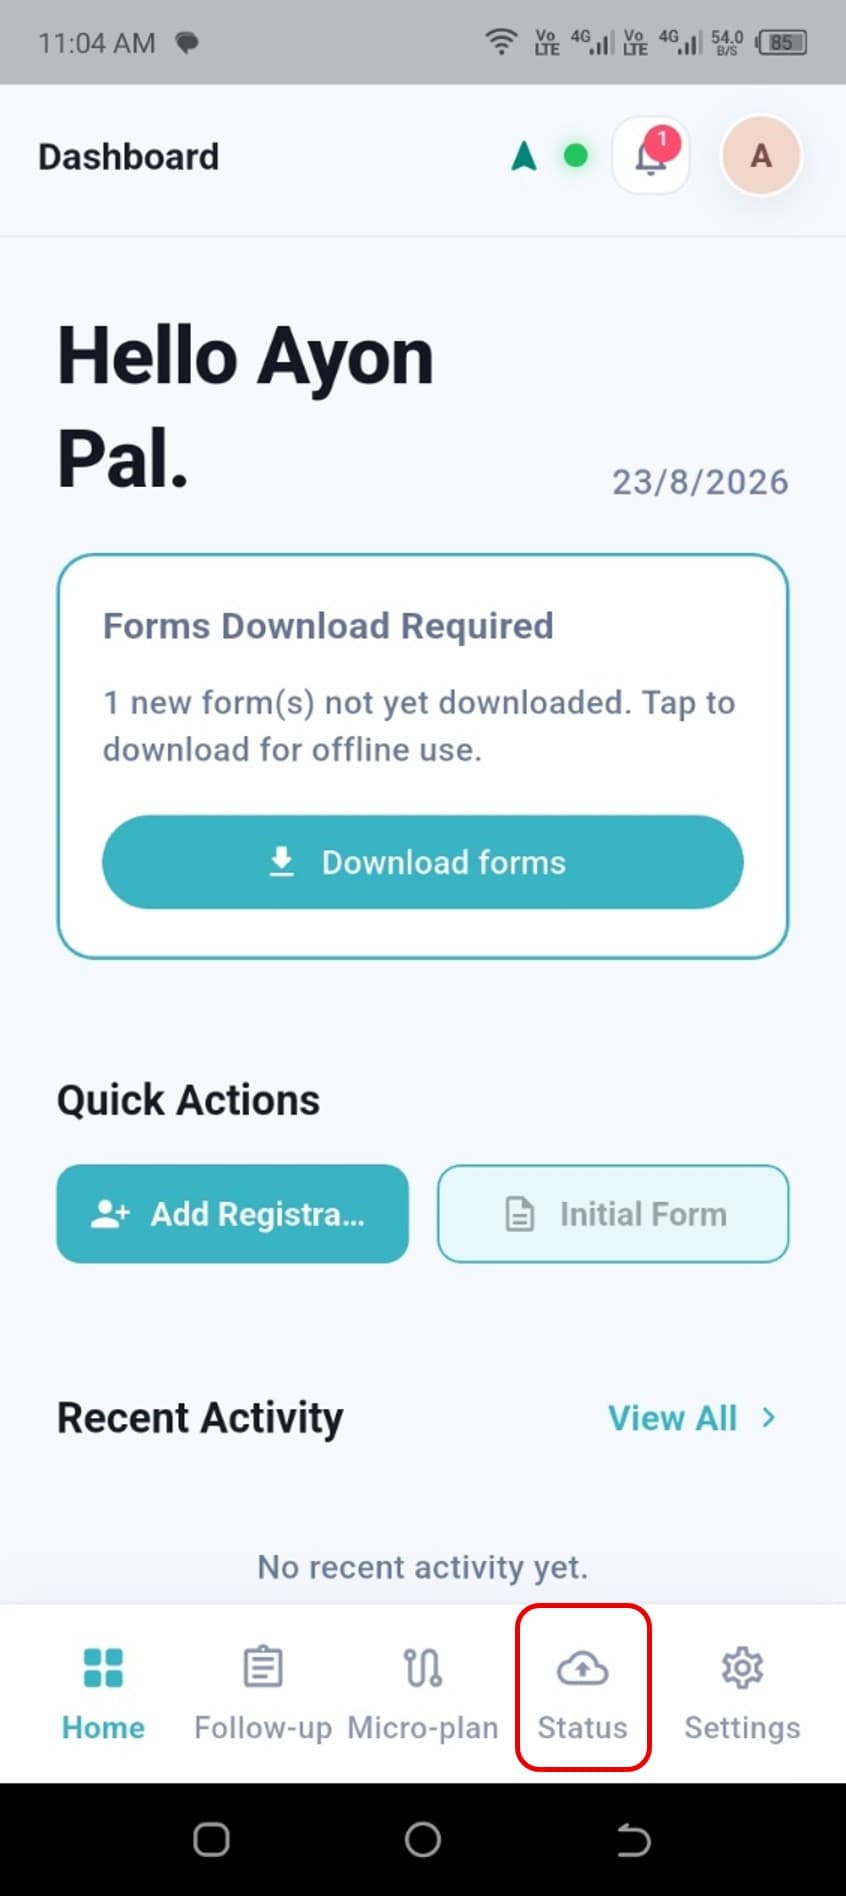
- 4.Status – shows whether submitted forms have synced successfully or have an issue.
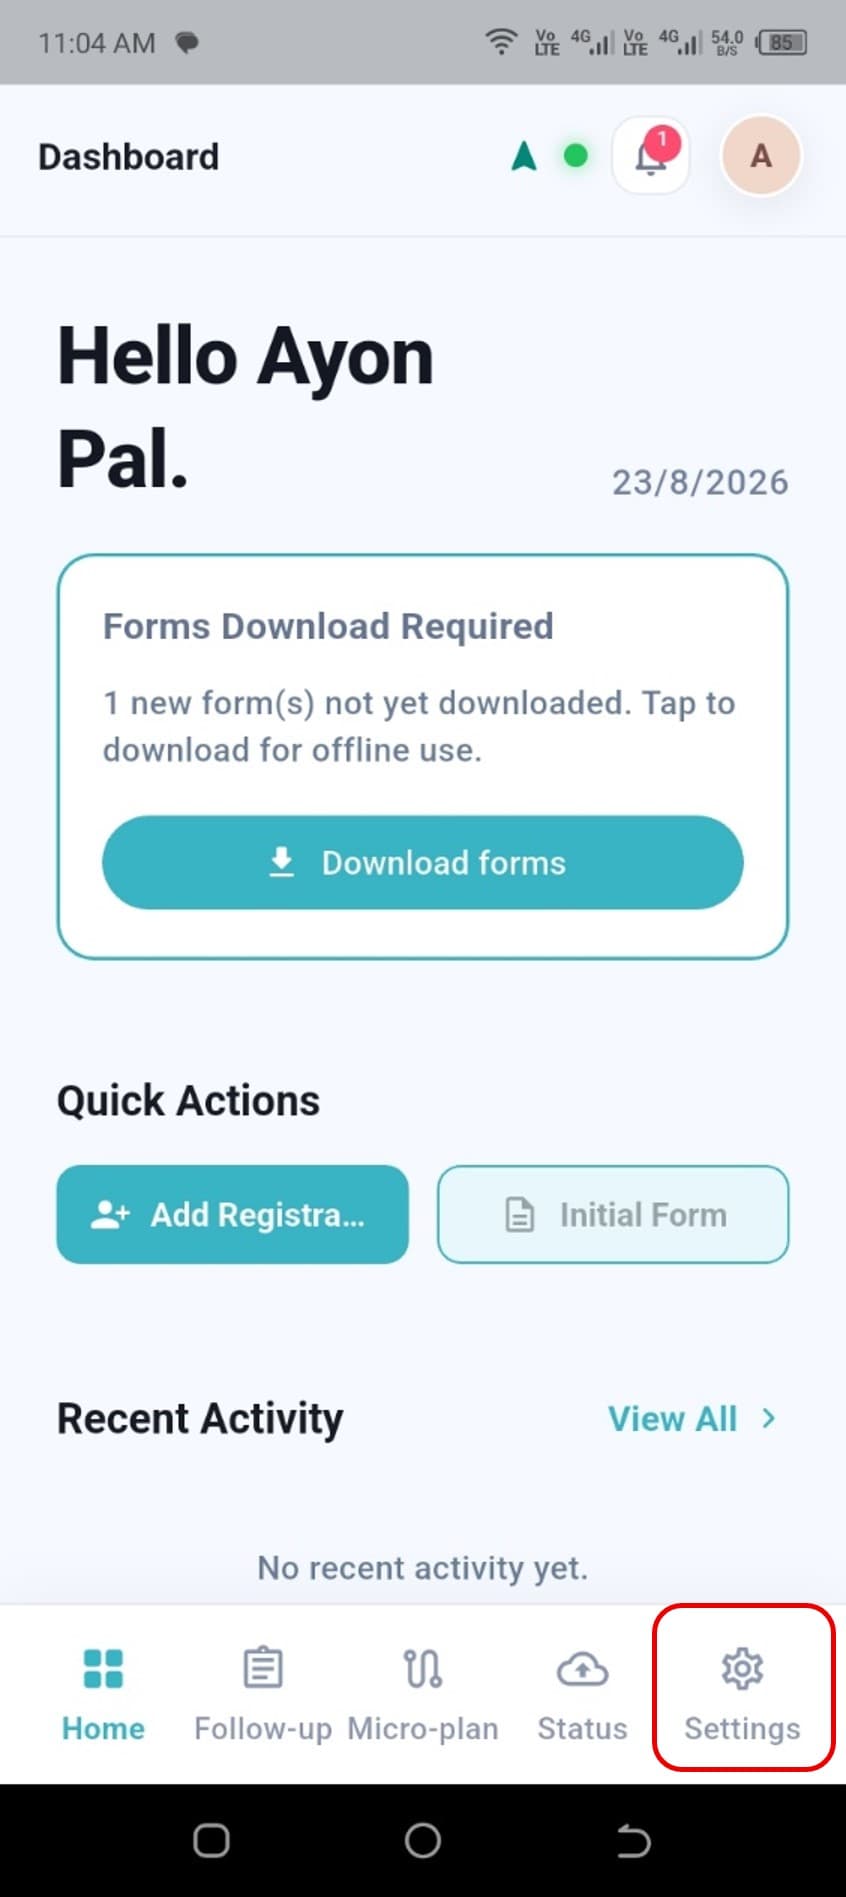
- 5.Settings – opens the app's settings.
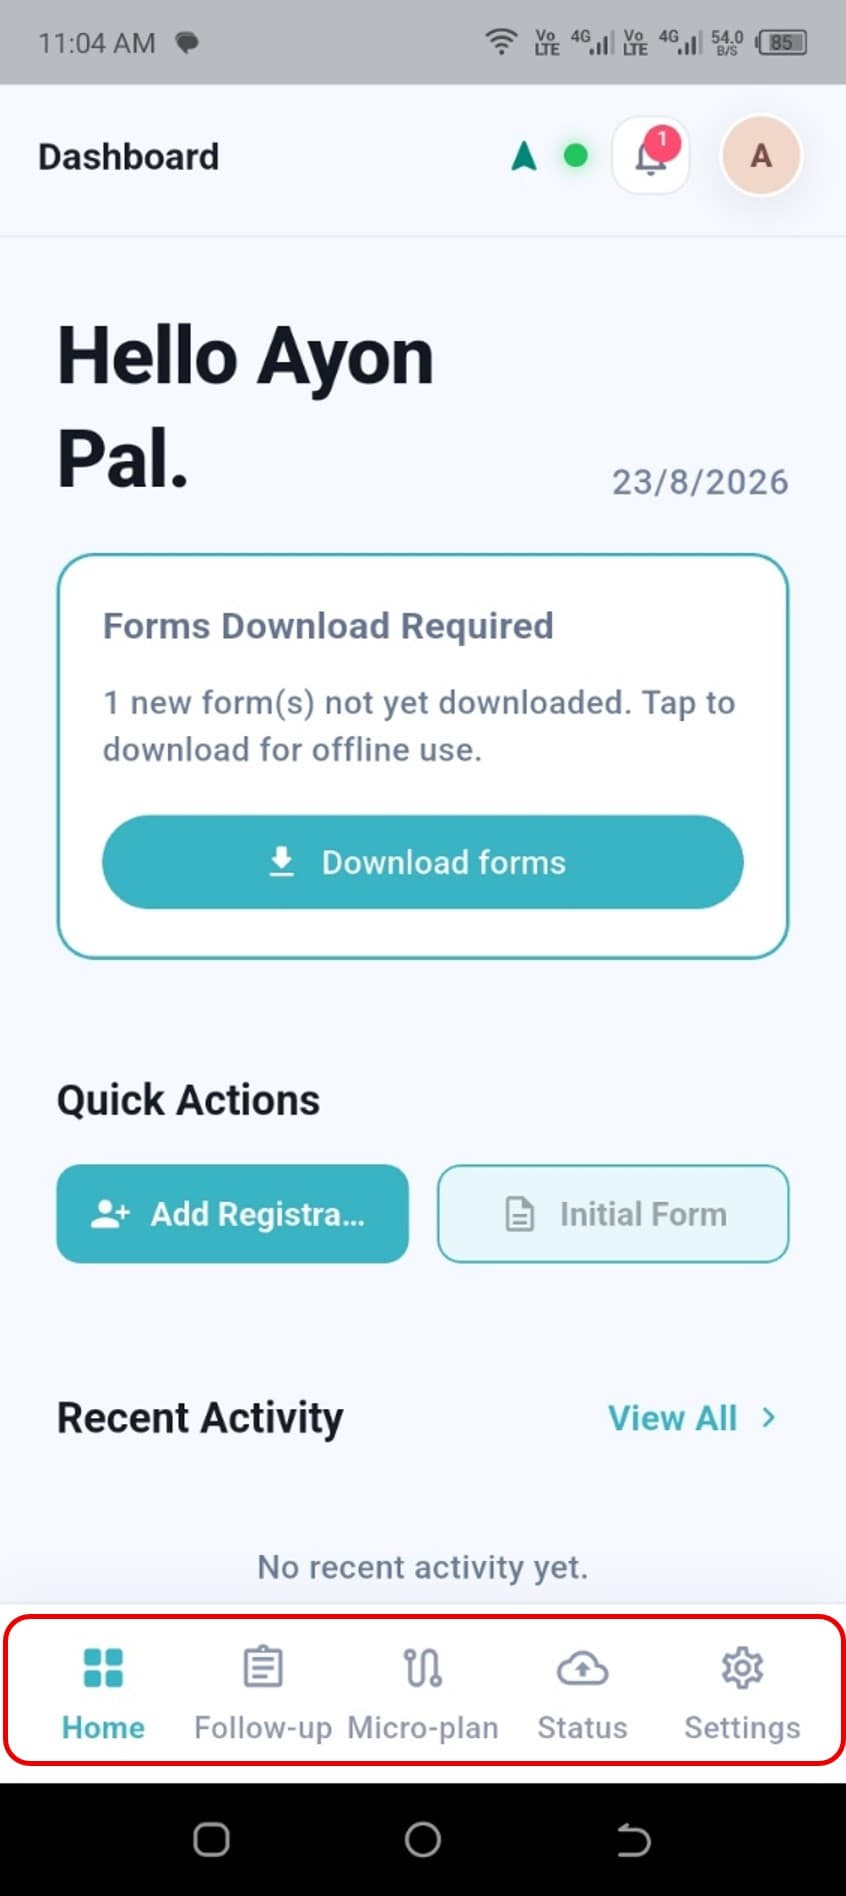
Dashboard contents
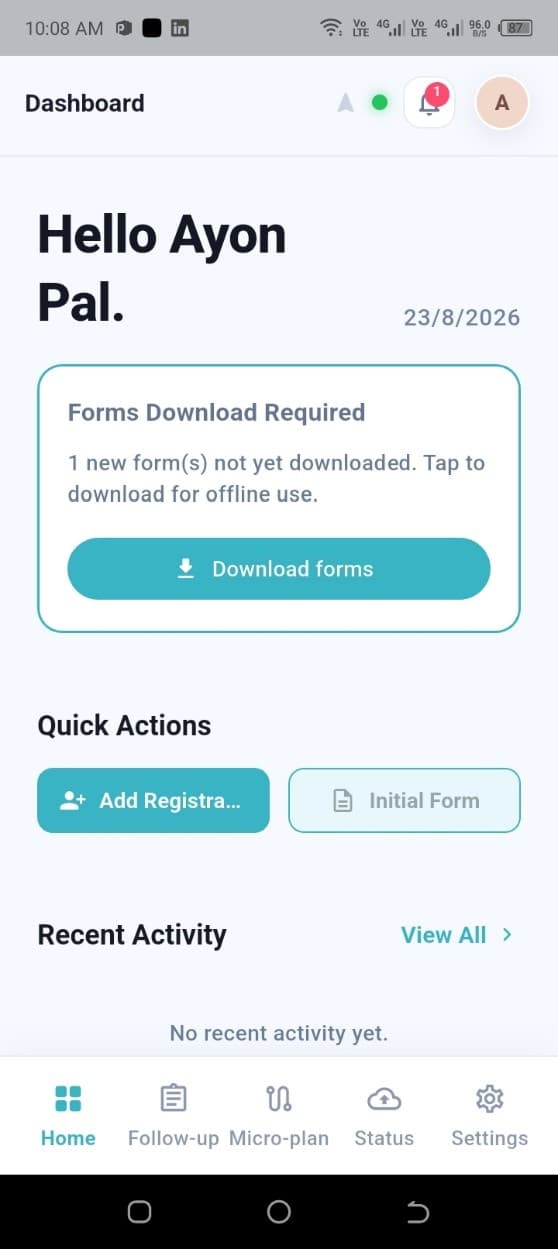
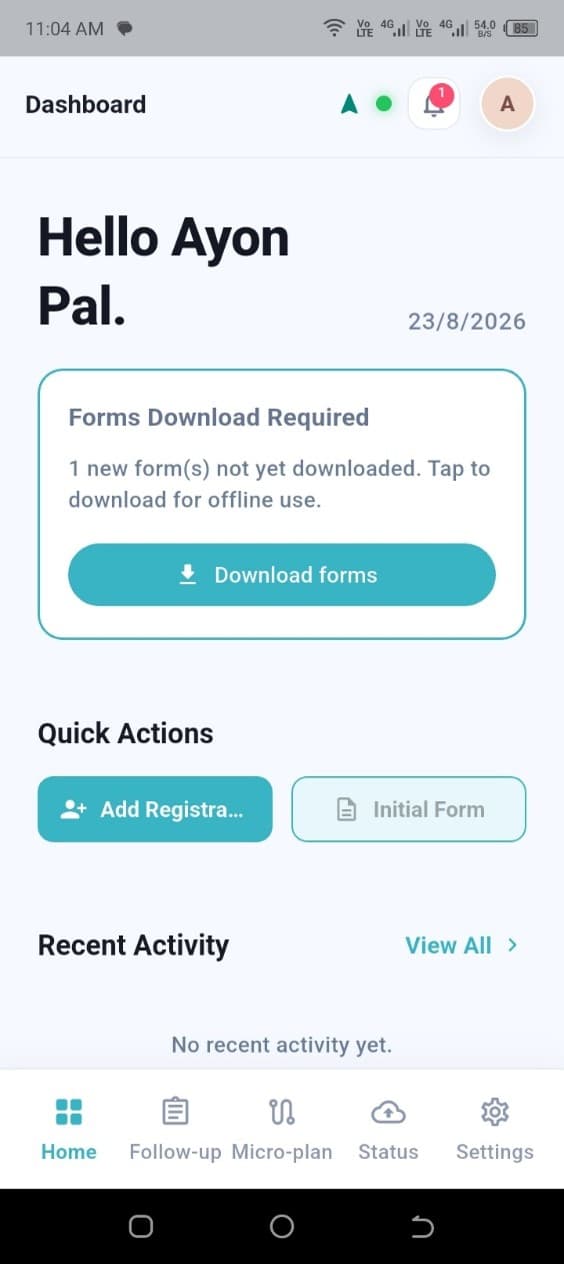
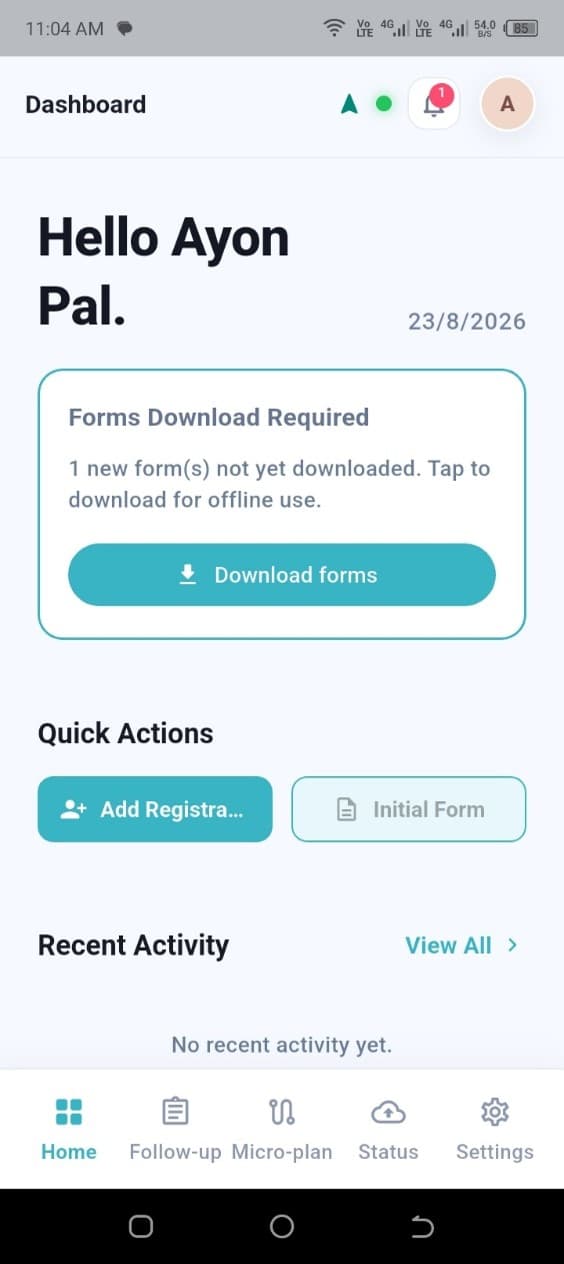
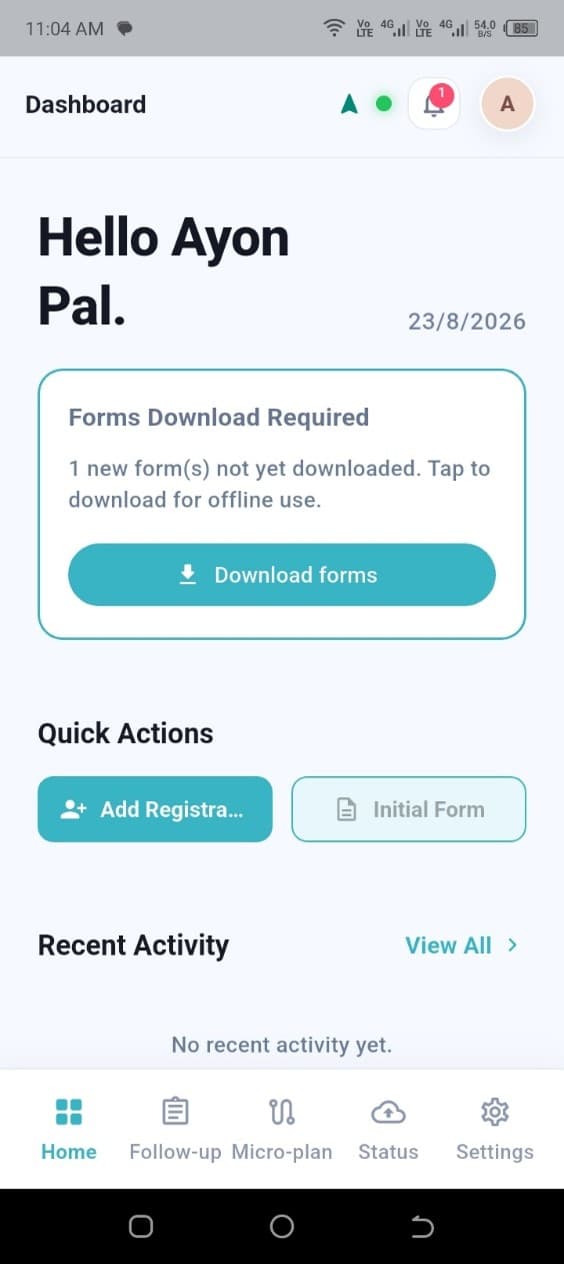
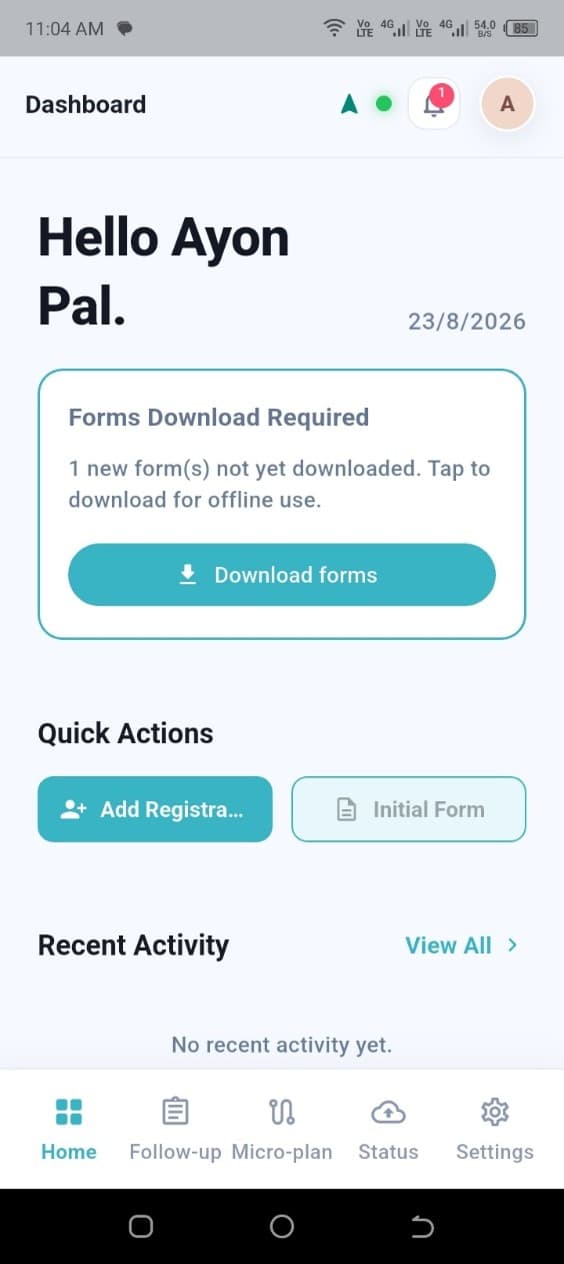
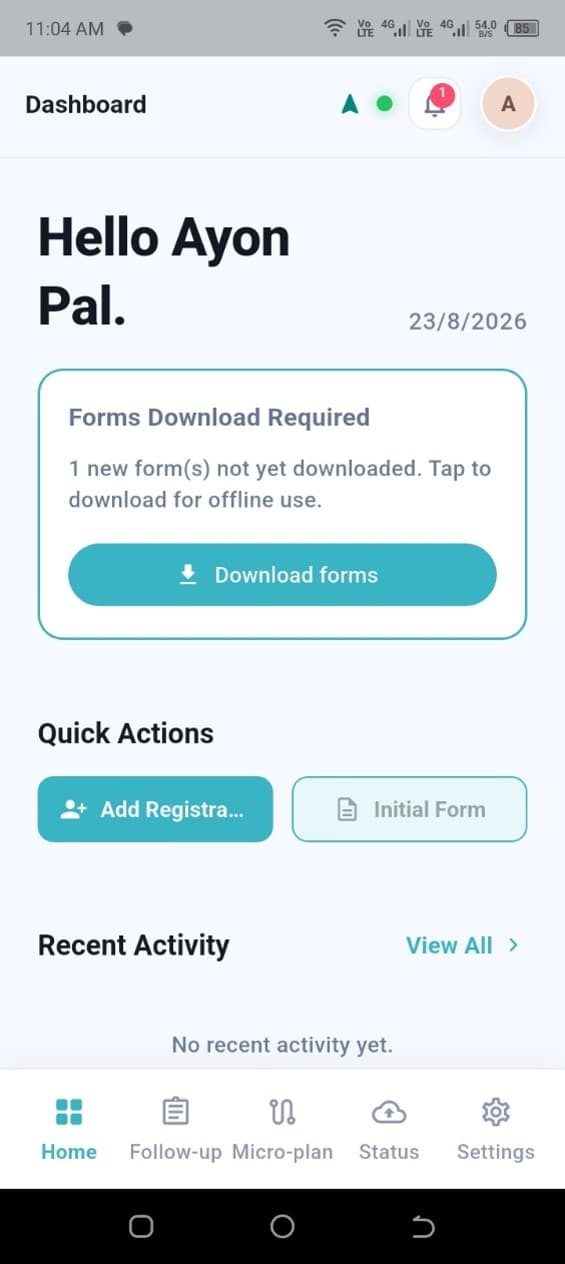
Below the app bar, the Dashboard shows the number of forms that still need to be downloaded, two Quick Action buttons, and a Recent Activity list.
- 1.Forms Download Required shows how many new forms are not yet downloaded for offline use; tap Download forms and wait for the progress to reach 100% Complete.
- 2.Quick Actions – Add Registration opens the registration form; Initial Form opens forms that have already been downloaded.
- 3.Recent Activity lists the user's most recent actions; tap View All to see the complete activity list instead of only the most recent items.
Personal information and project
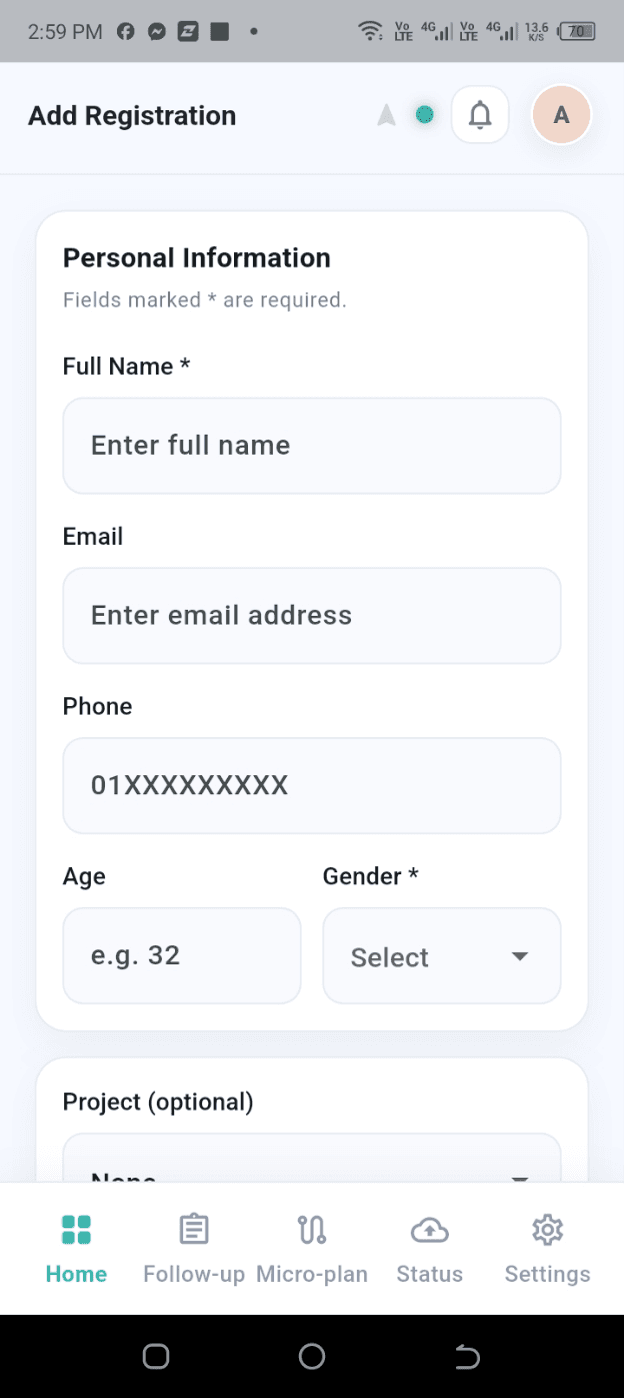
Add Registration creates a new registration by collecting personal information, an identity document, location, address, and notification preferences. Tap Add Registration from Quick Actions to open the Registration page.
- 1.First Name, Email, Phone, Age, and Gender capture the person's personal information.
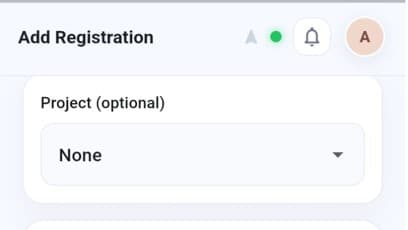
- 2.Project is optional — select an existing project to create the registration under that project, or leave it unselected for an individual registration.
Identity document
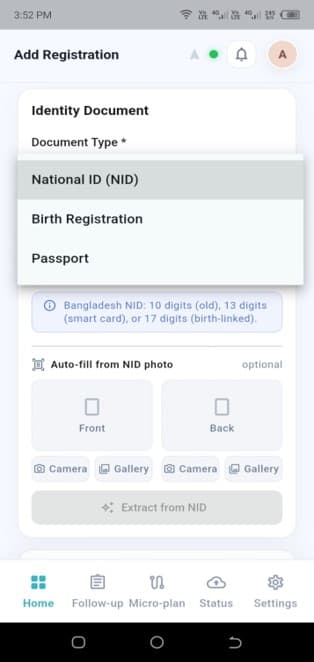
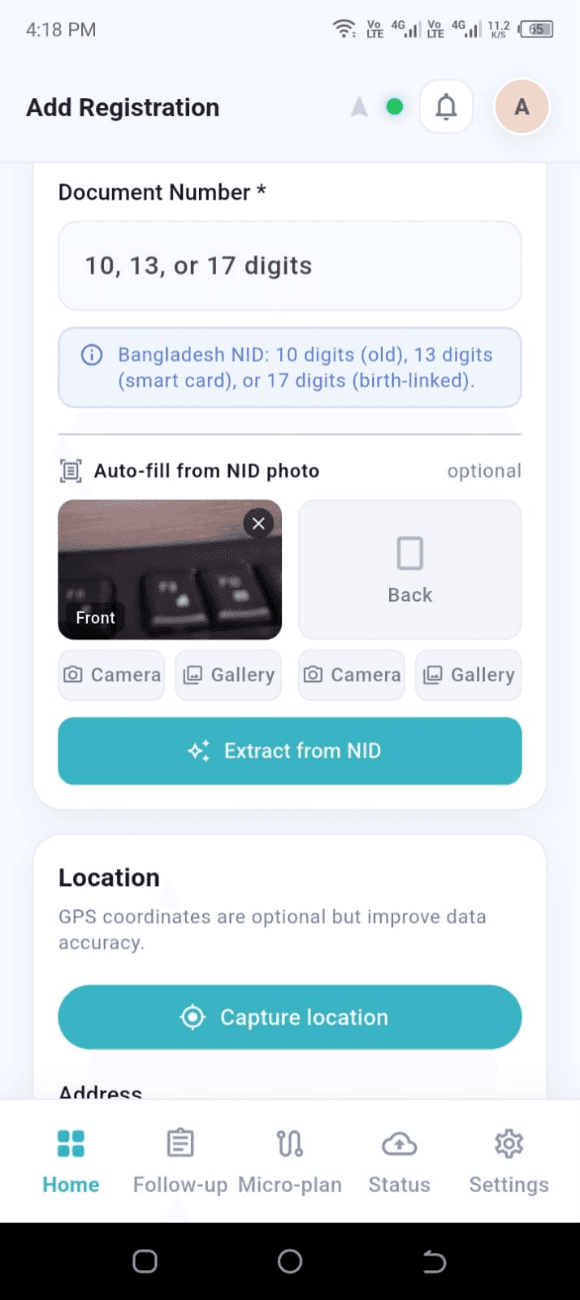
The Identity Document card collects a Document Type and Document Number. The Document Type dropdown offers National ID (NID), Birth Registration, and Passport. Once a type is selected, the Document Number field appears with a hint for the expected digit count — for example, Bangladesh NID accepts 10 digits (old), 13 digits (smart card), or 17 digits (birth-linked).
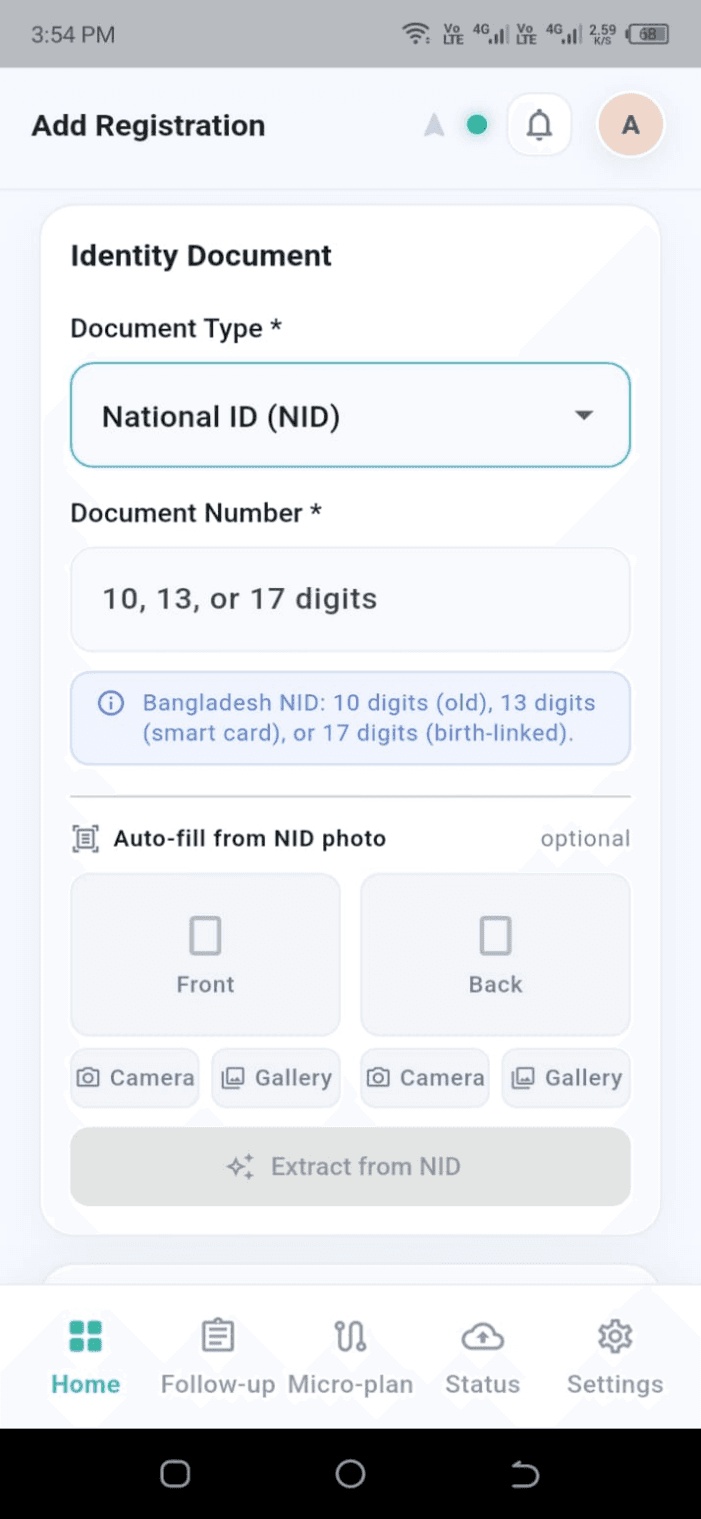
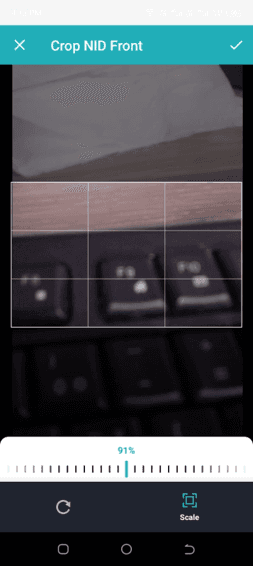
Capture the NID front
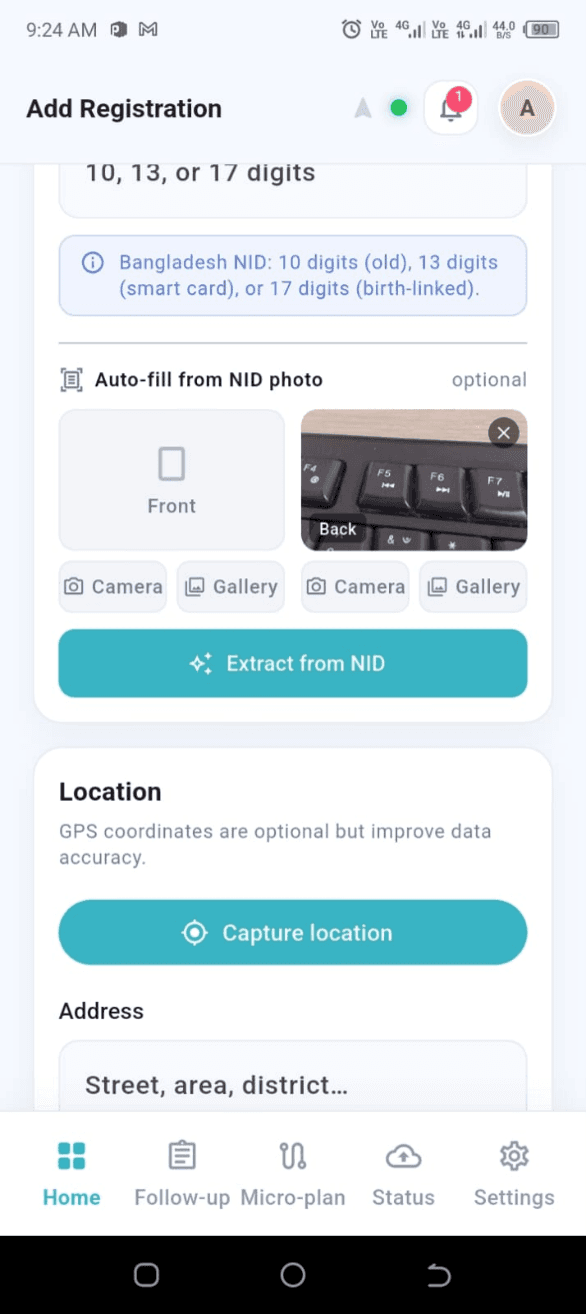
Auto Fill from NID Photo lets users provide Front and Back images of the NID card and extract information automatically instead of typing it in. Each side can be captured with the device Camera or picked from the Gallery.
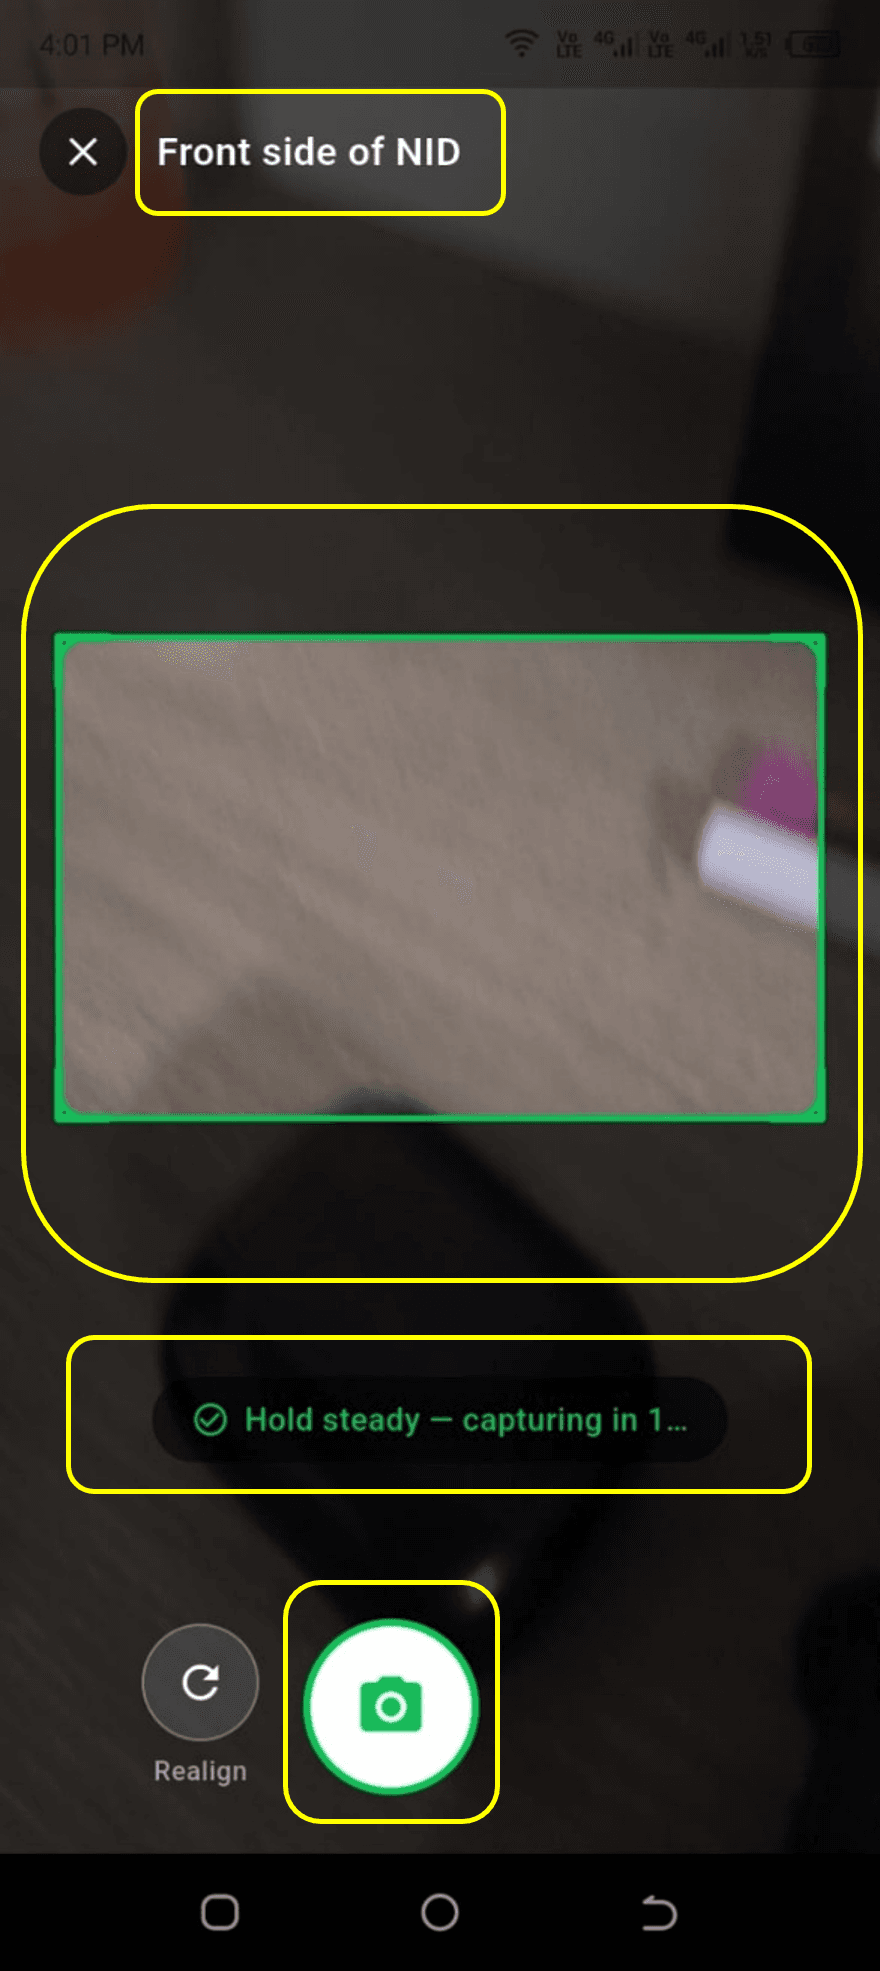
- 1.Tap Camera under Front and grant camera access if prompted.
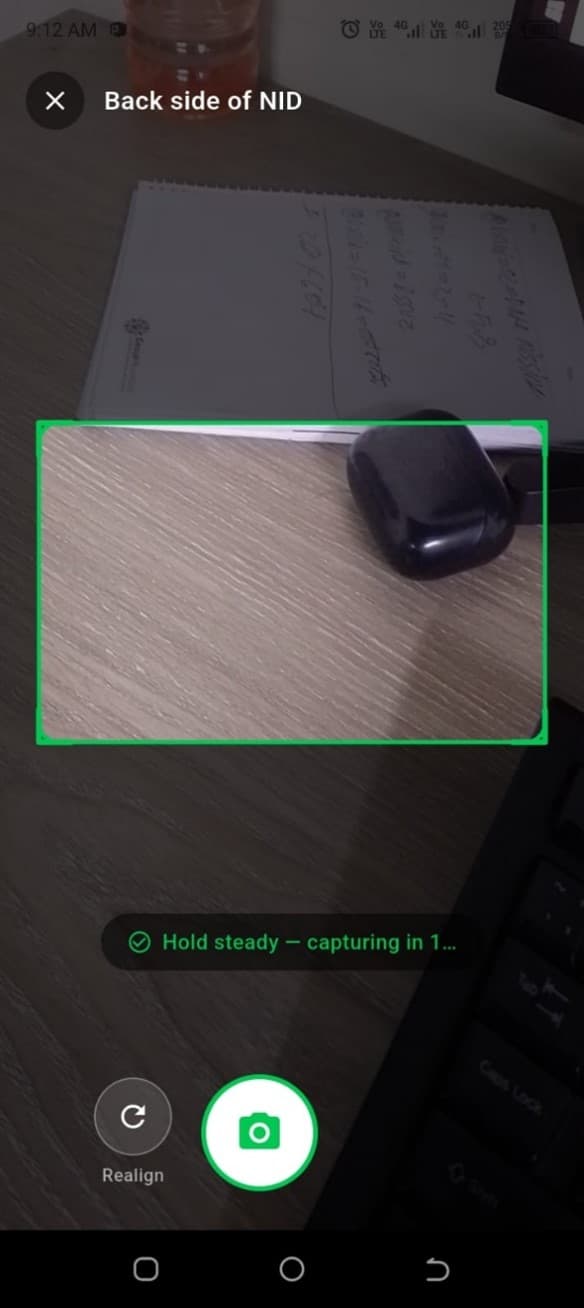
- 2.Frame the front of the NID card and capture the photo.
- 3.Confirm the captured image is selected for the Front slot.
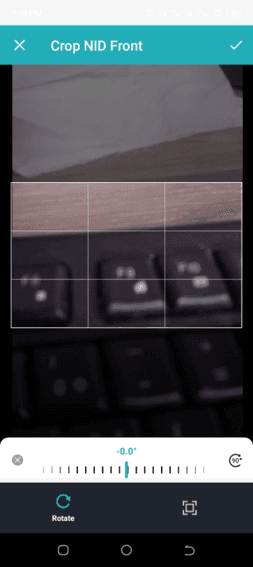
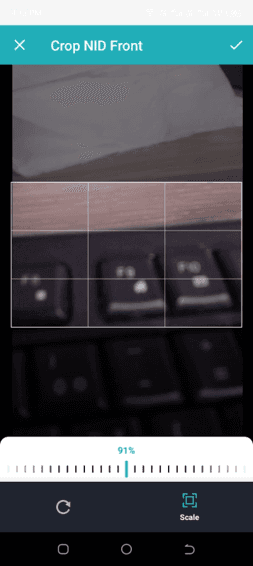
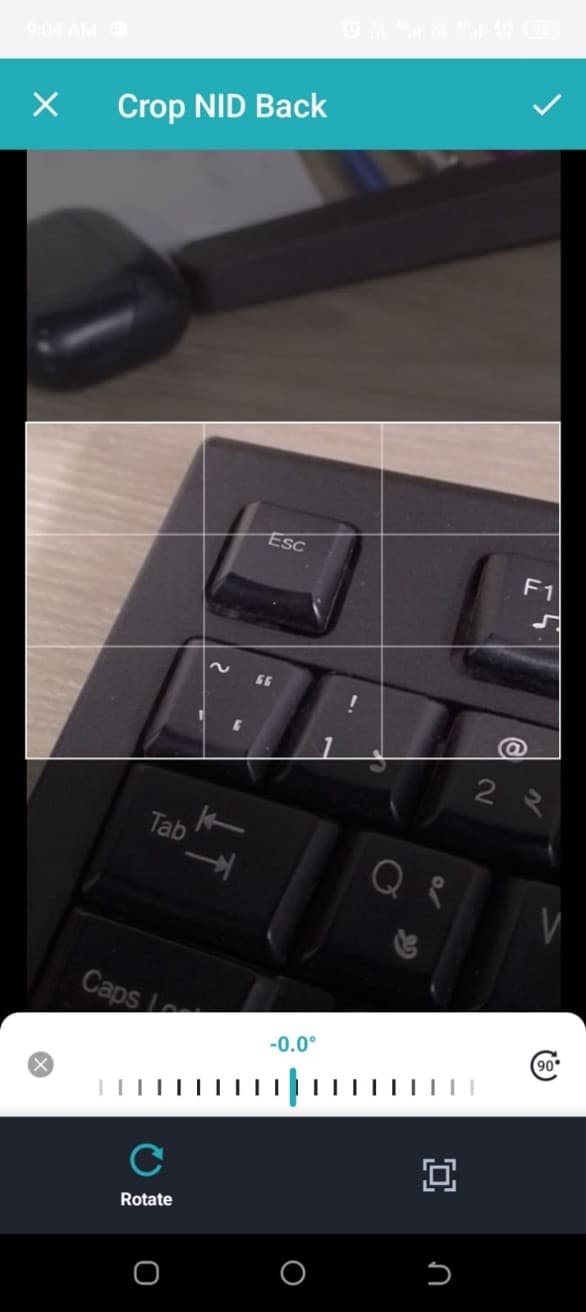
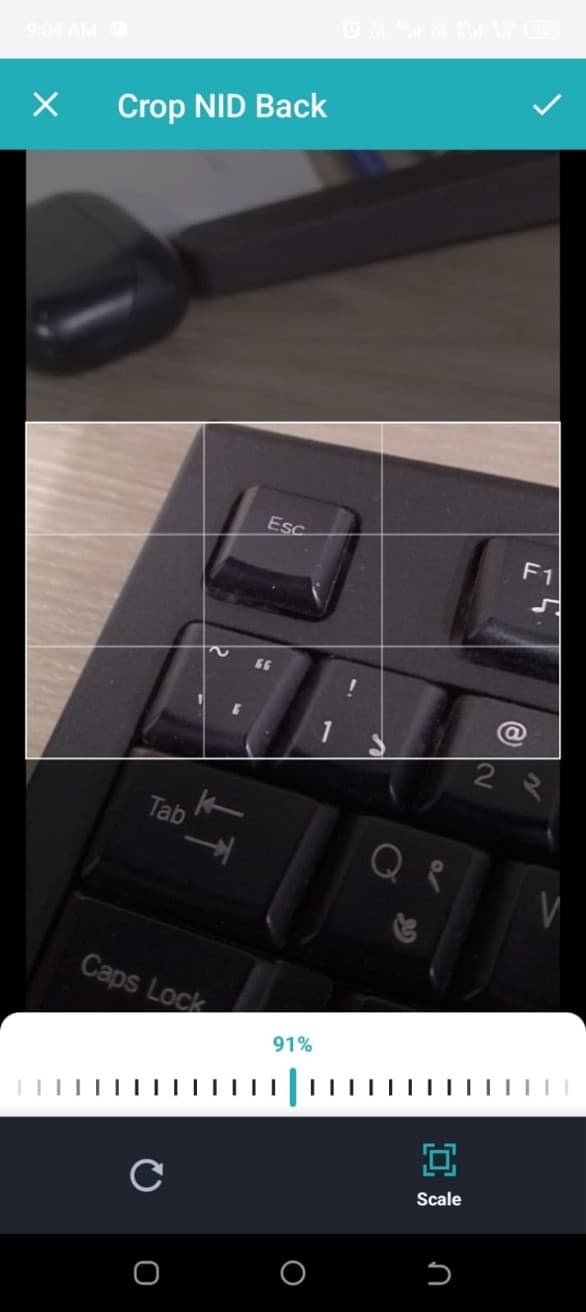
- 4.Rotate and scale the crop frame so only the card is inside it, then confirm the crop.
- 5.Tap Extract from NID to pull the available fields directly from the photo.
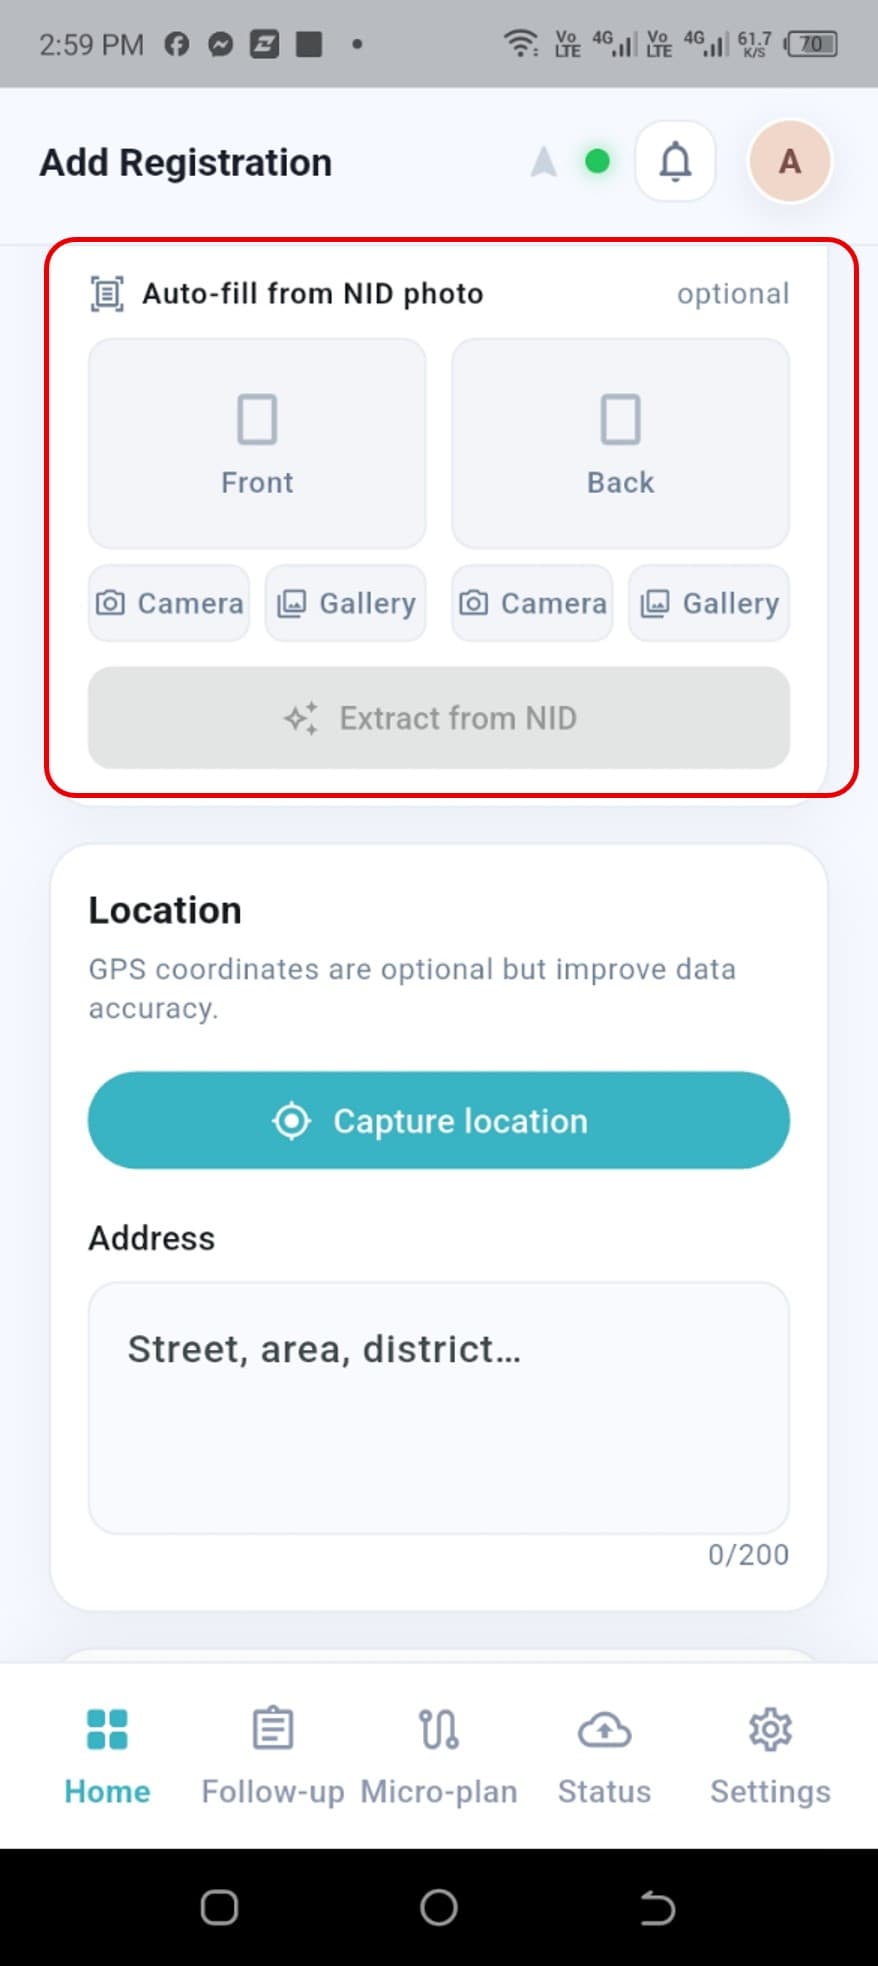
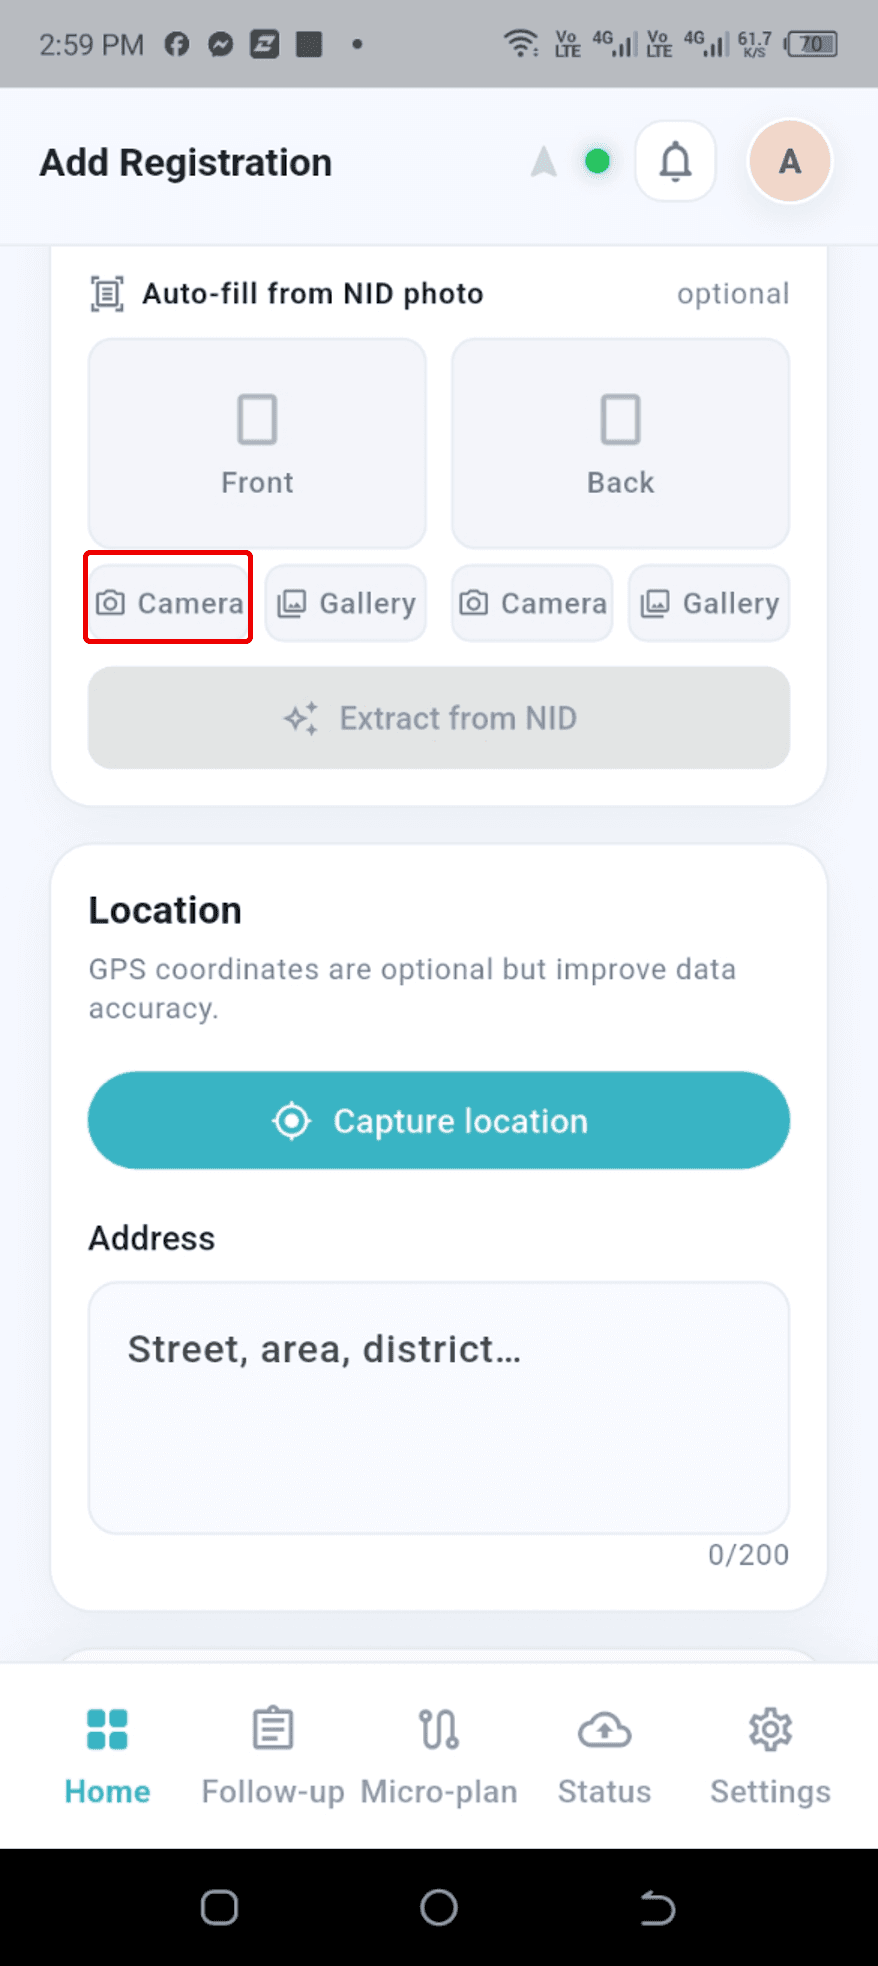
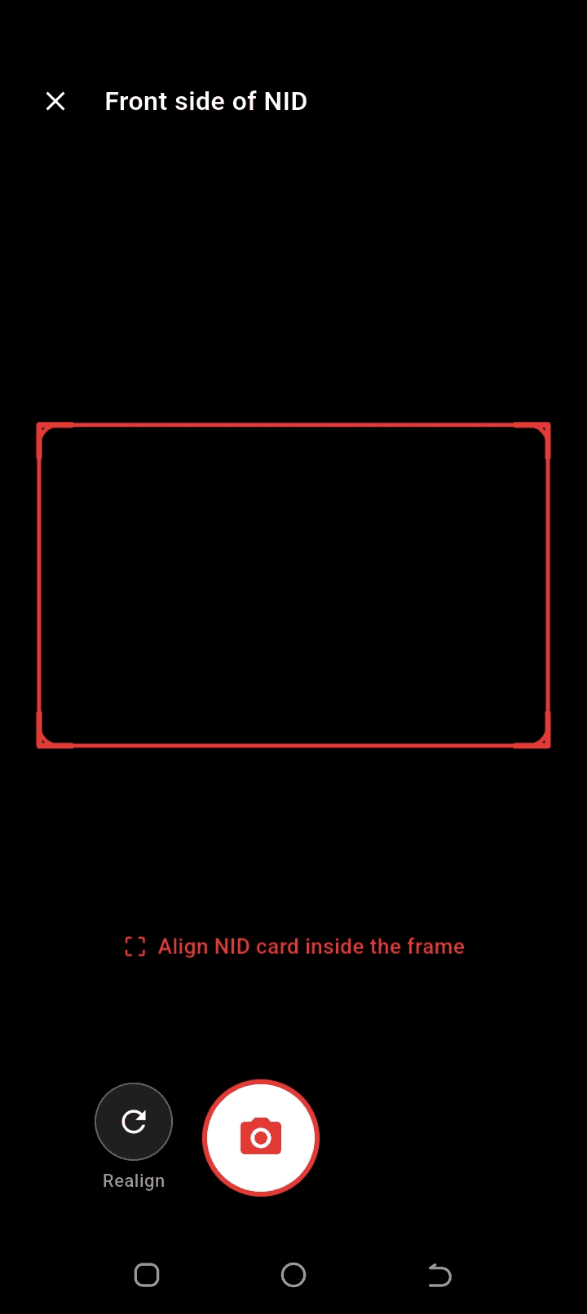
Capture the NID back
Repeat the same capture and crop steps for the Back side of the NID card.
Location, address, and notifications
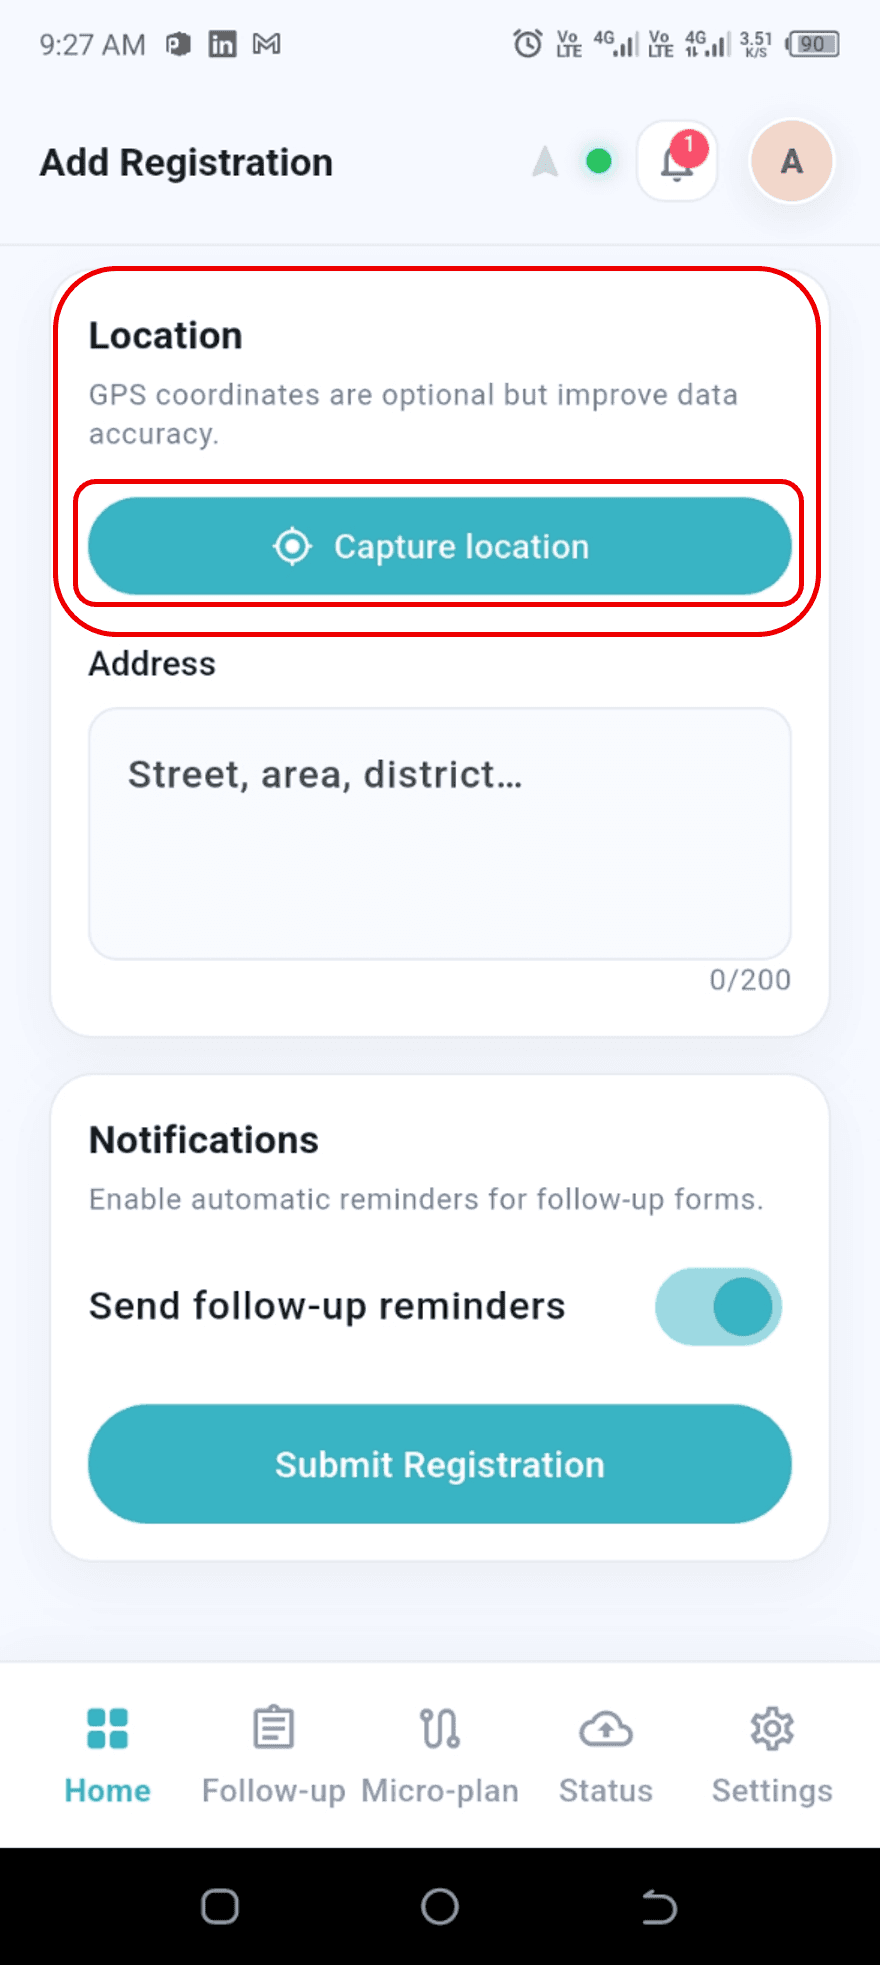
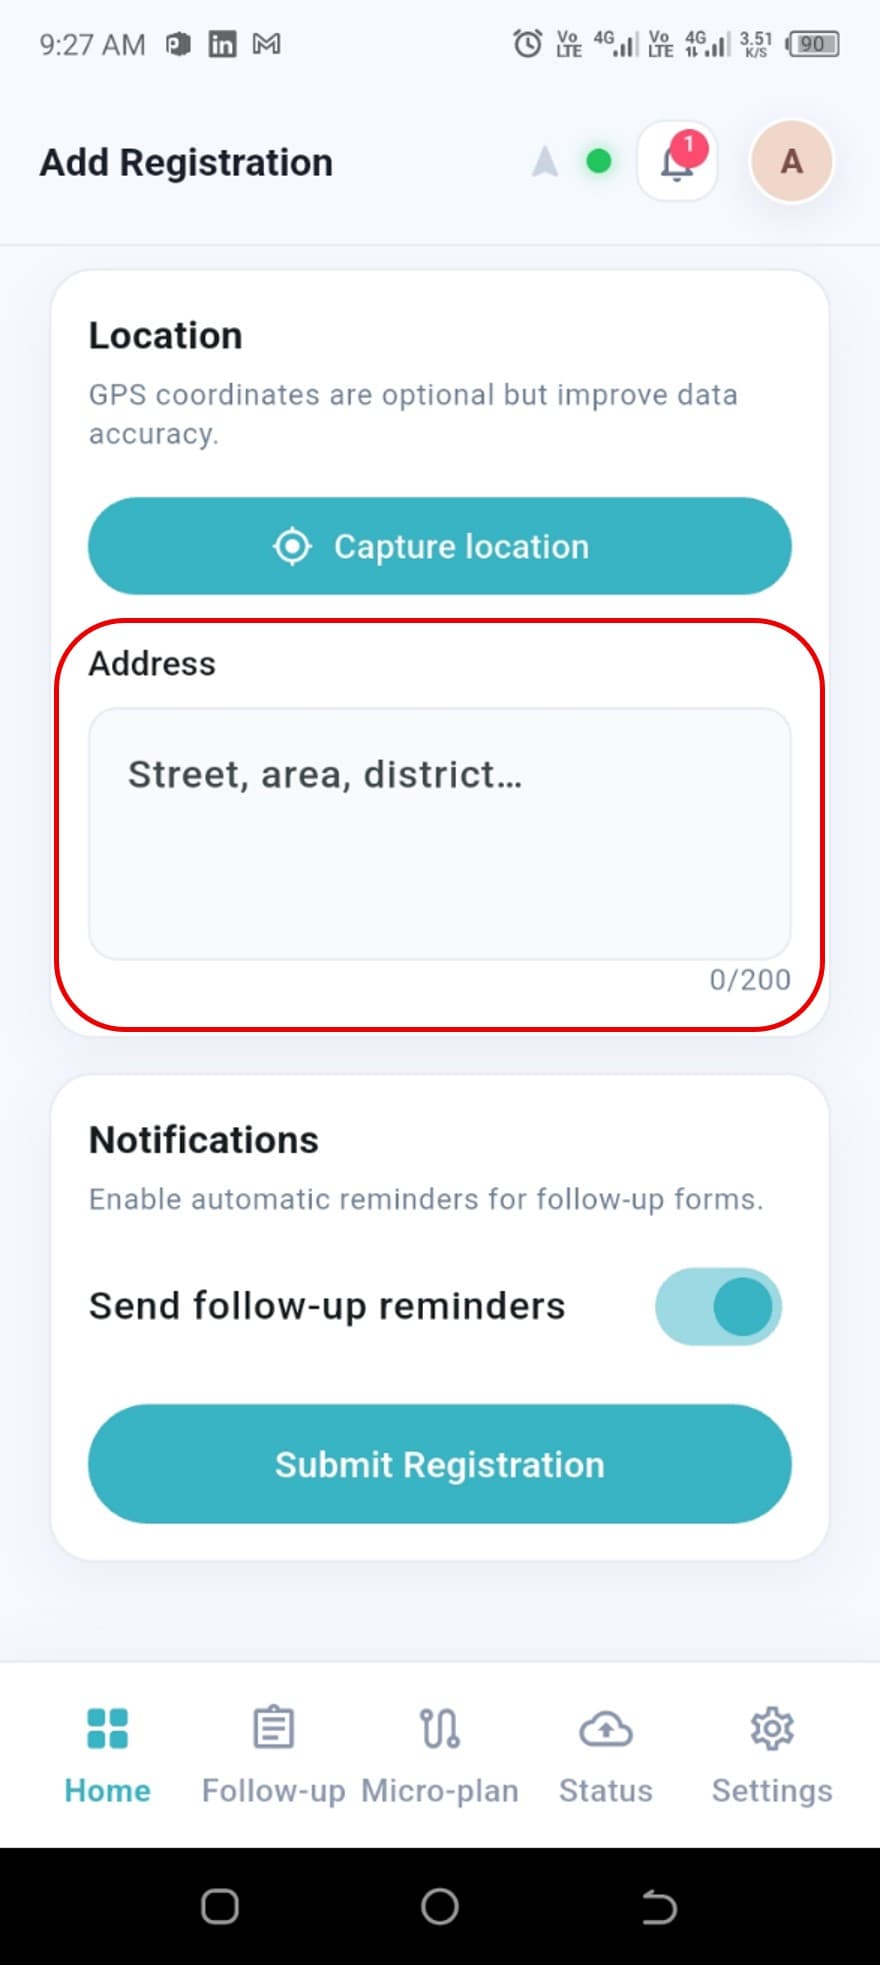
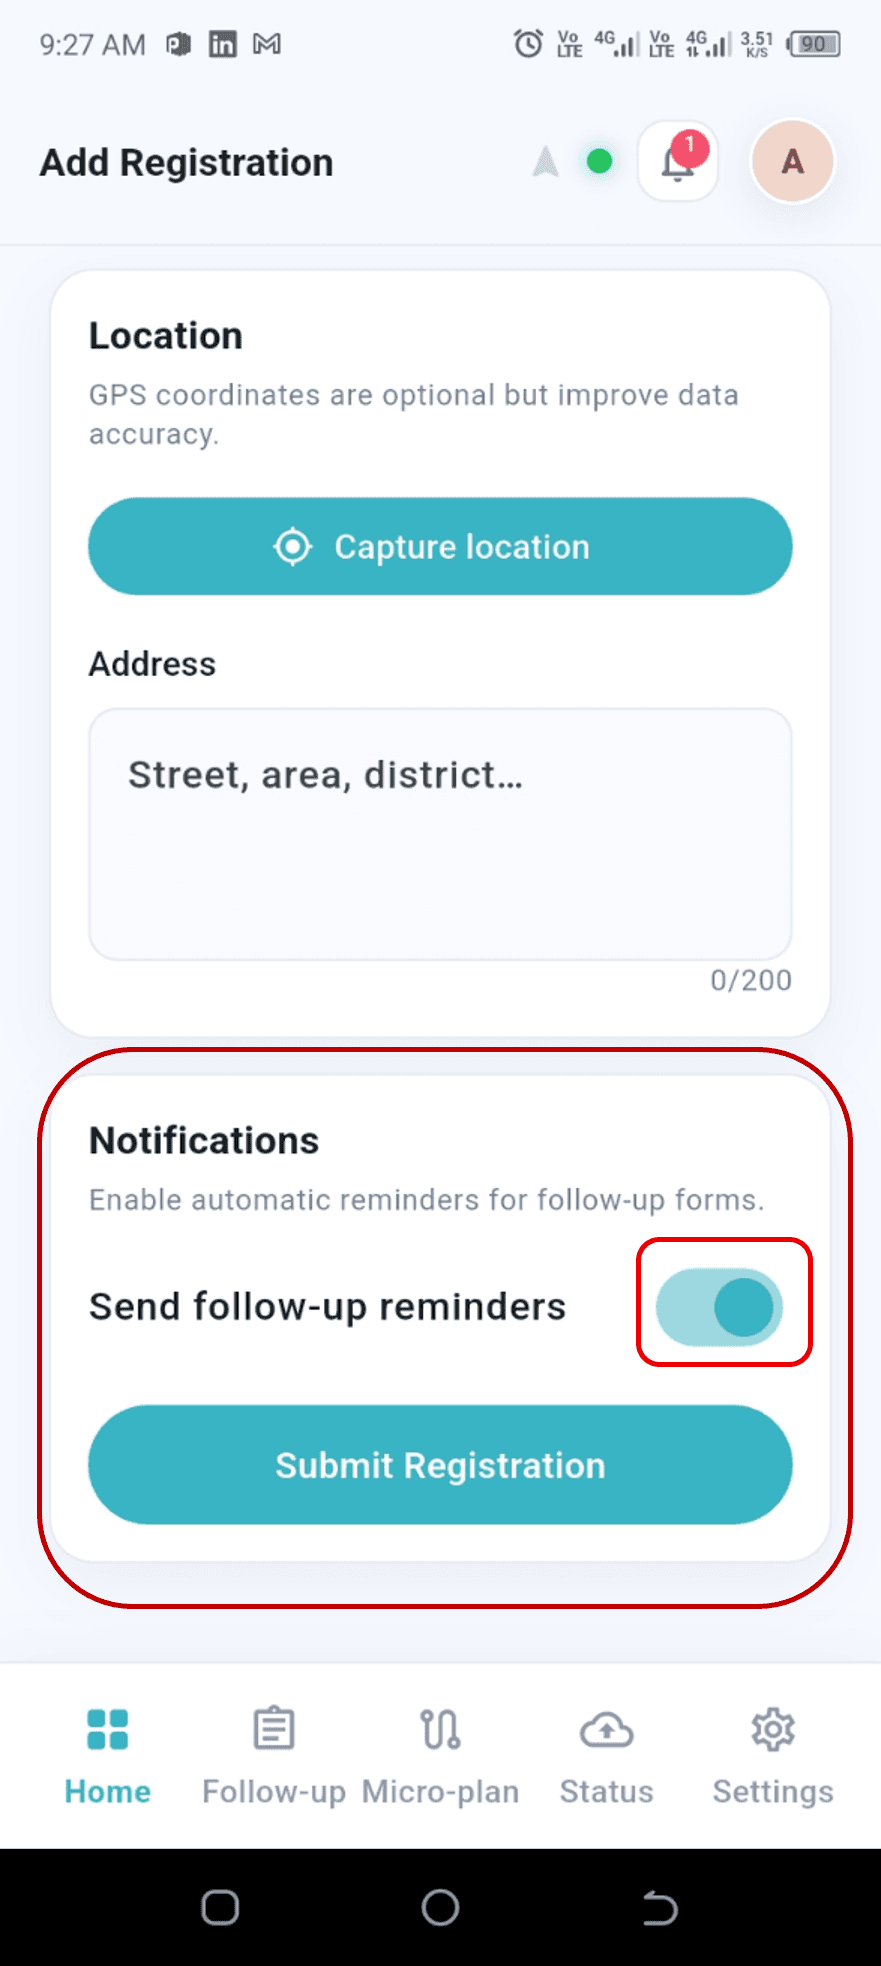
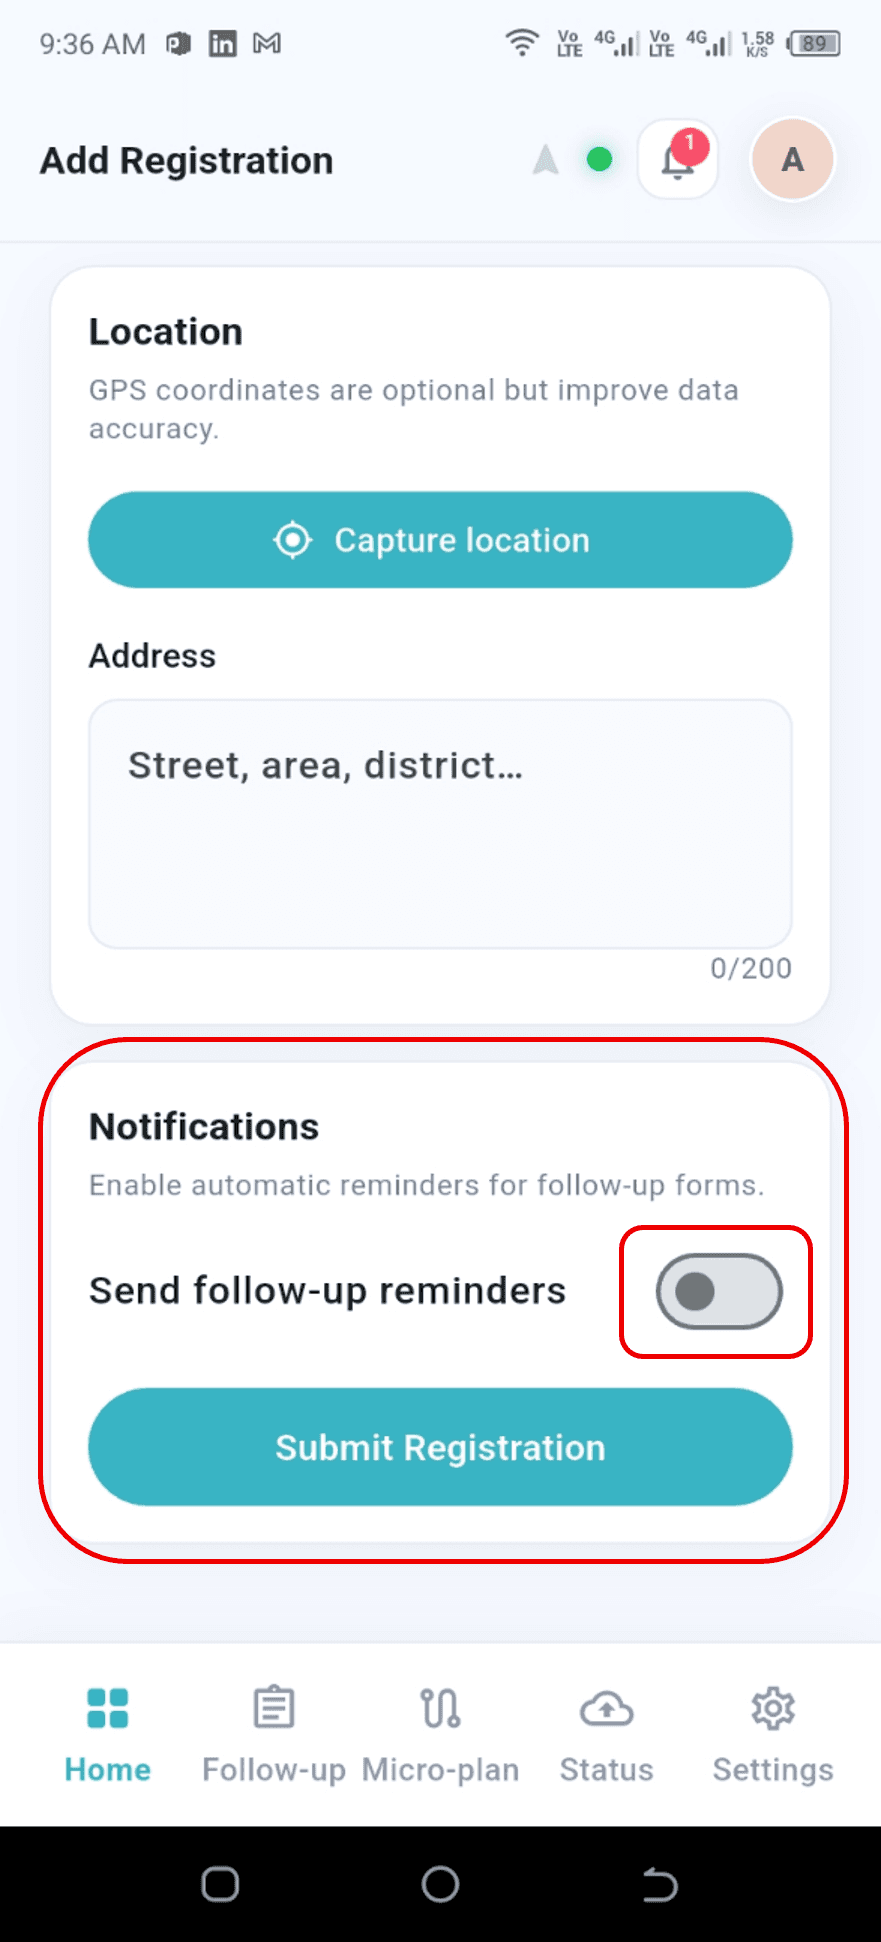
Below the identity document, Capture Location records the user's current GPS coordinates (optional but improves data accuracy), and Address accepts a manually typed address of up to 200 characters. At the bottom of the form, the Notifications switch controls follow-up reminders and is on by default; turning it off means the user will not receive follow-up reminder notifications for that registration.
- 1Add Registration
- 2Personal information
- 3Project selection (optional)
- 4Identity document – type and number
- 5NID photo – front and back
- 6Extract from NID
- 7Capture location
- 8Address
- 9Notification settings, then submit
Follow-up categories
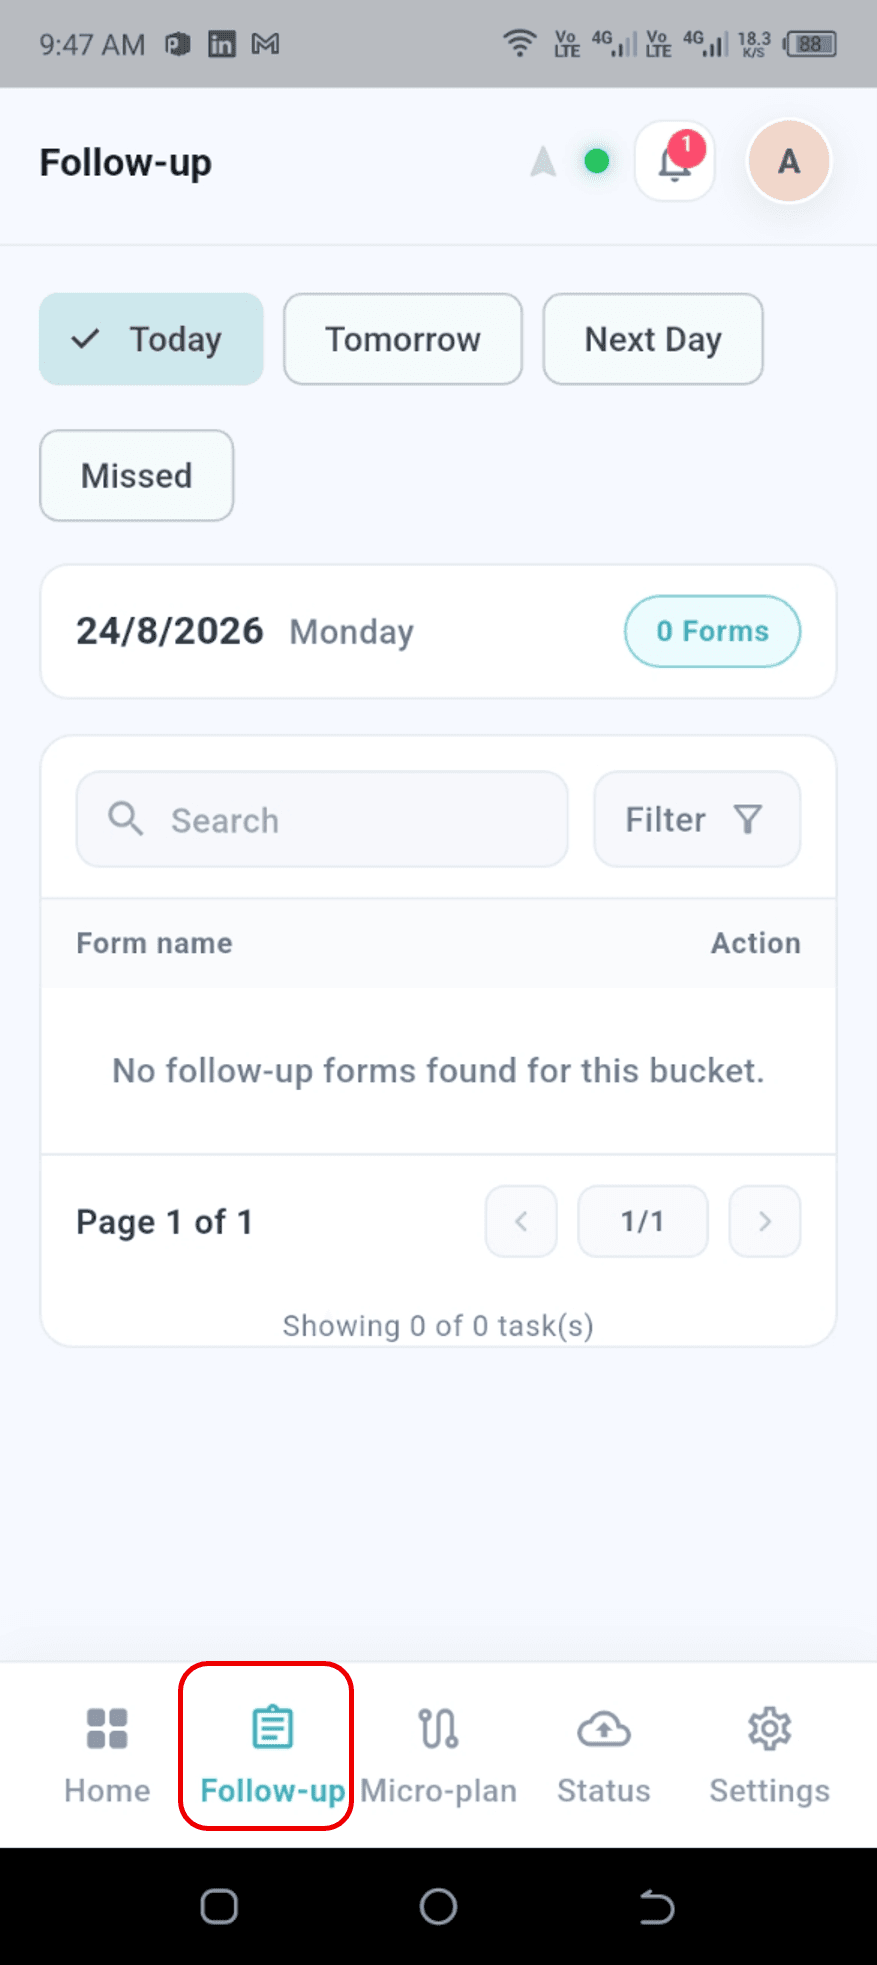
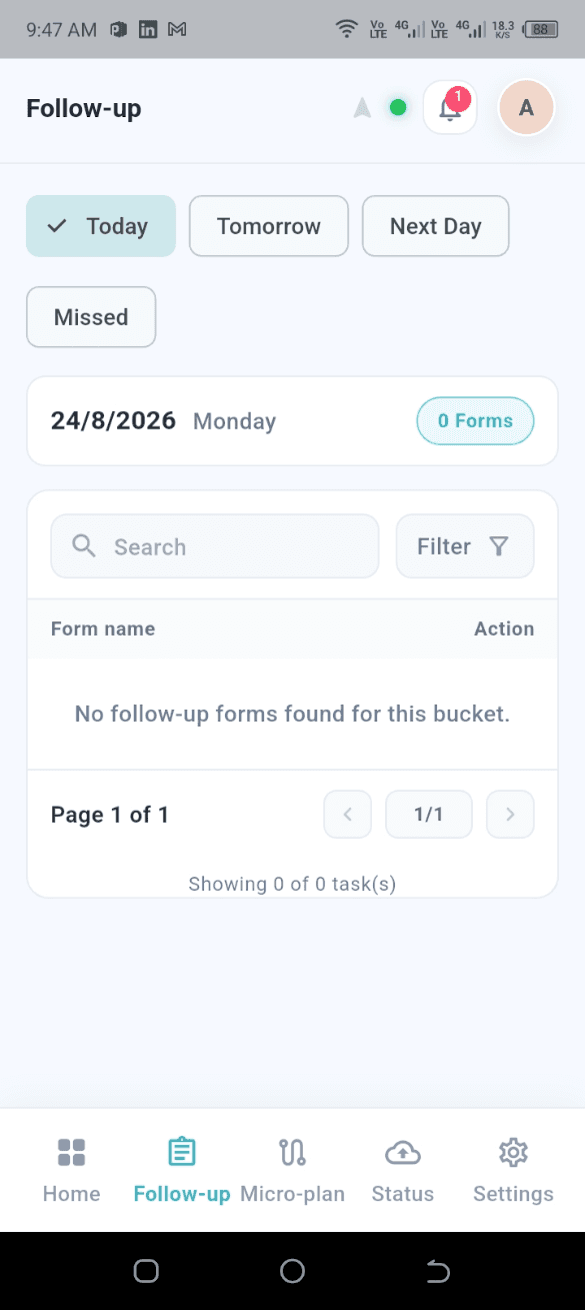
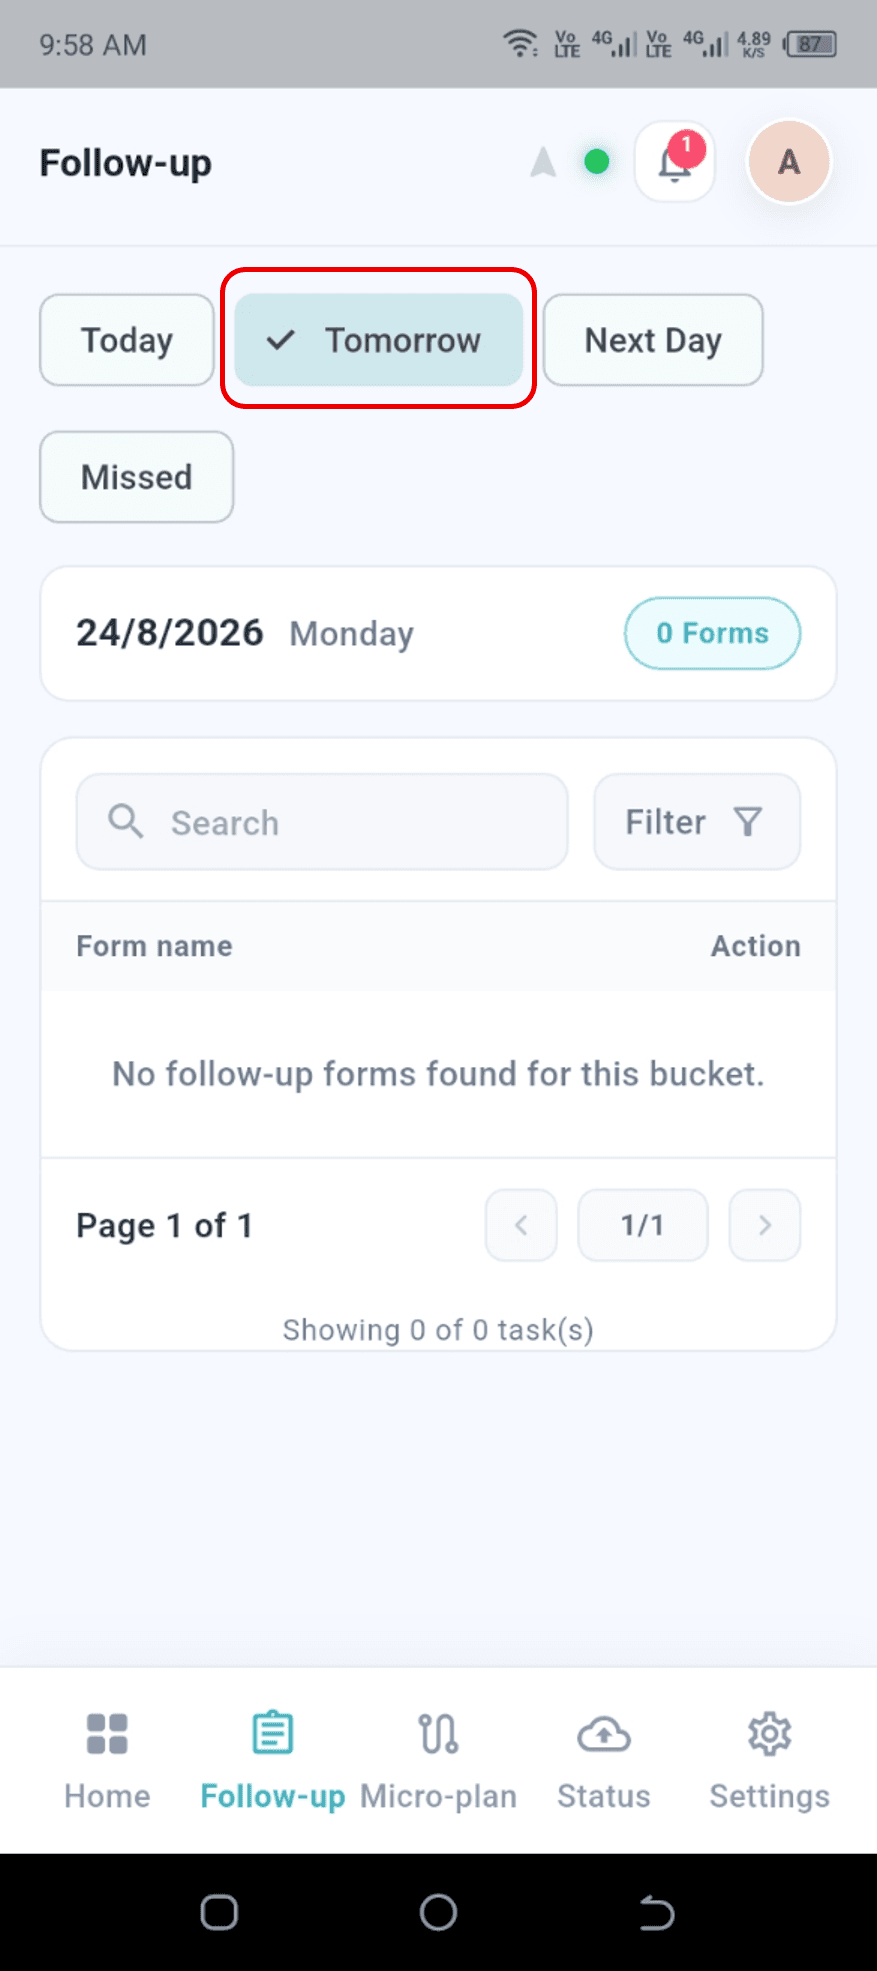
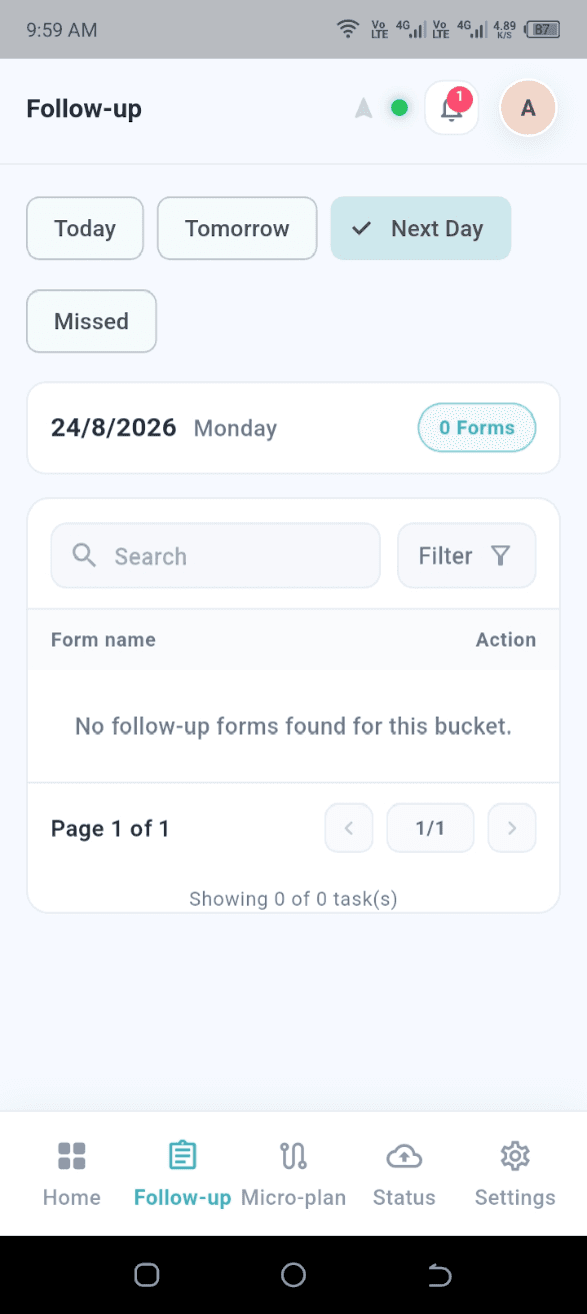
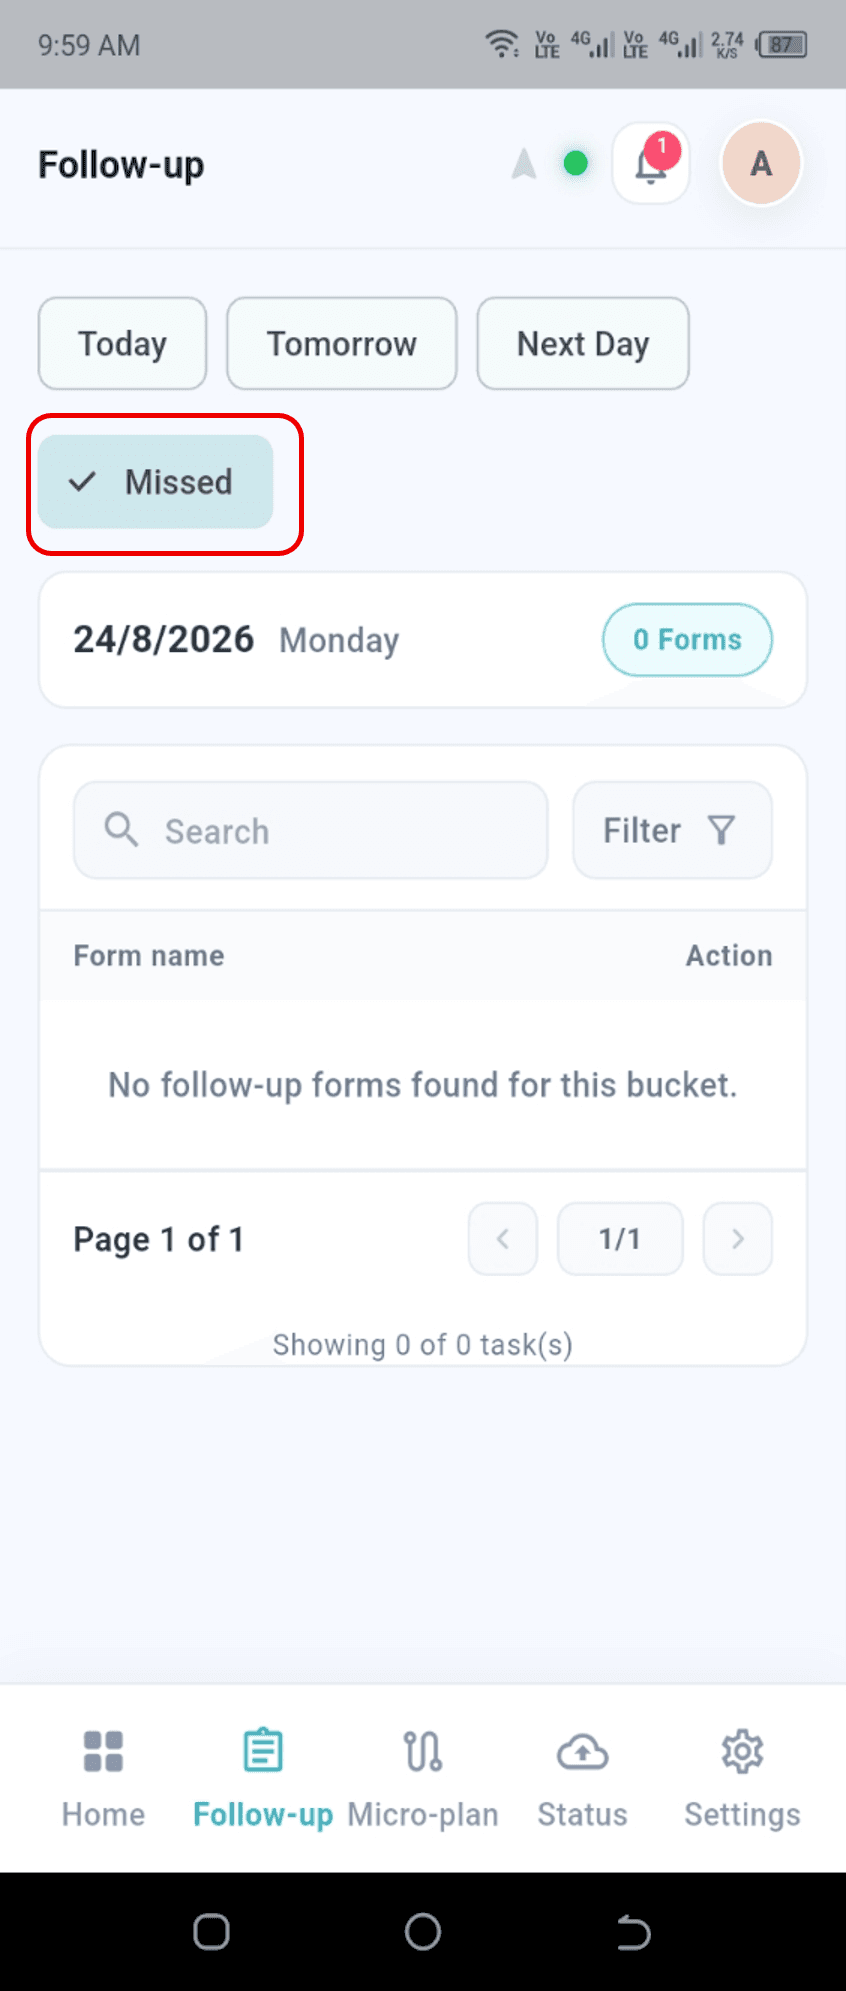
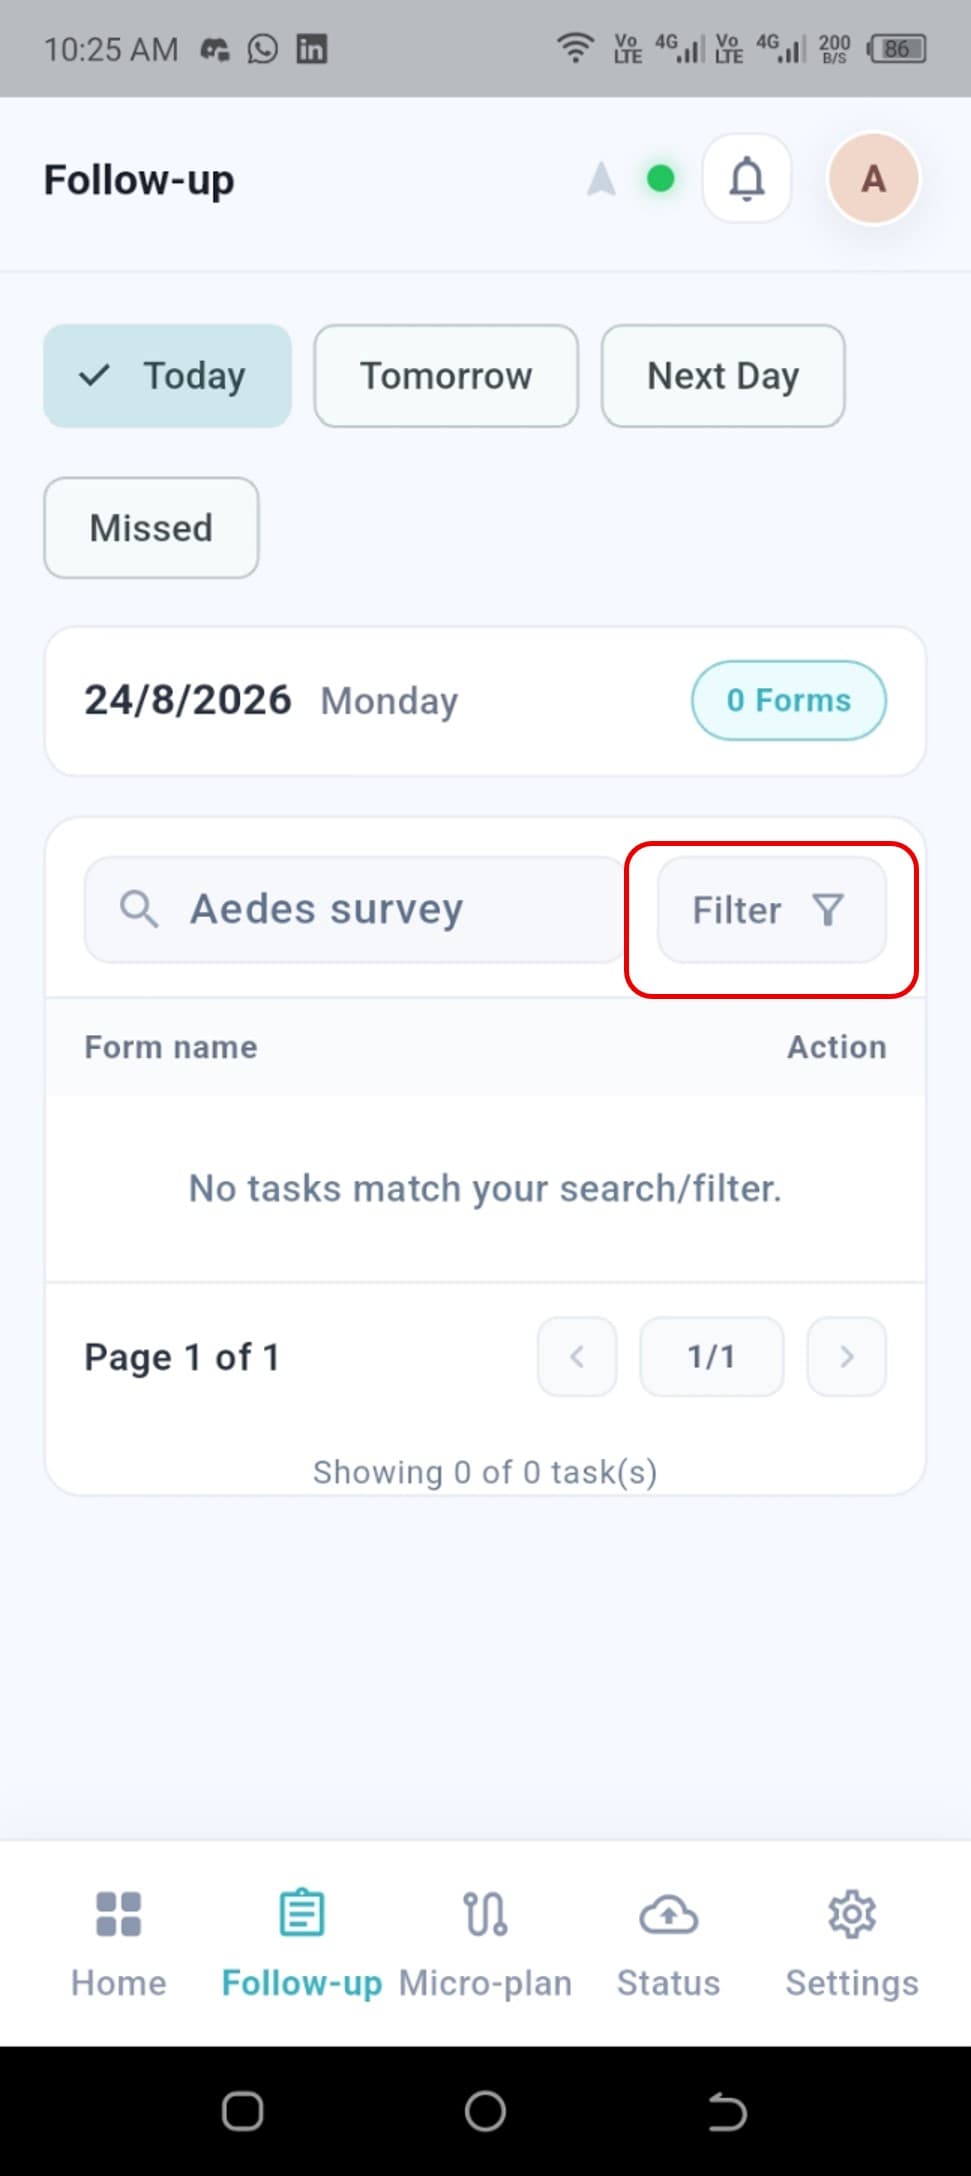
The Follow-up page lists forms that require follow-up. Open it from the Follow-up tab in the bottom navigation bar. Four tabs — Today, Tomorrow, Next Day, and Missed — filter the list by schedule. Today is selected by default. Below the tabs, the page shows the date and the number of follow-up forms scheduled for it; Missed shows follow-ups whose scheduled date has already passed without being completed.
Search and filter follow-ups
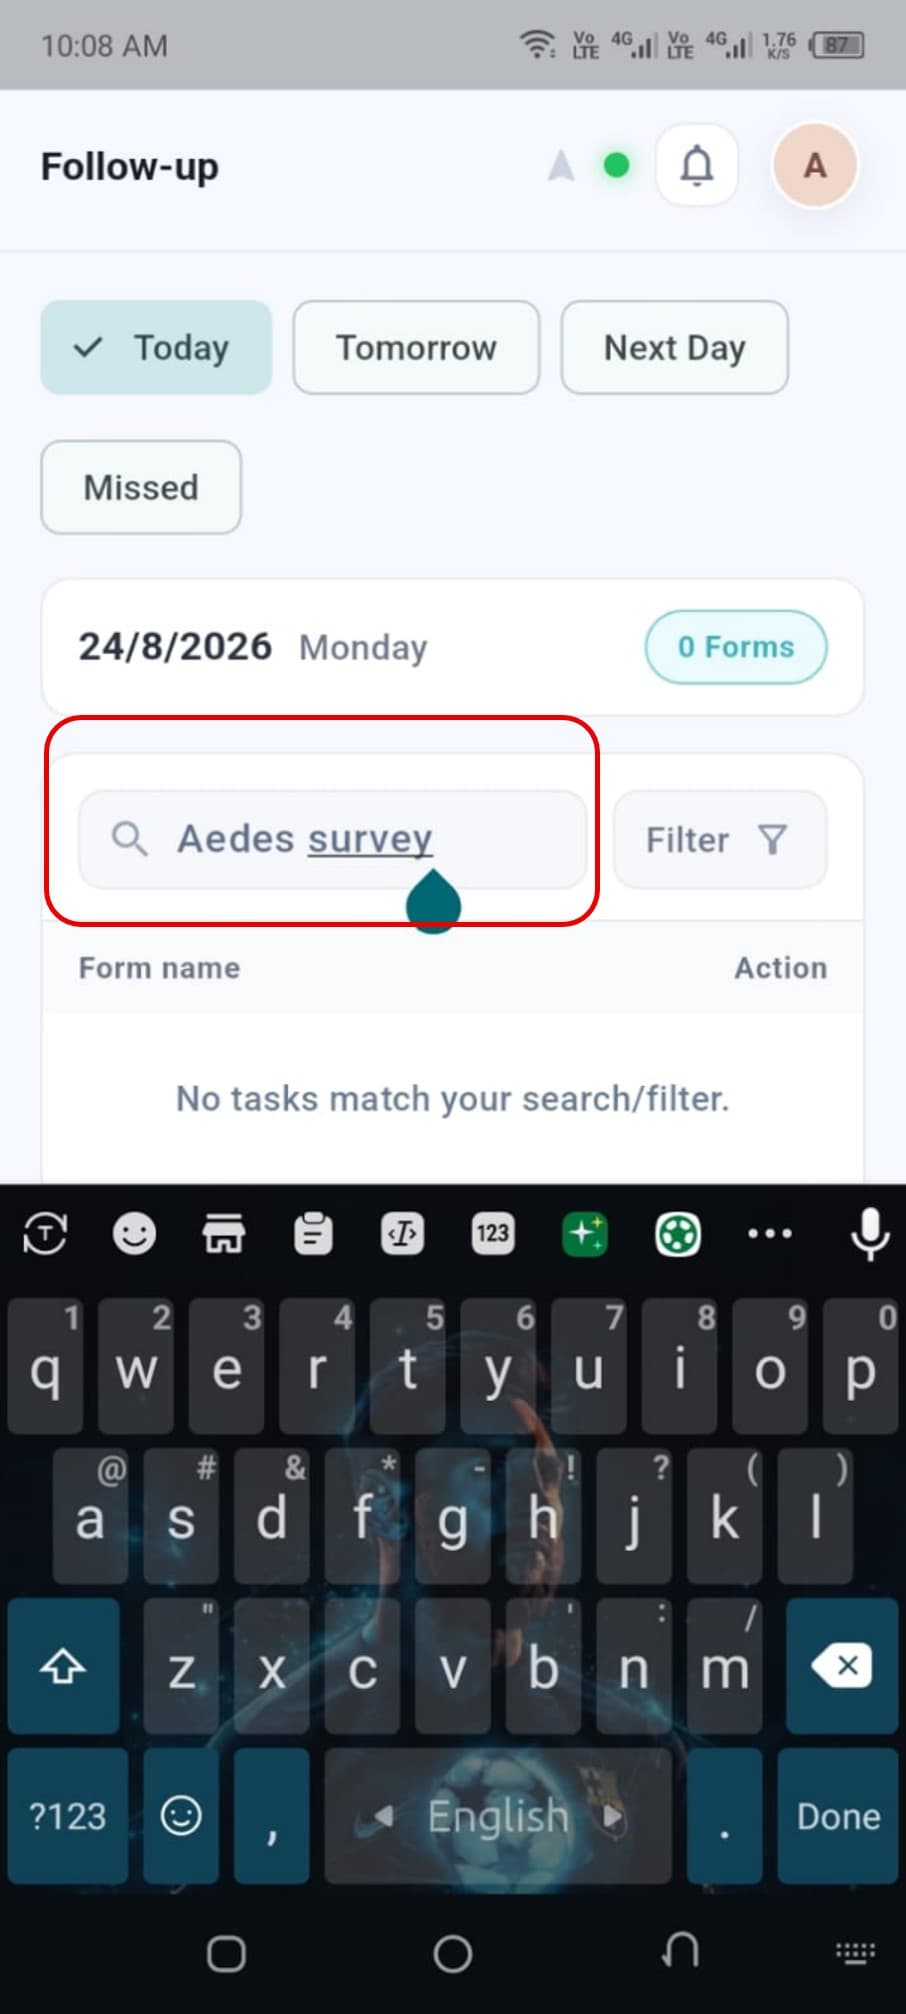
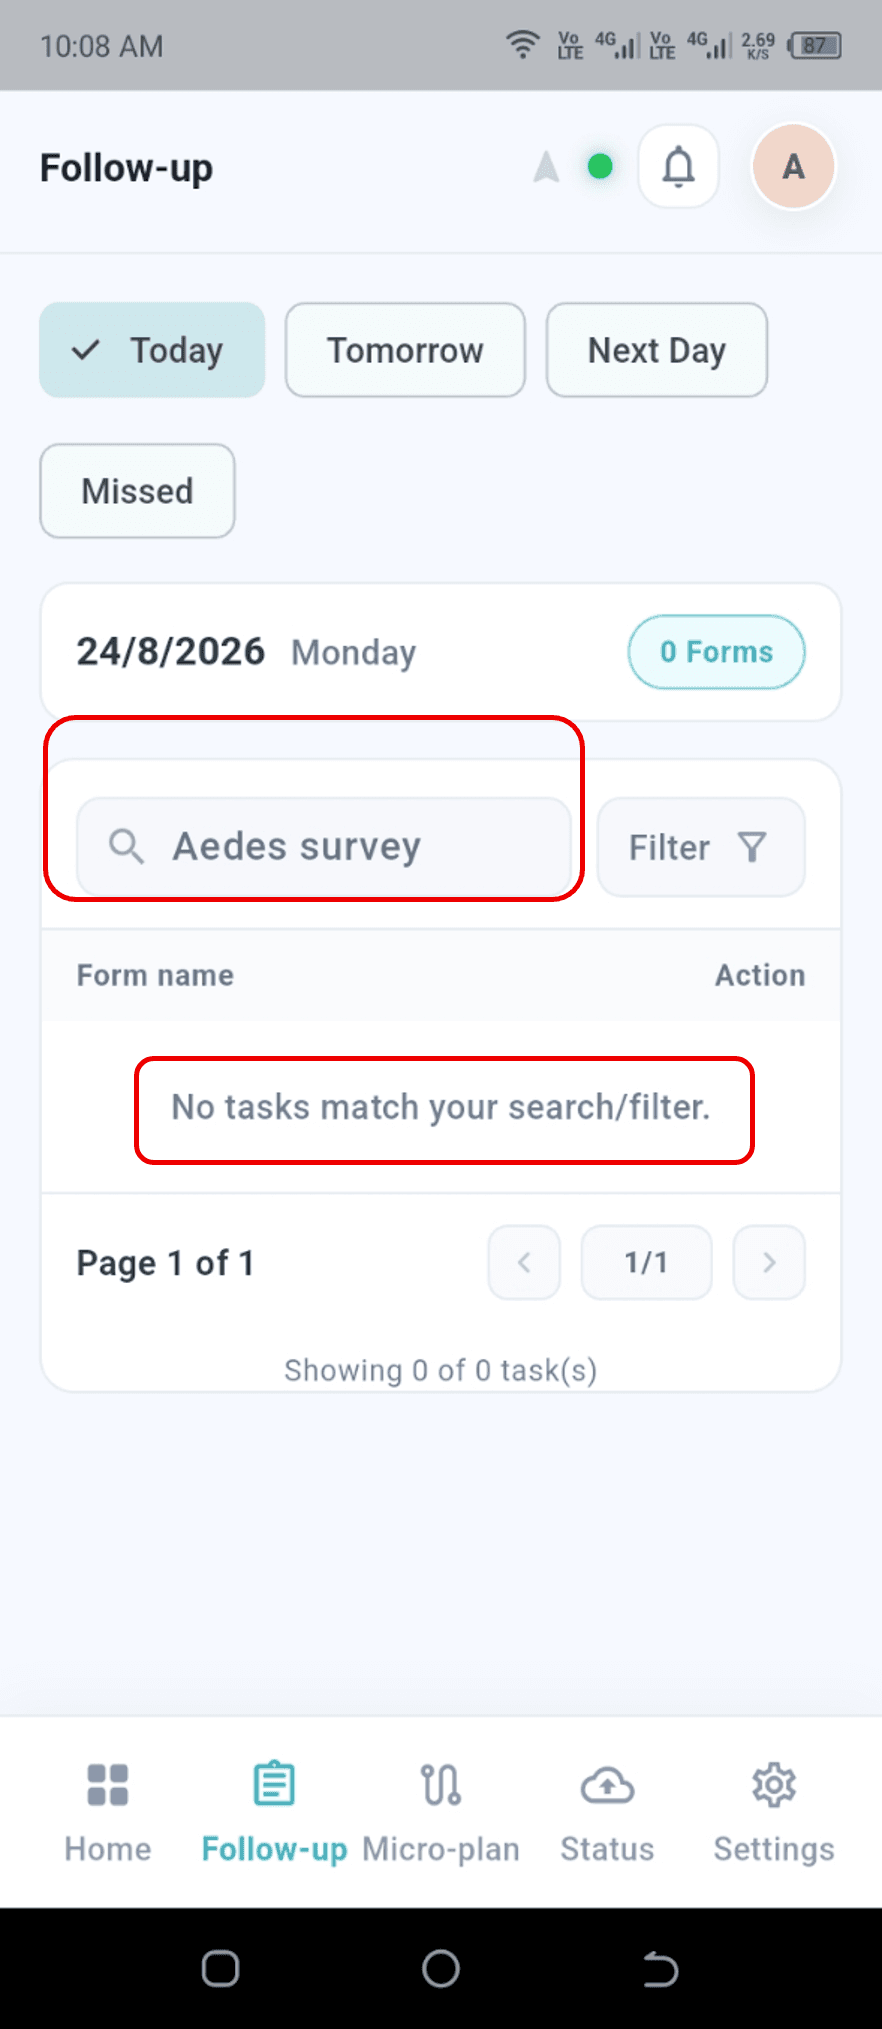
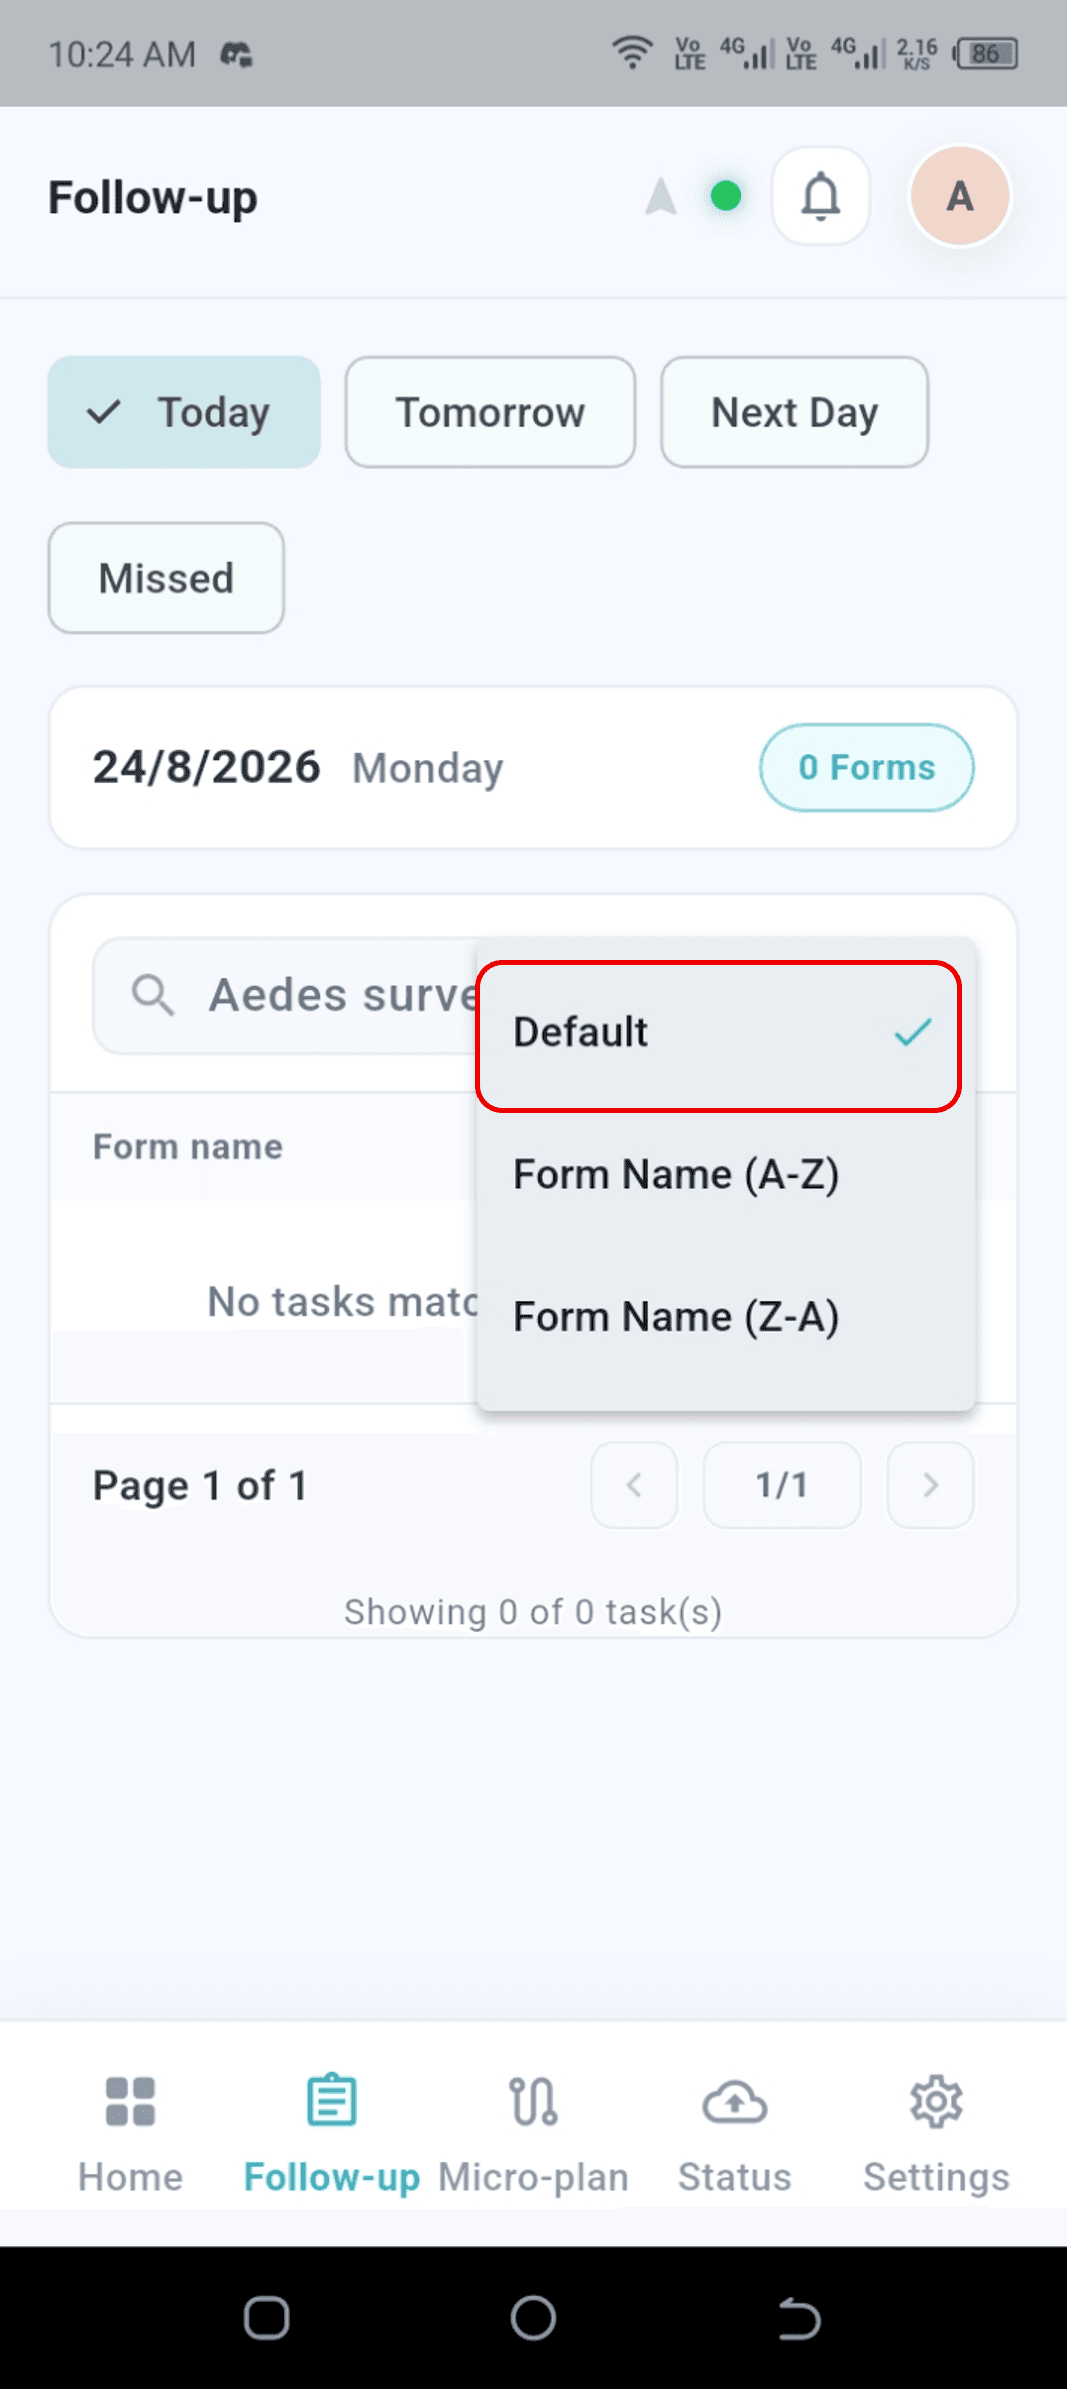
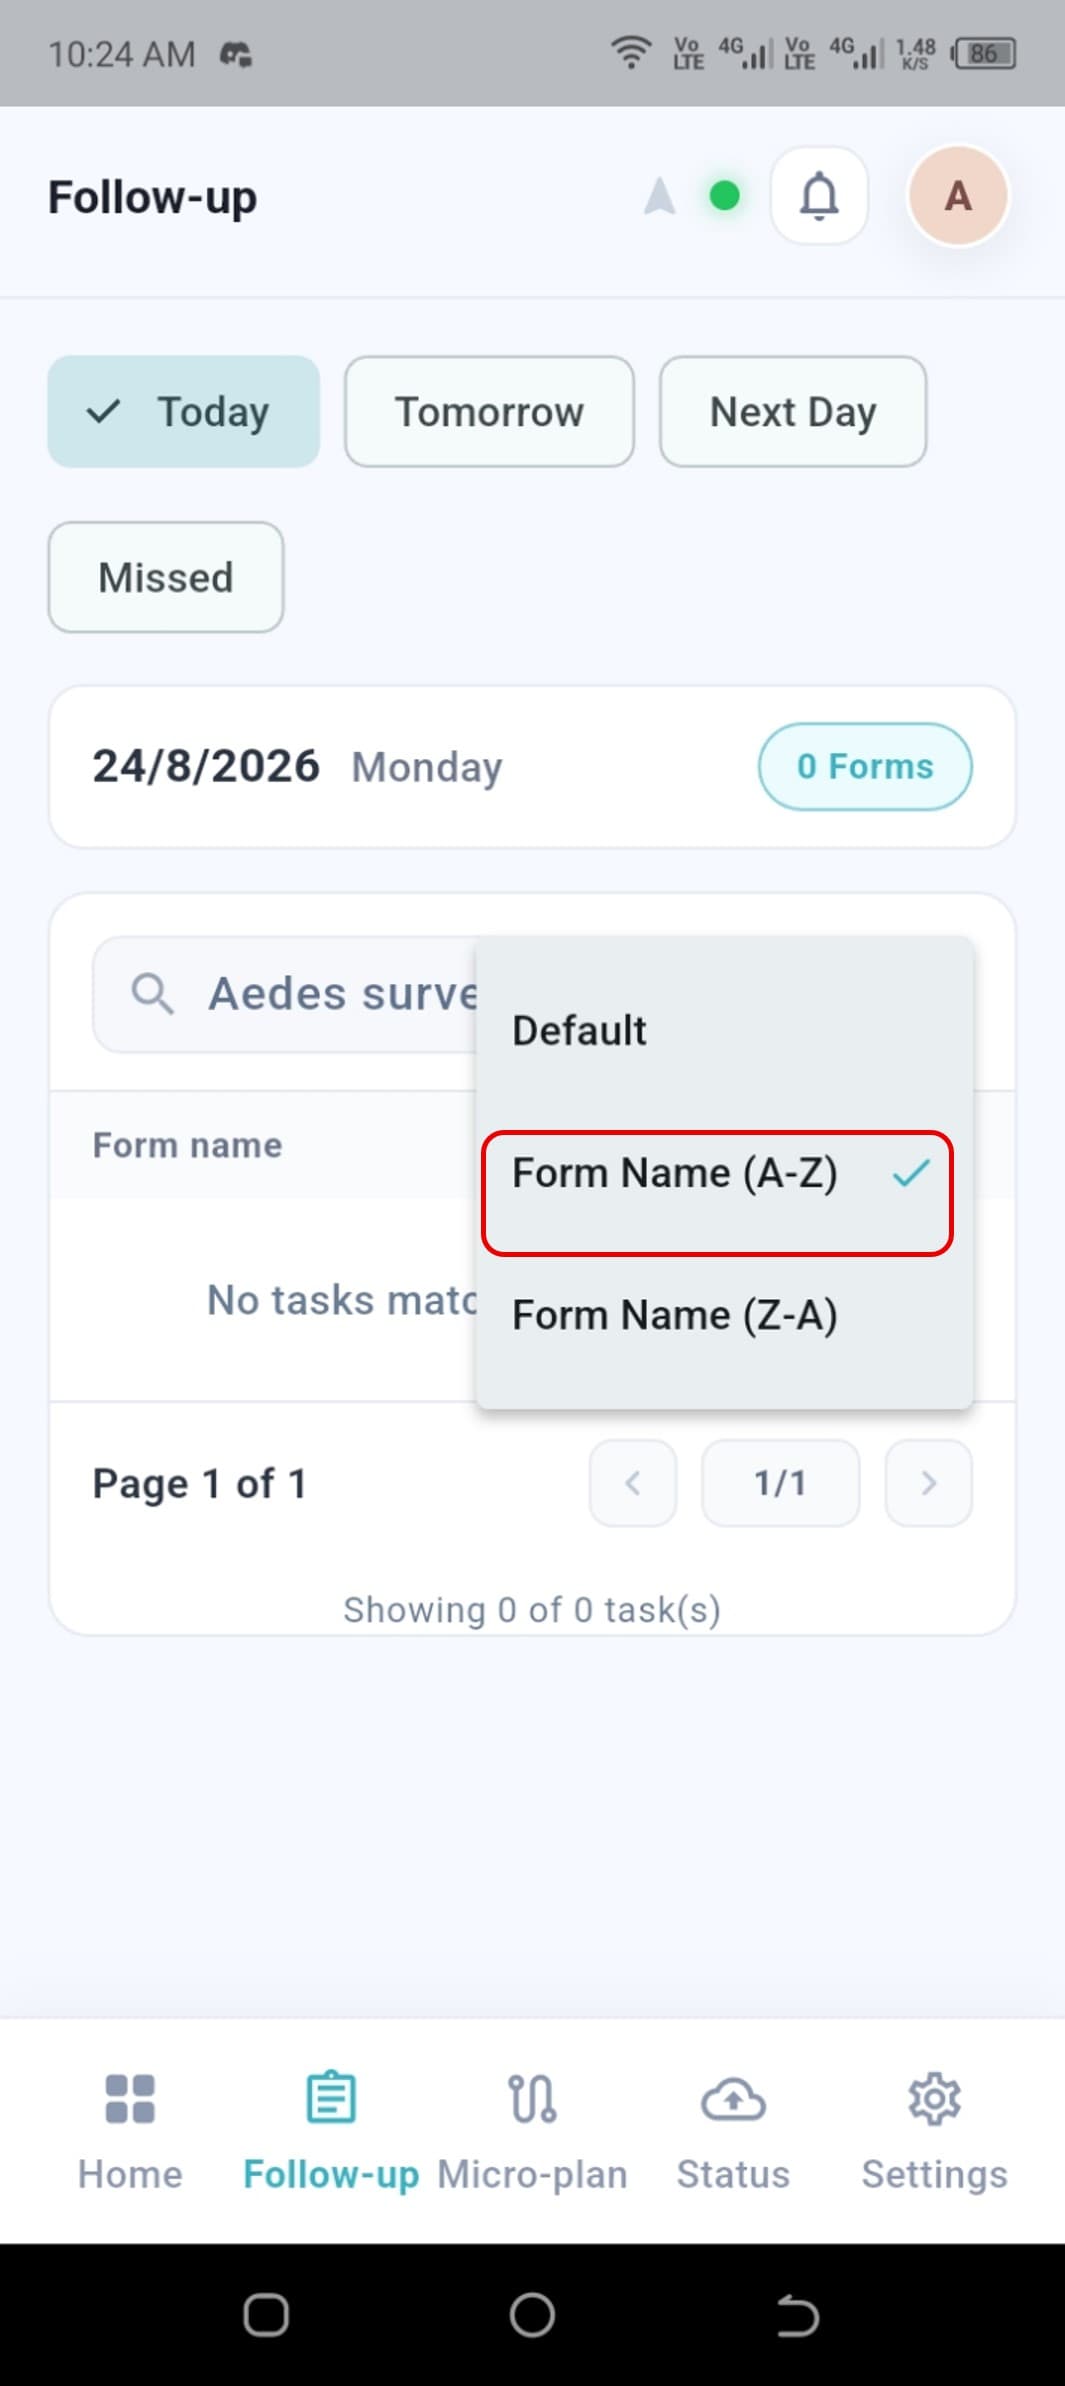
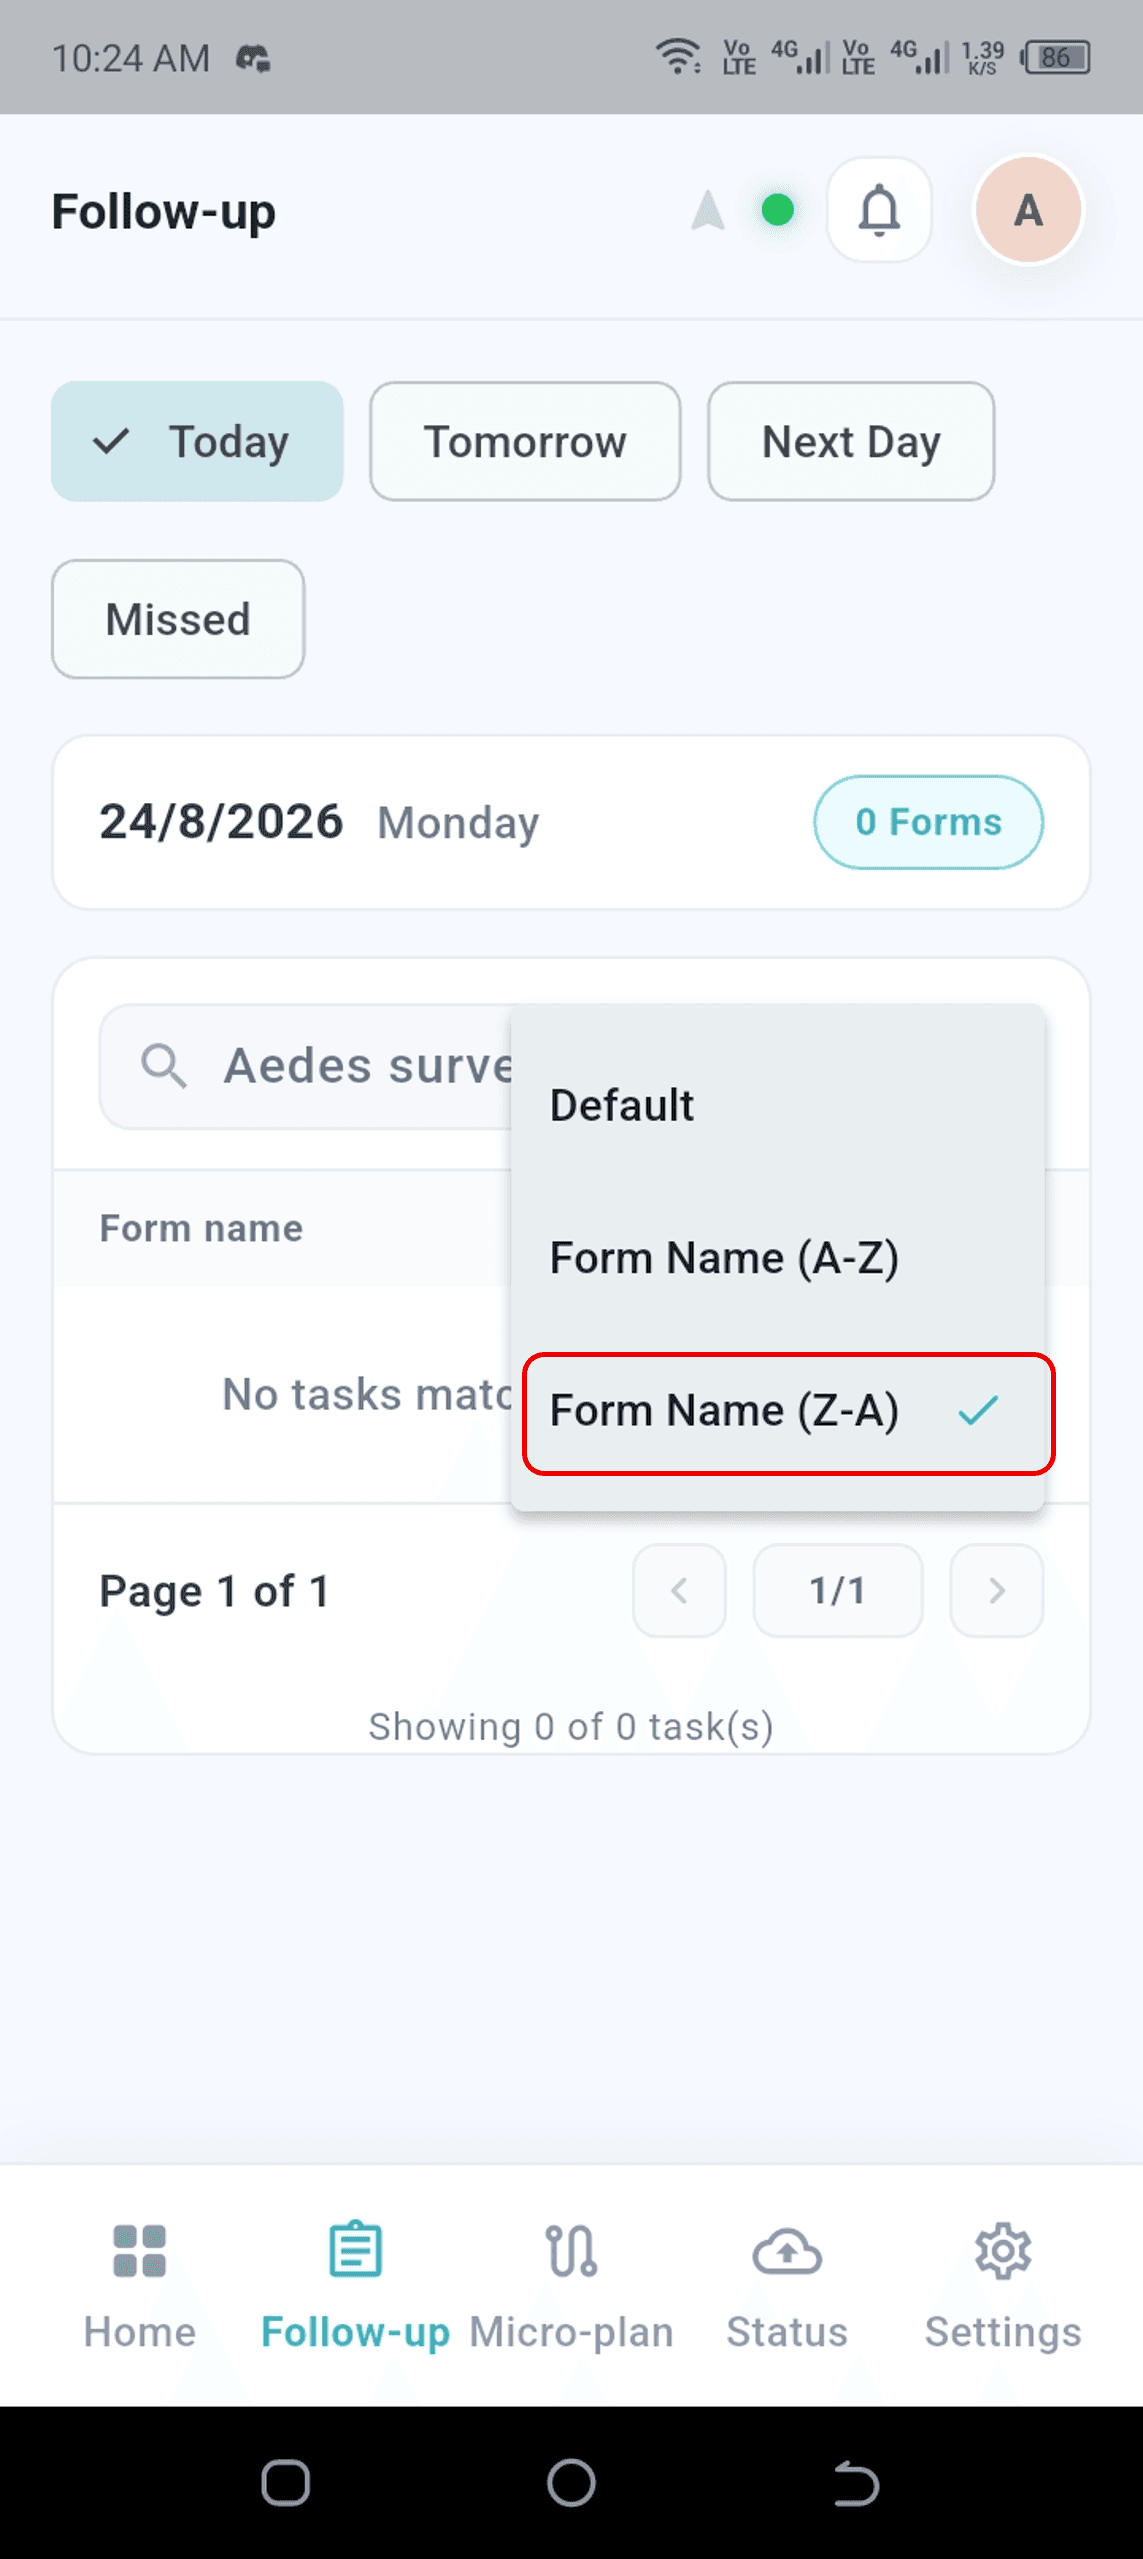
A Search bar finds a specific follow-up form by name; if nothing matches, the app shows “No task matches your search.” The Filter button next to it opens a sort menu with Default, Form Name (A–Z), and Form Name (Z–A), which can be combined with the search to find a form quickly.
Path tracking workflow
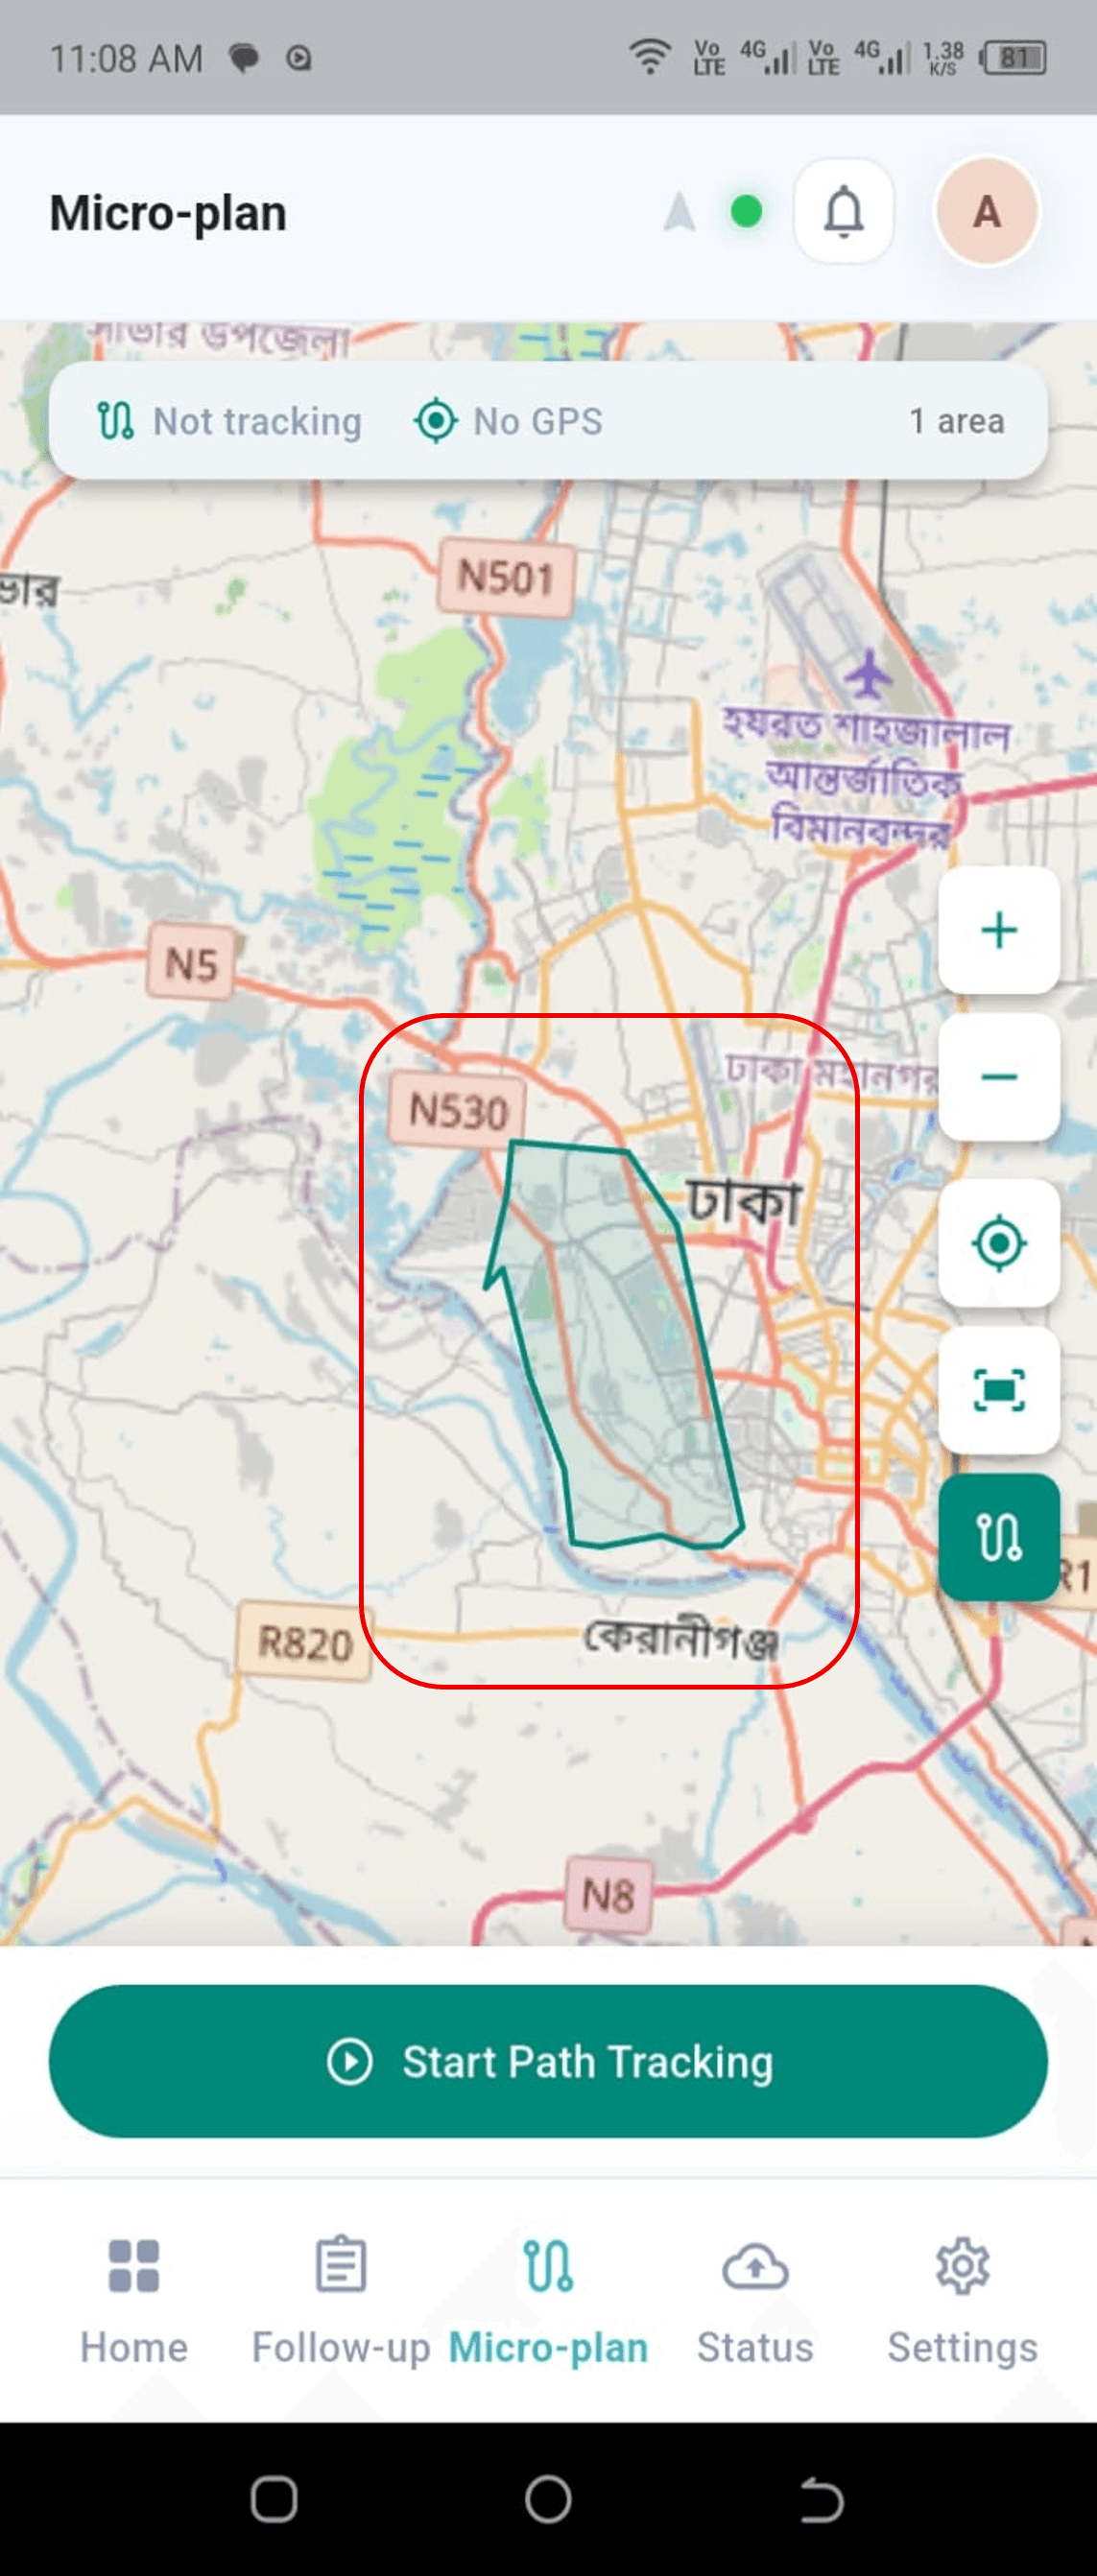
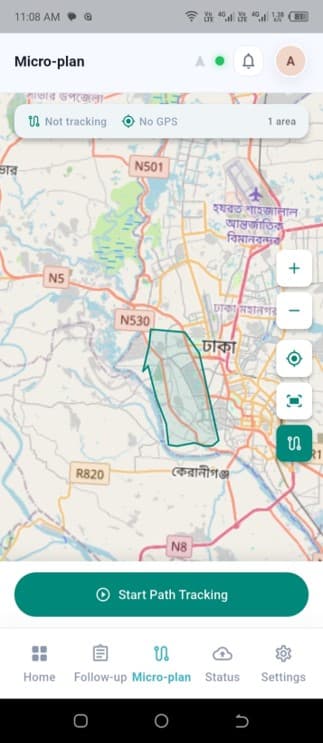
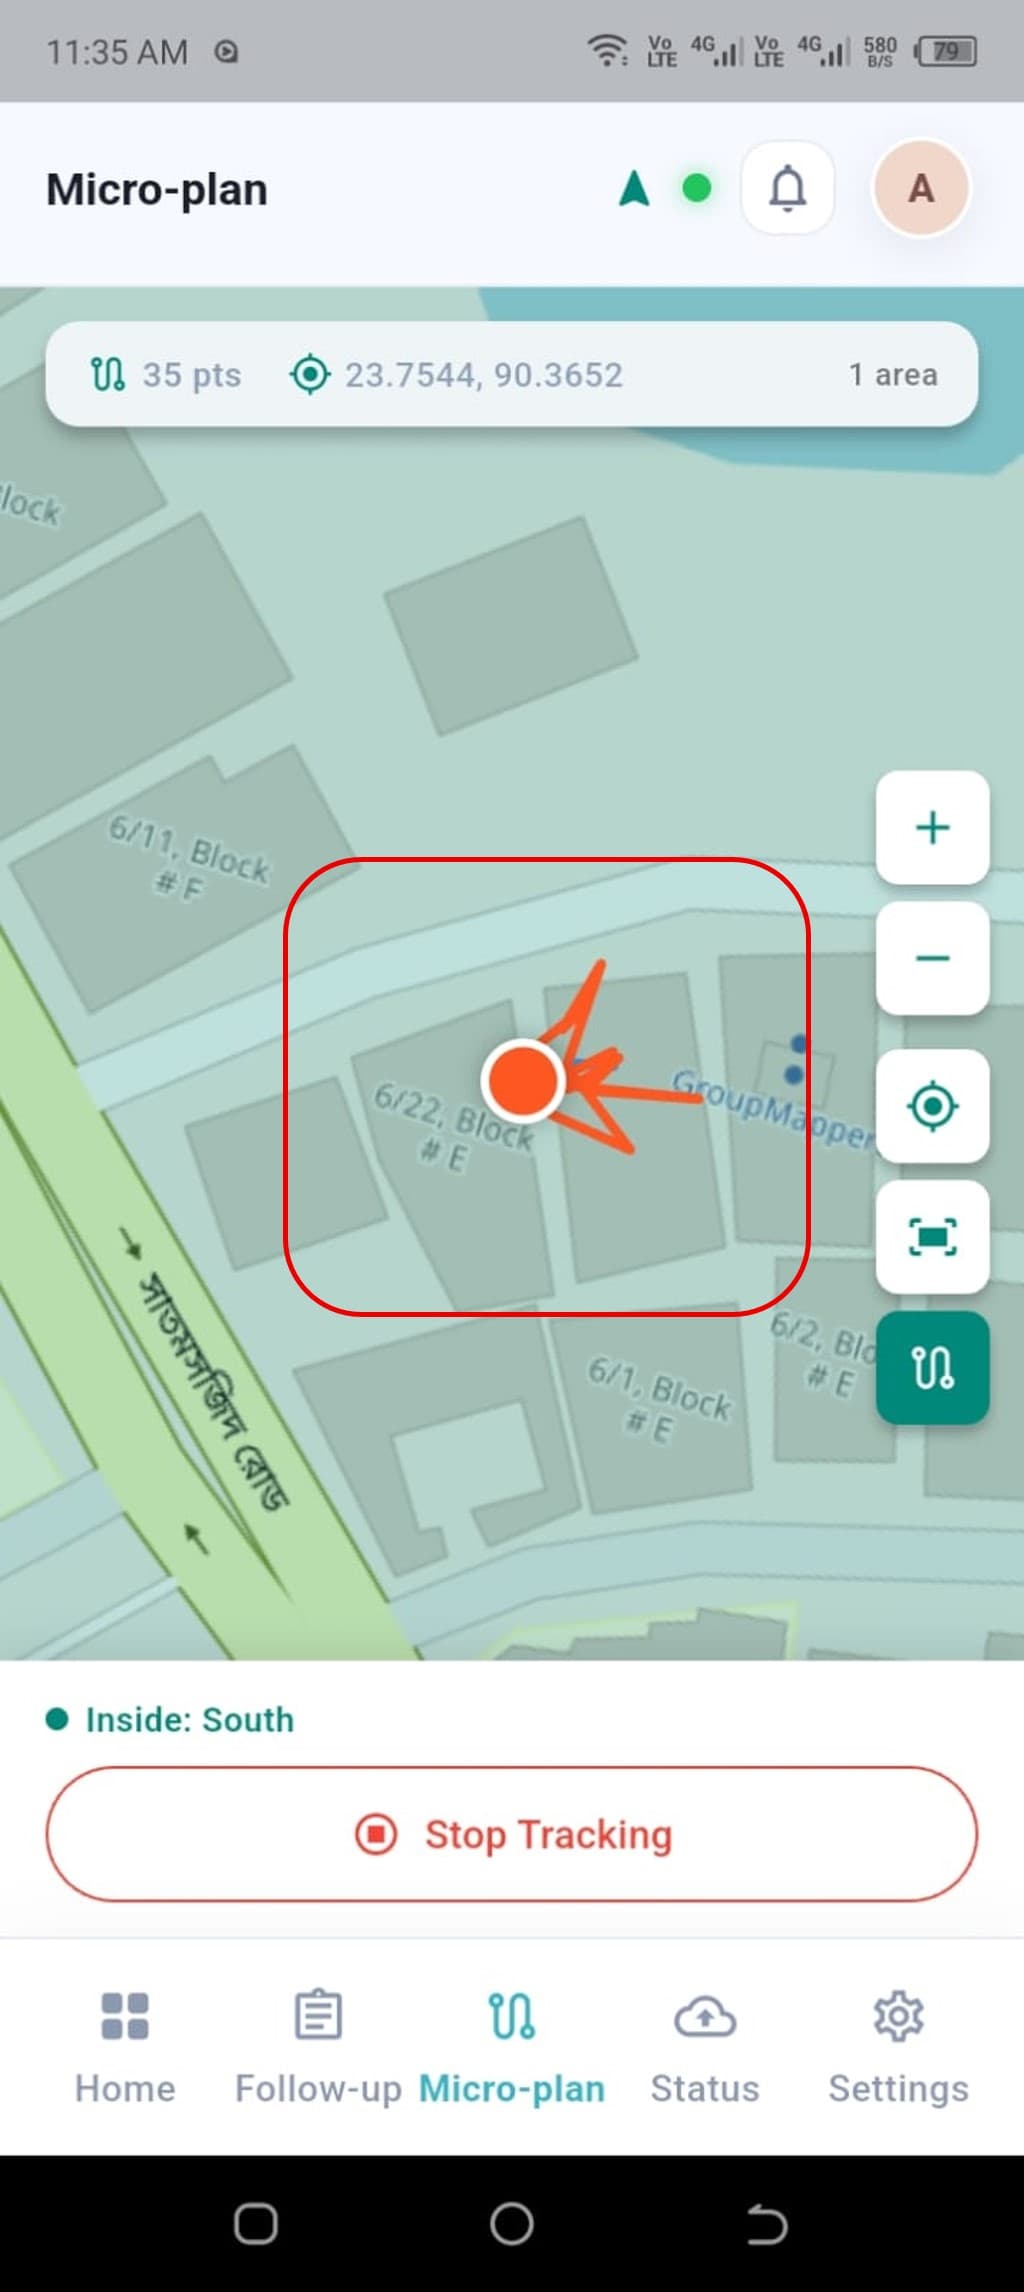
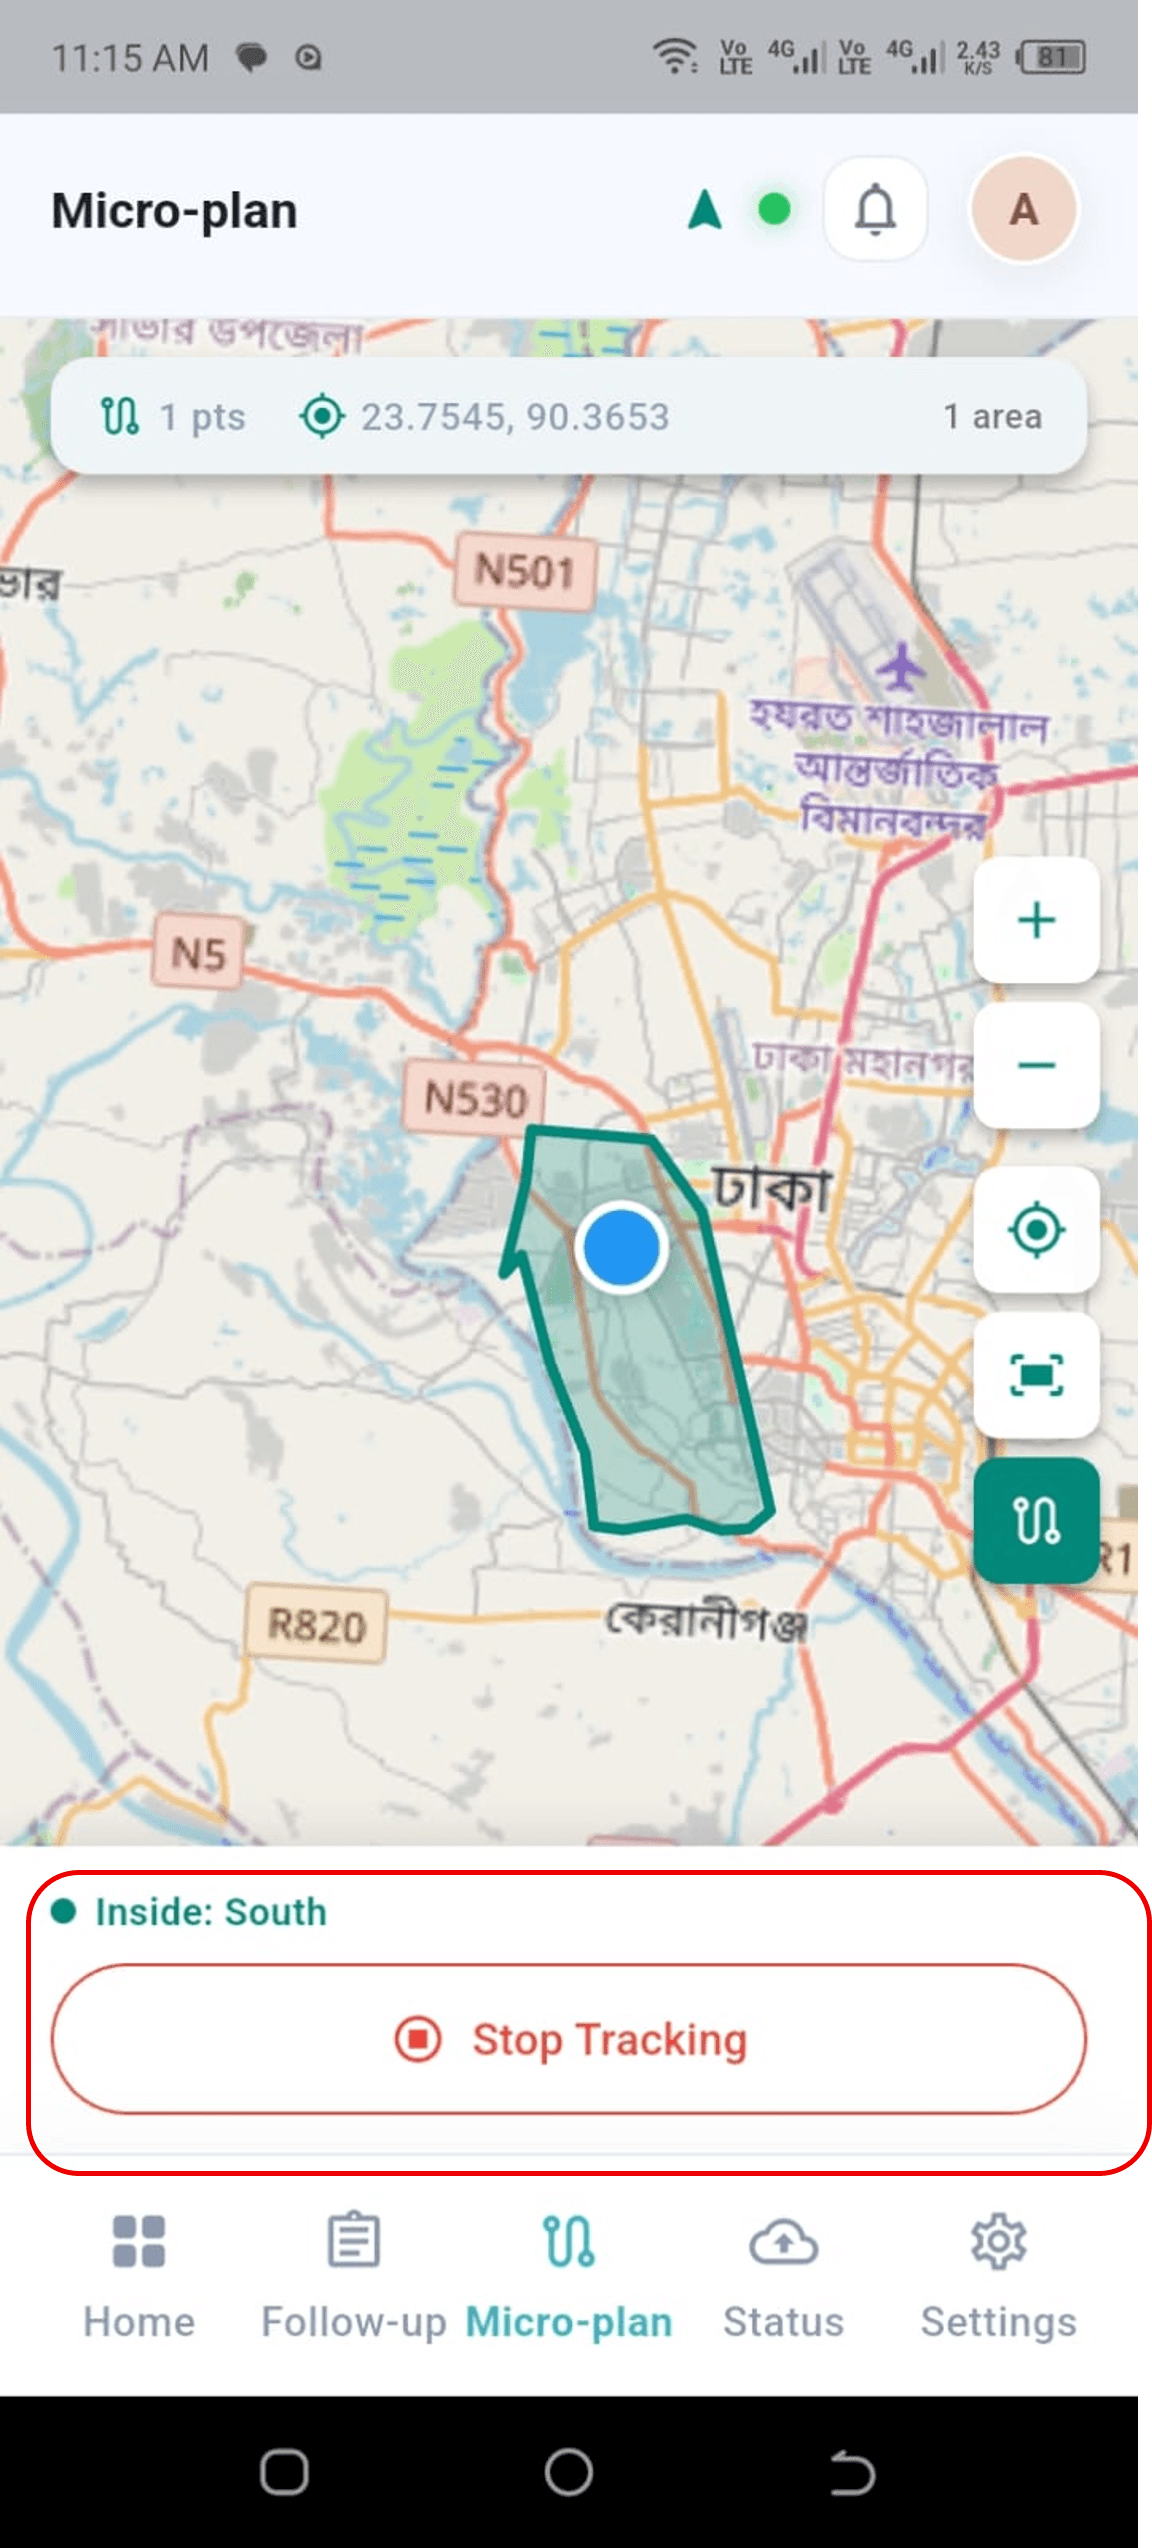
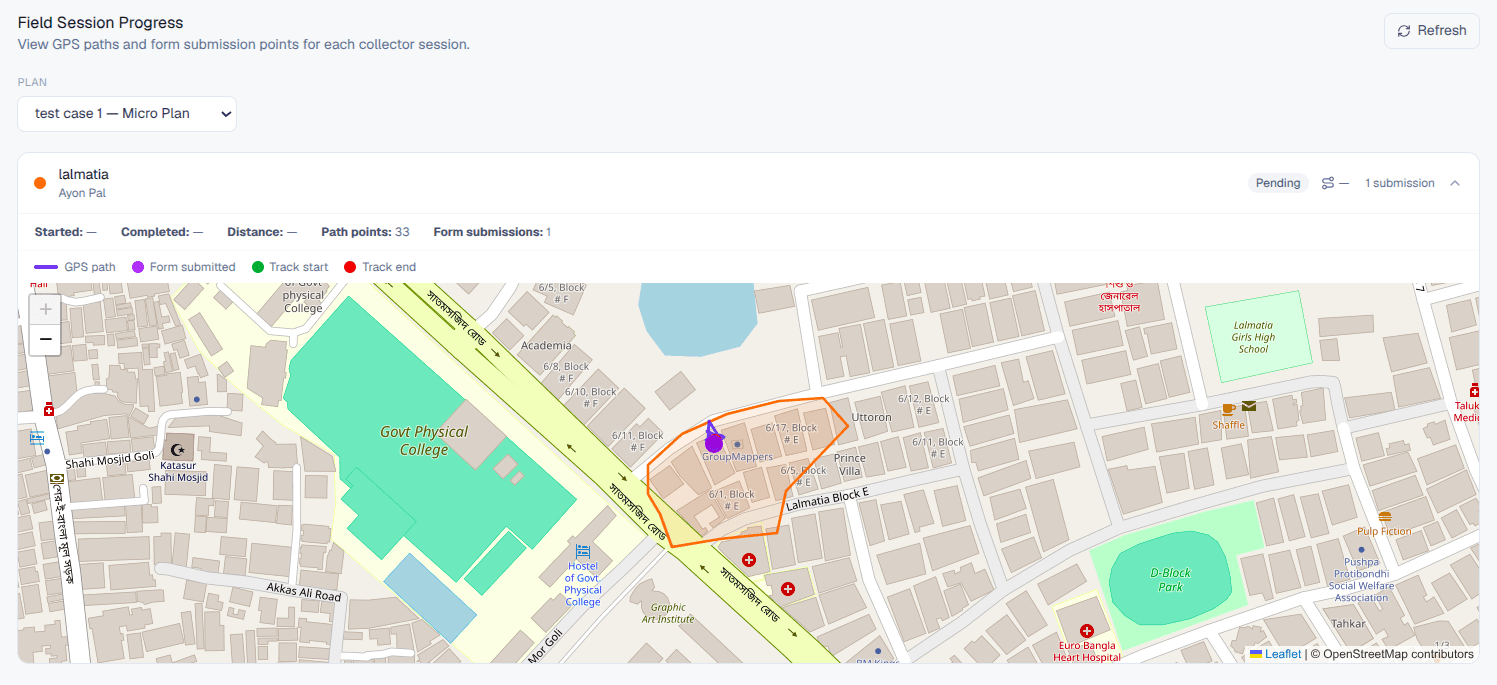
The Microplanning page shows the area assigned to the user and tracks their current location and movement inside it. While tracking is active, the app checks whether the user is within the assigned area and shows a warning — with the distance from the boundary — if they move outside it.
- 1Navigation Bar → Micro-plan
- 2View the assigned area on the map
- 3Start Path Tracking
- 4Check the current location against the assigned boundary
- 5Track movement in real time
- 6Stop Path Tracking
- 7Review the tracked locations and path
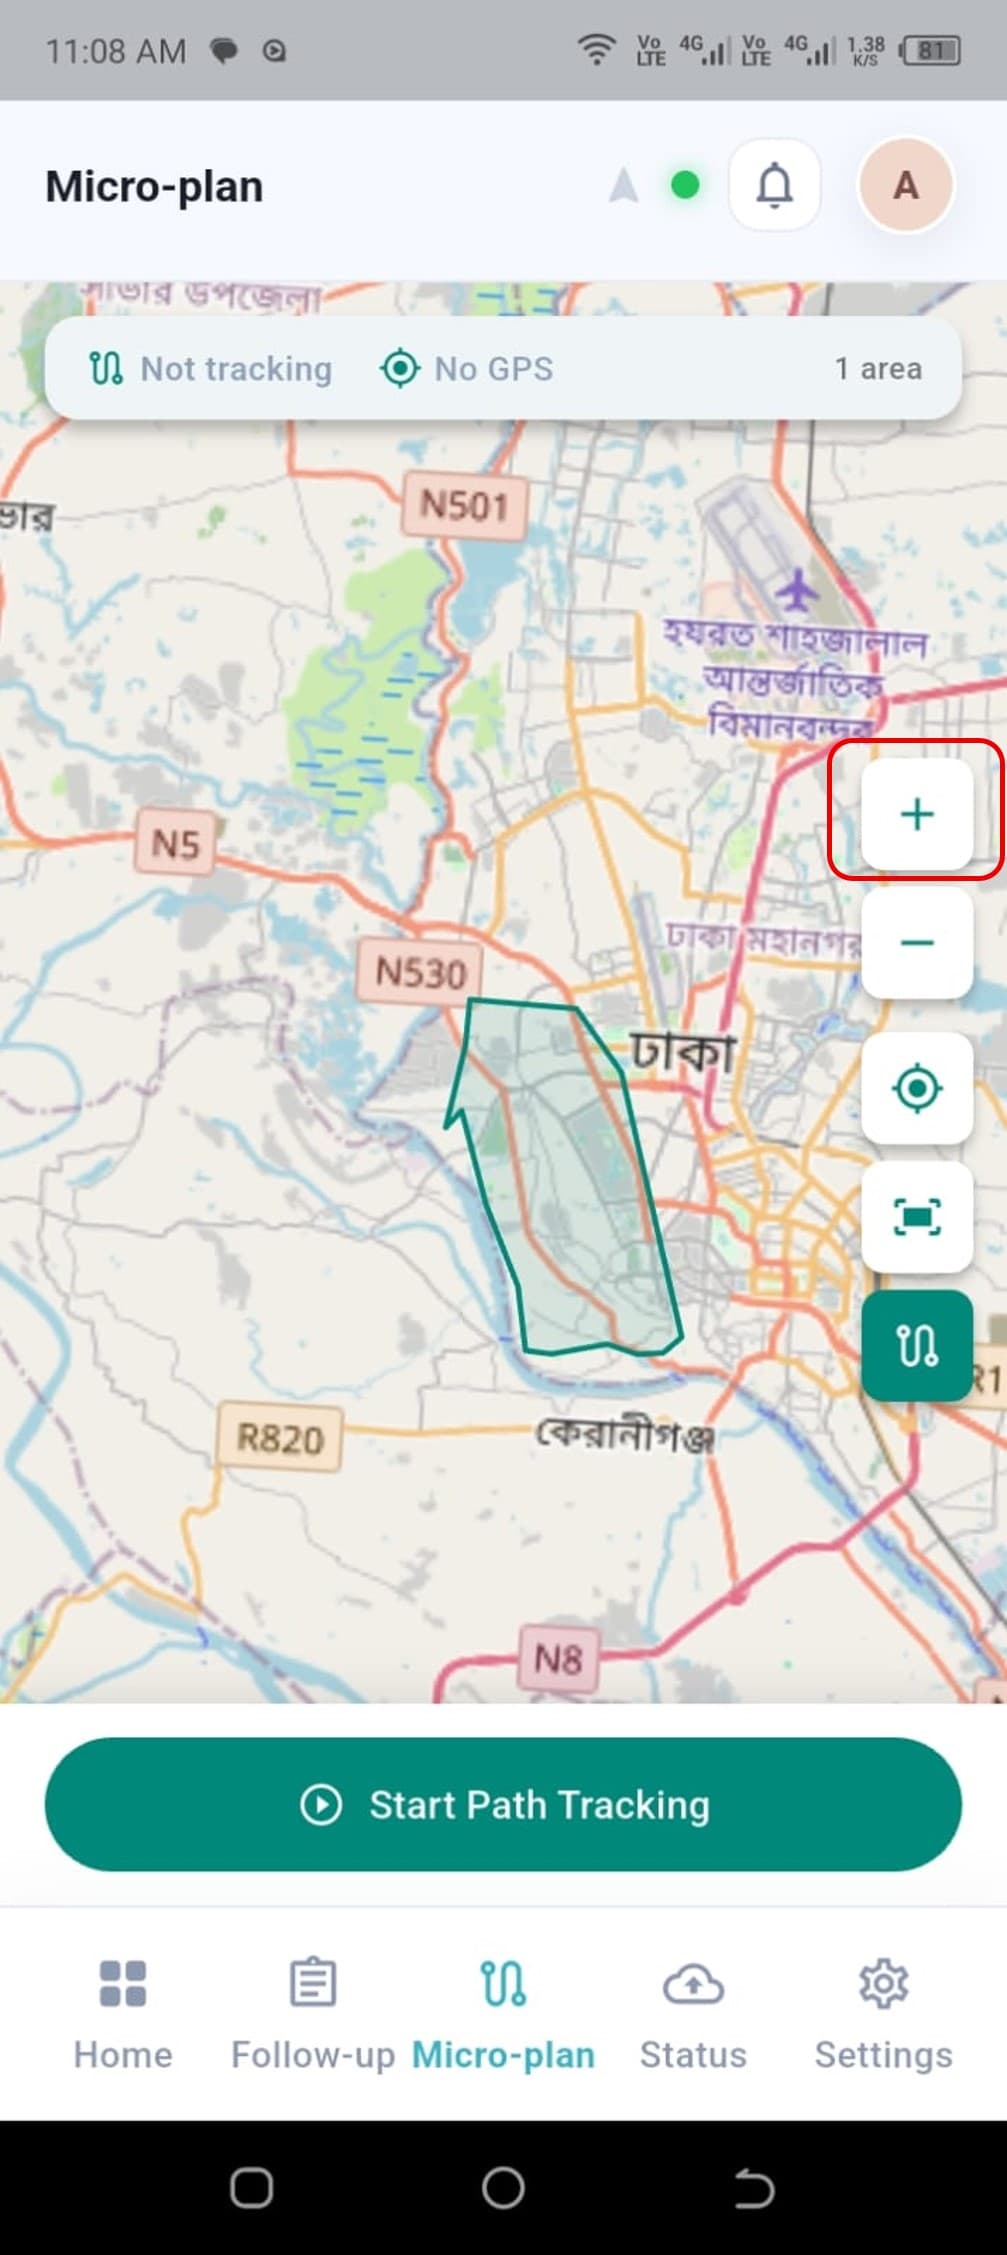
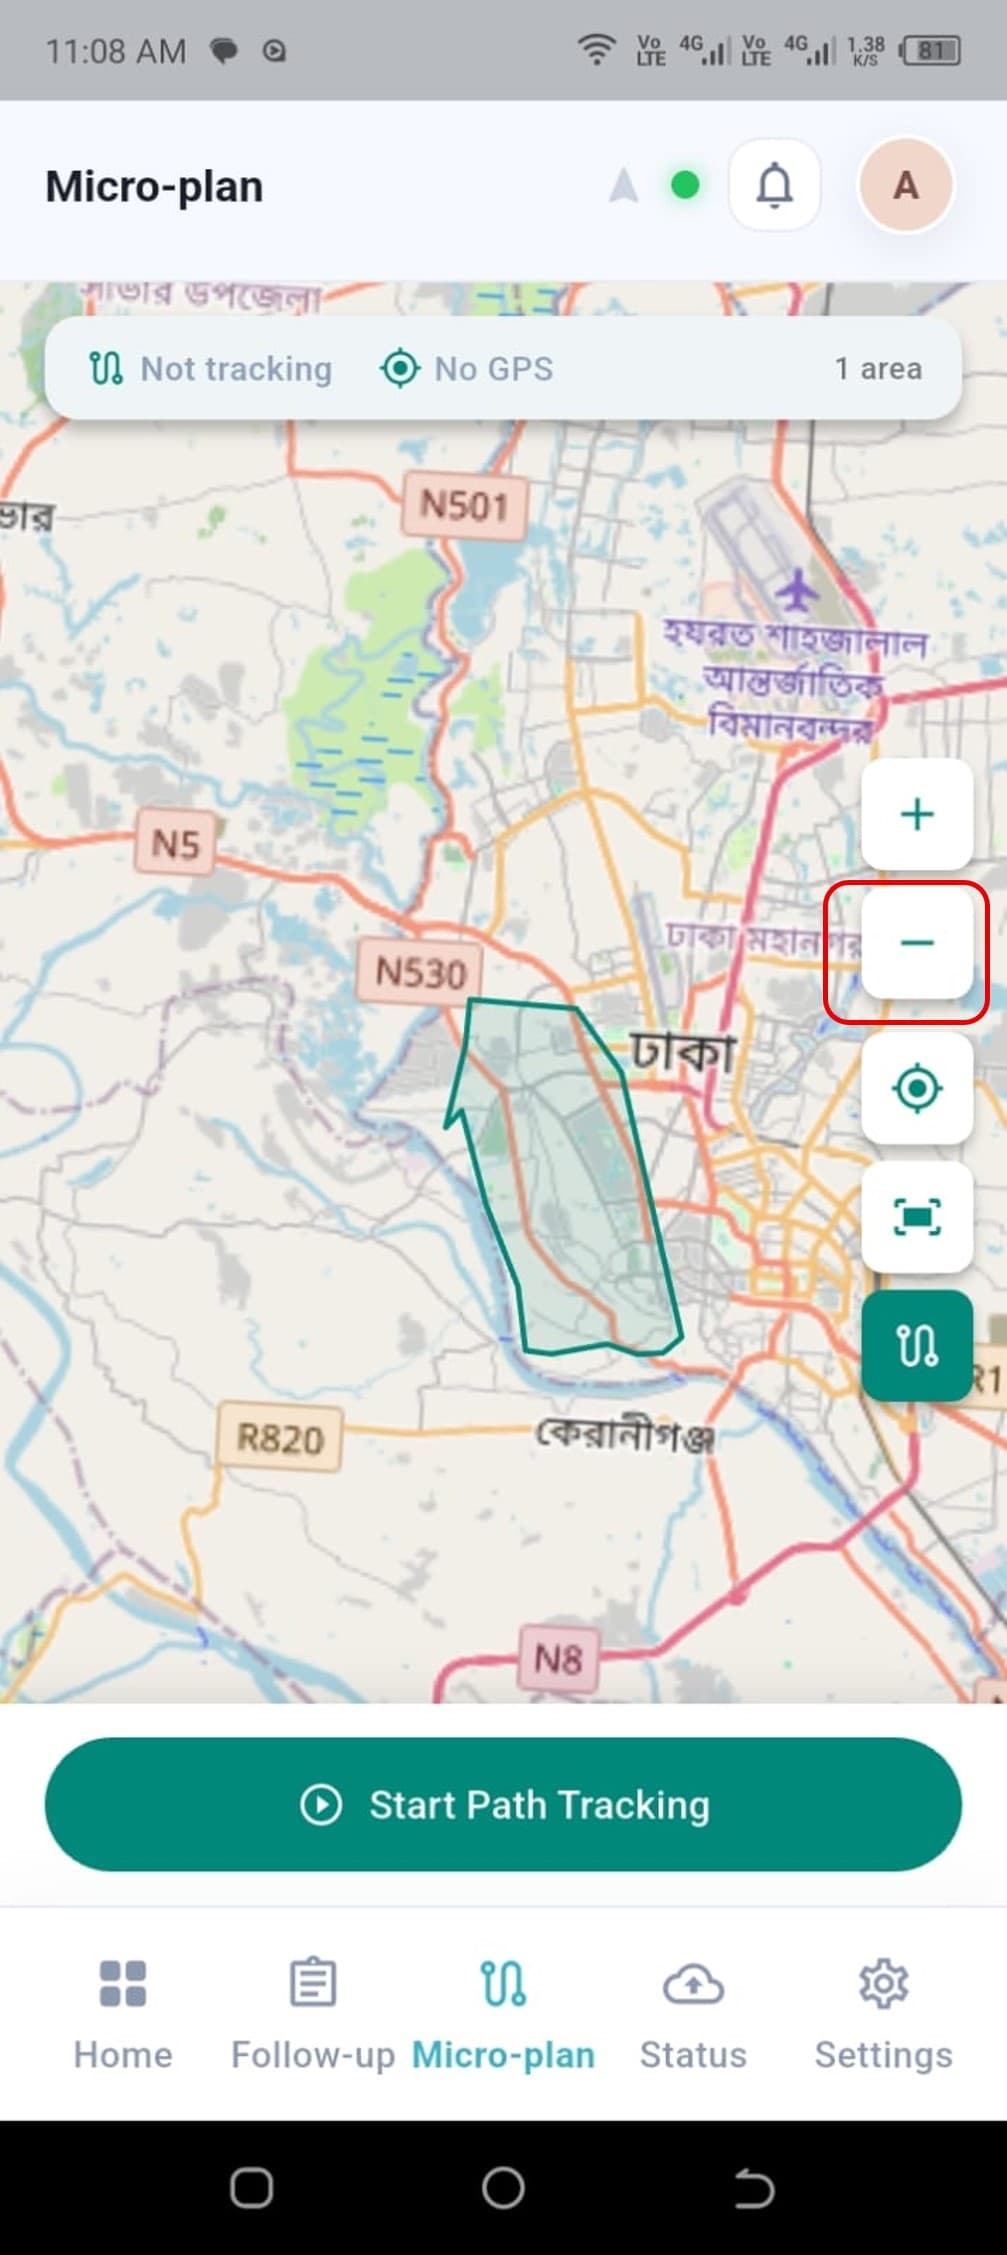
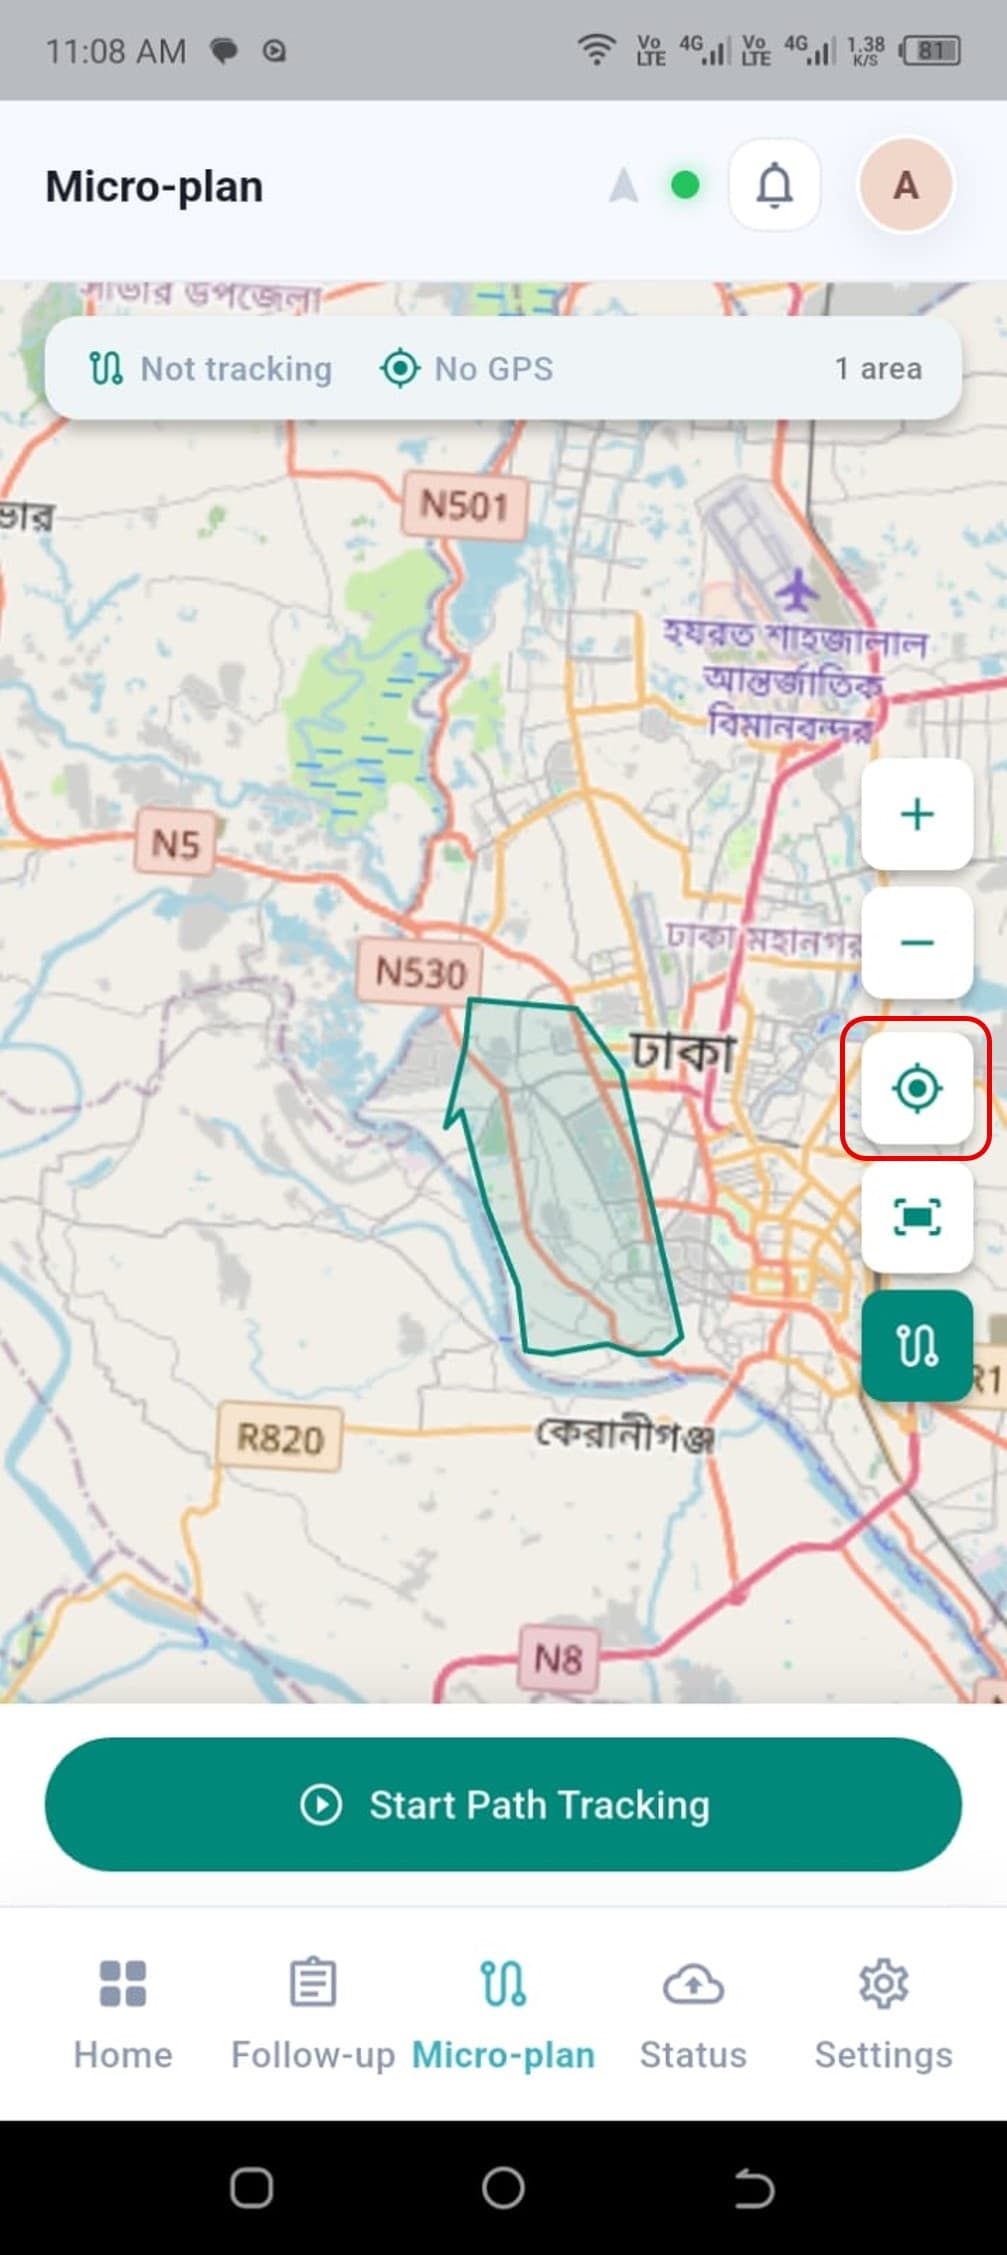
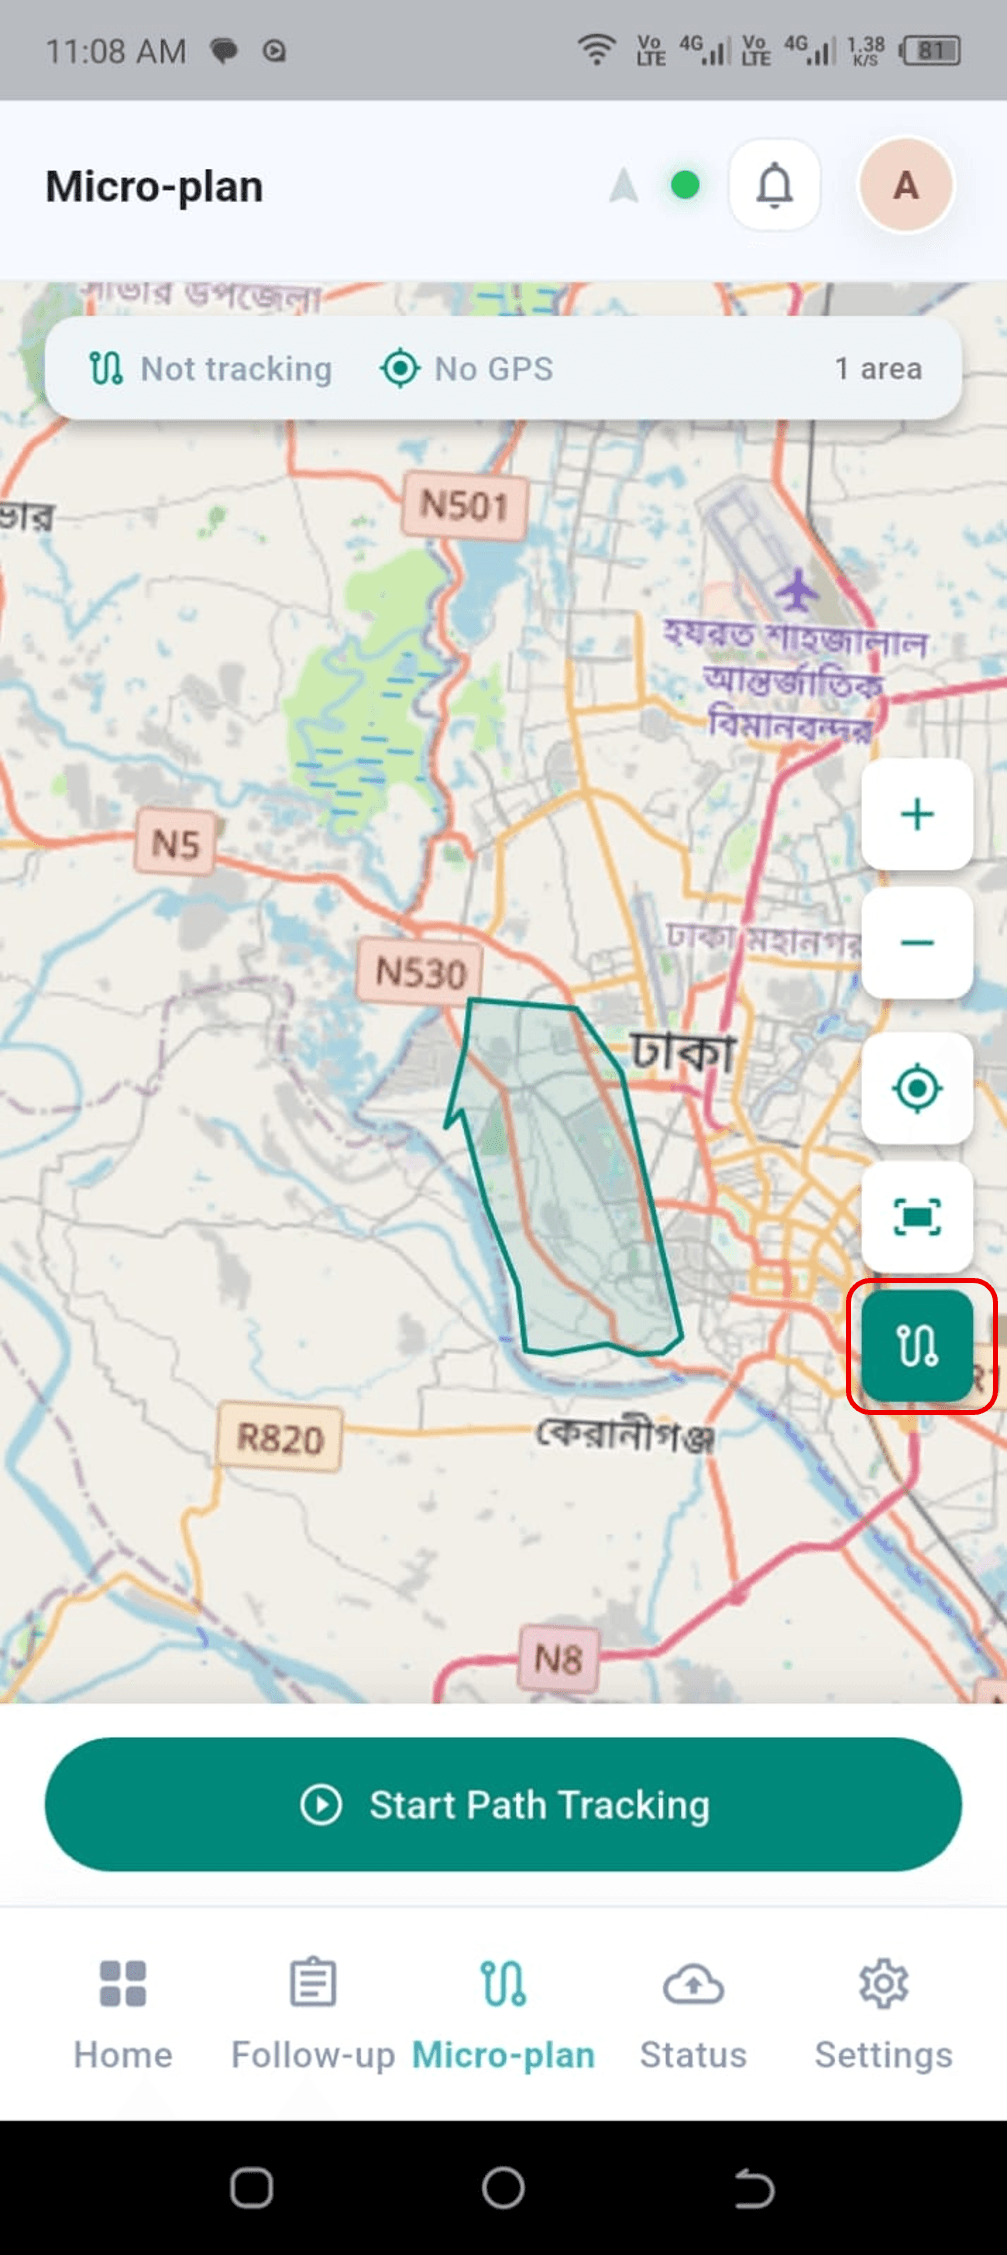
Map controls
A control stack on the right side of the map helps users navigate while tracking.
- 1.+ zooms in for more detail.
- 2.– zooms out to see a larger area.
- 3.The center icon recenters the map on the current or selected location.
- 4.The full-screen icon expands the map for easier monitoring.
- 5.The path tracking icon stays active by default, indicating movement is being tracked.
Status and sync
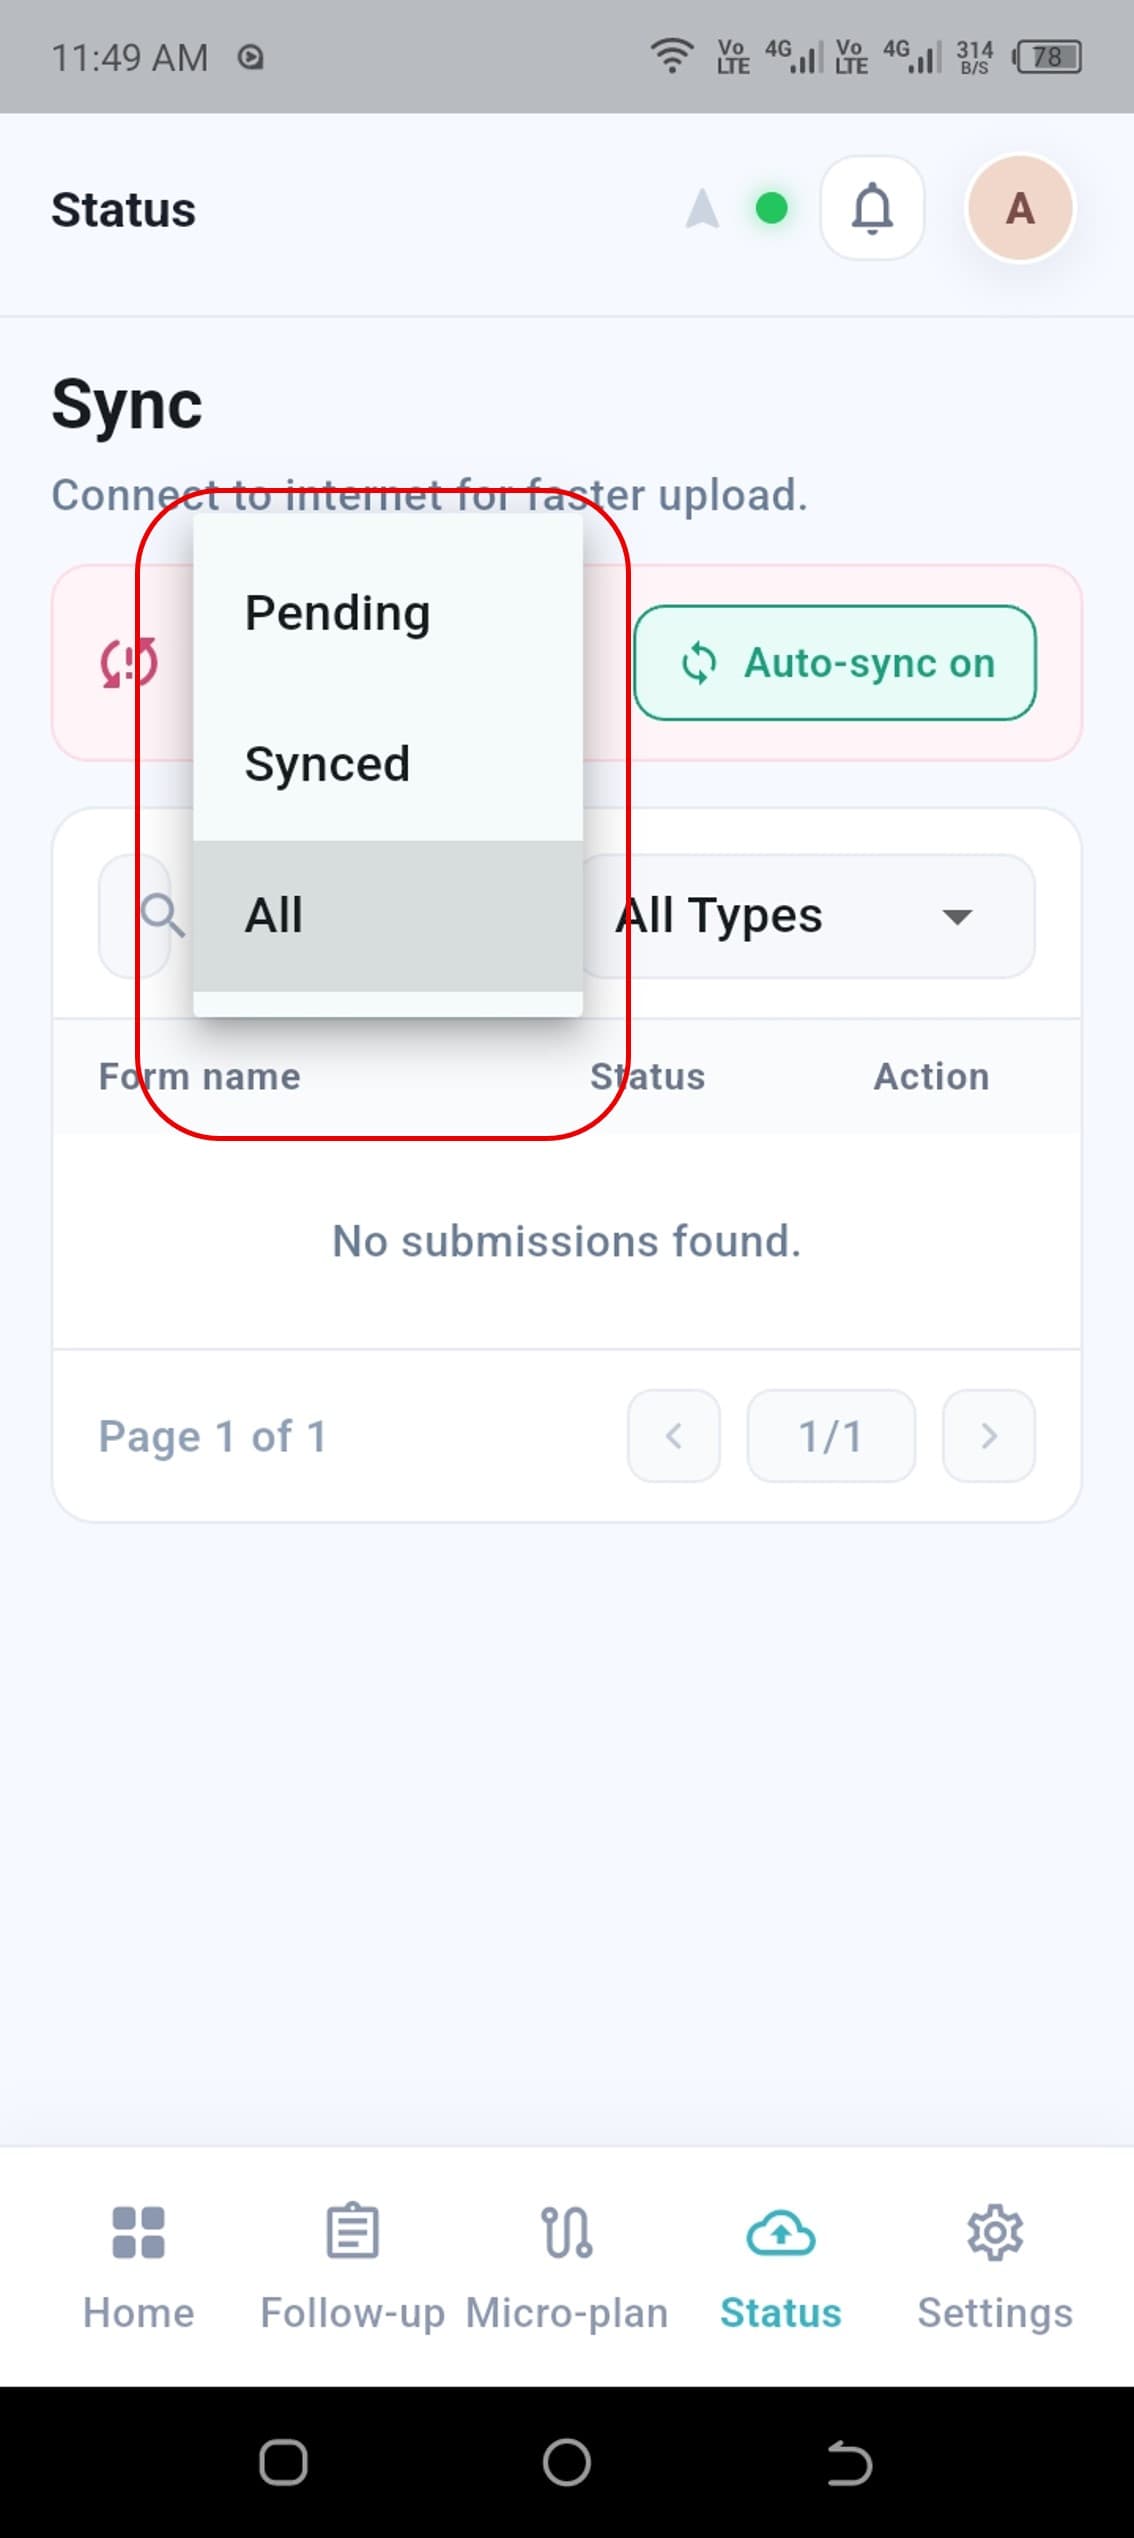
Open the Status tab from the bottom navigation bar to see whether completed forms have synced. A Sync section reports how many forms are Pending Uploads and whether Auto Sync is on — an active internet connection is required for forms to sync, otherwise they stay pending until a connection is available.
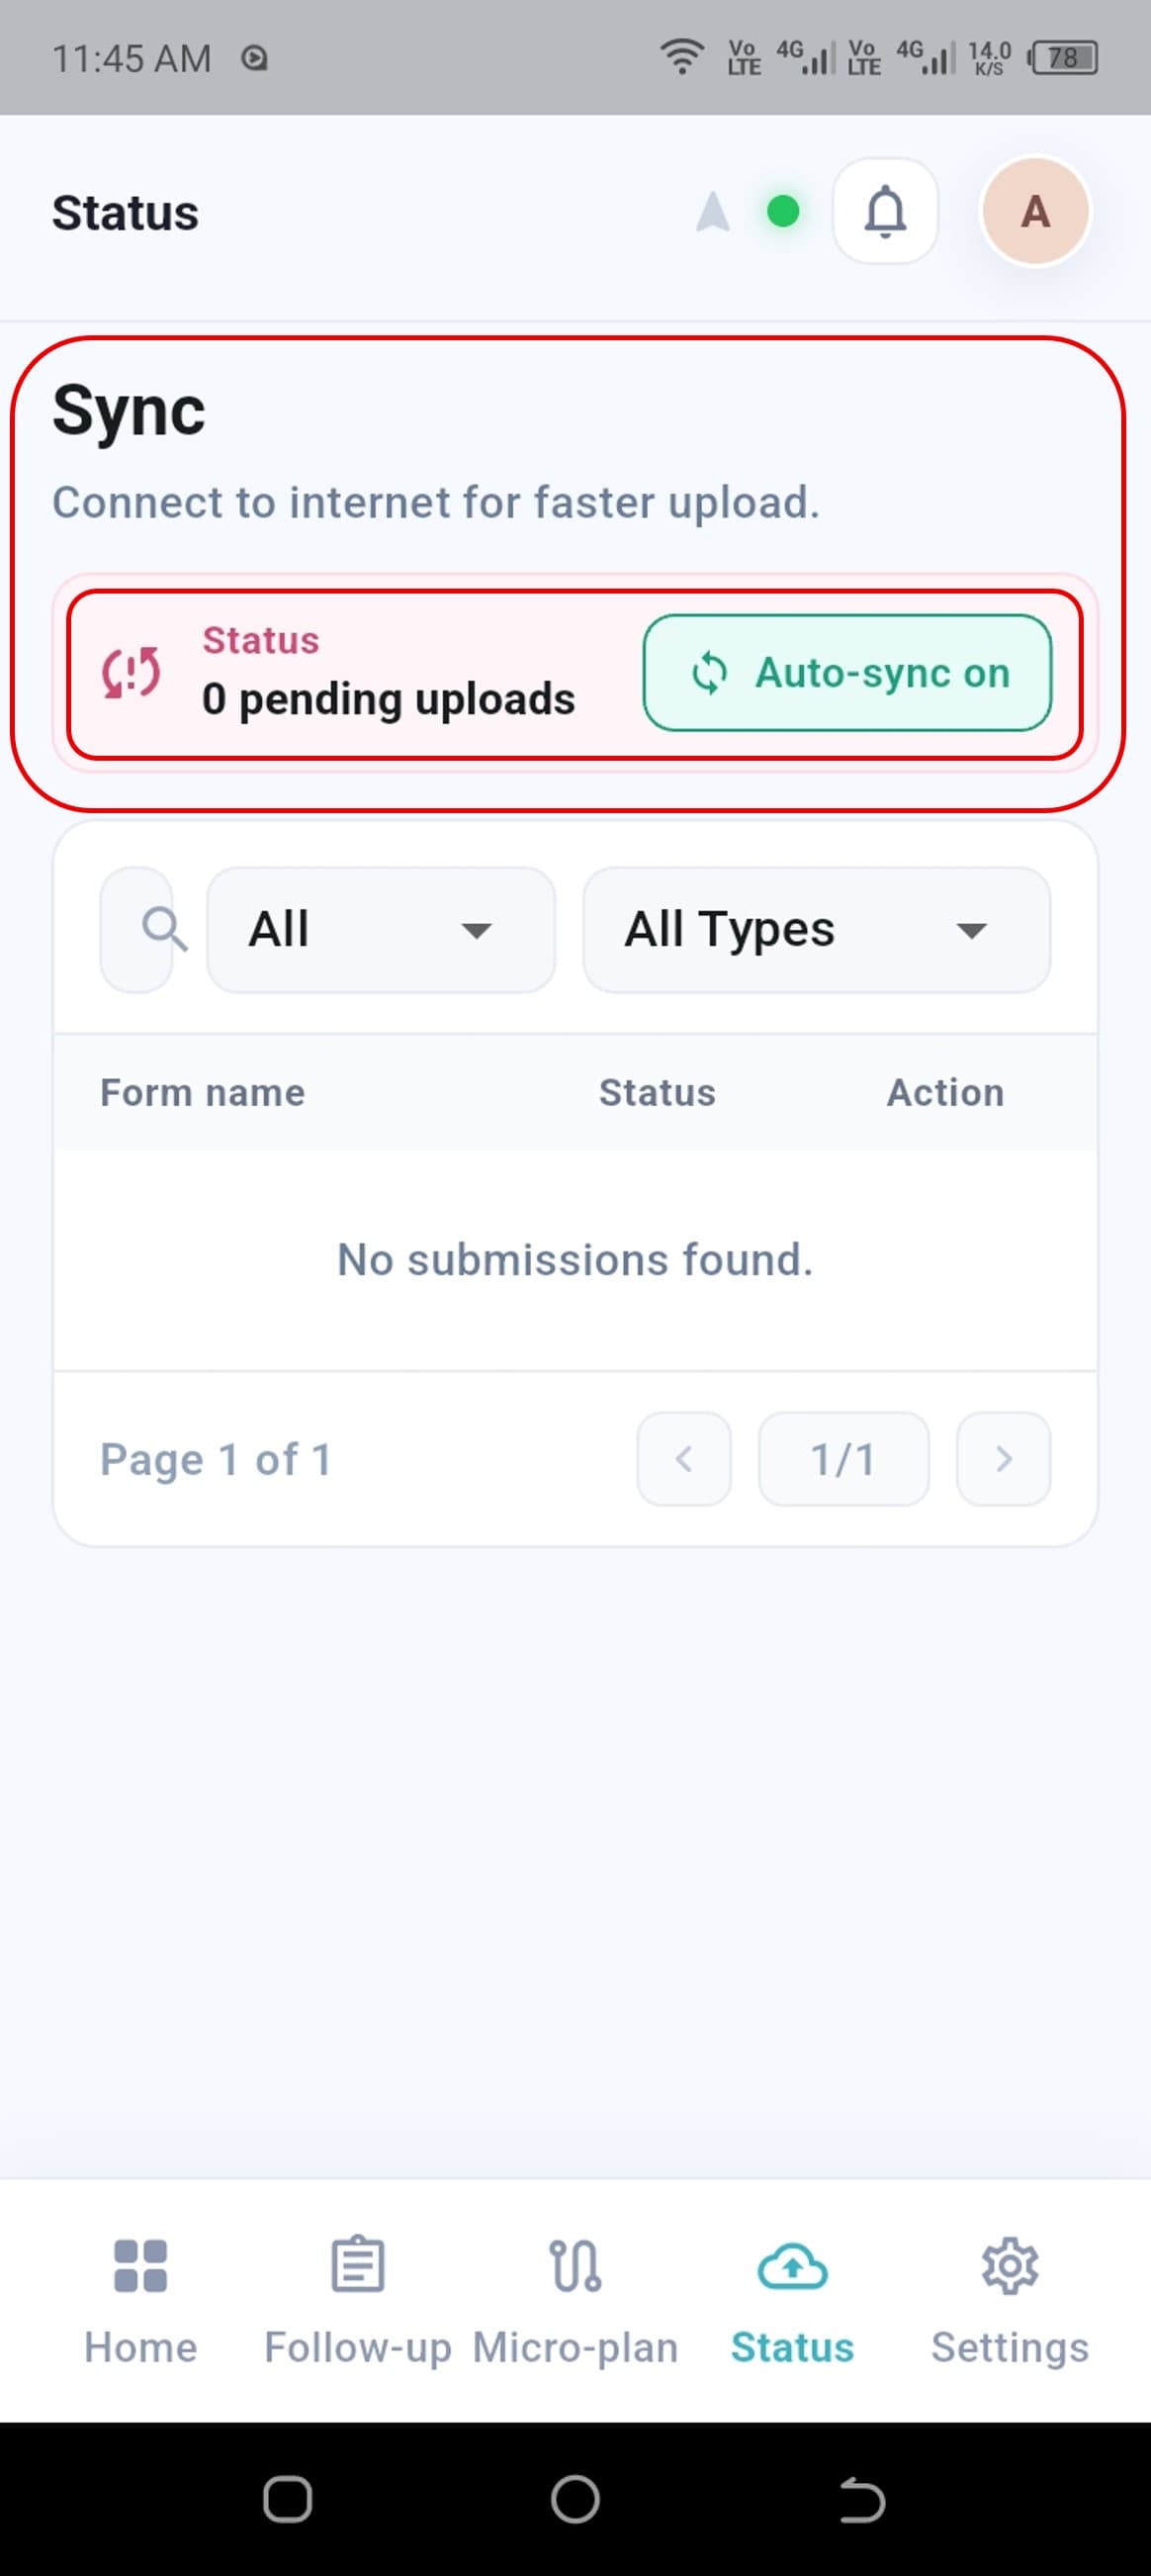
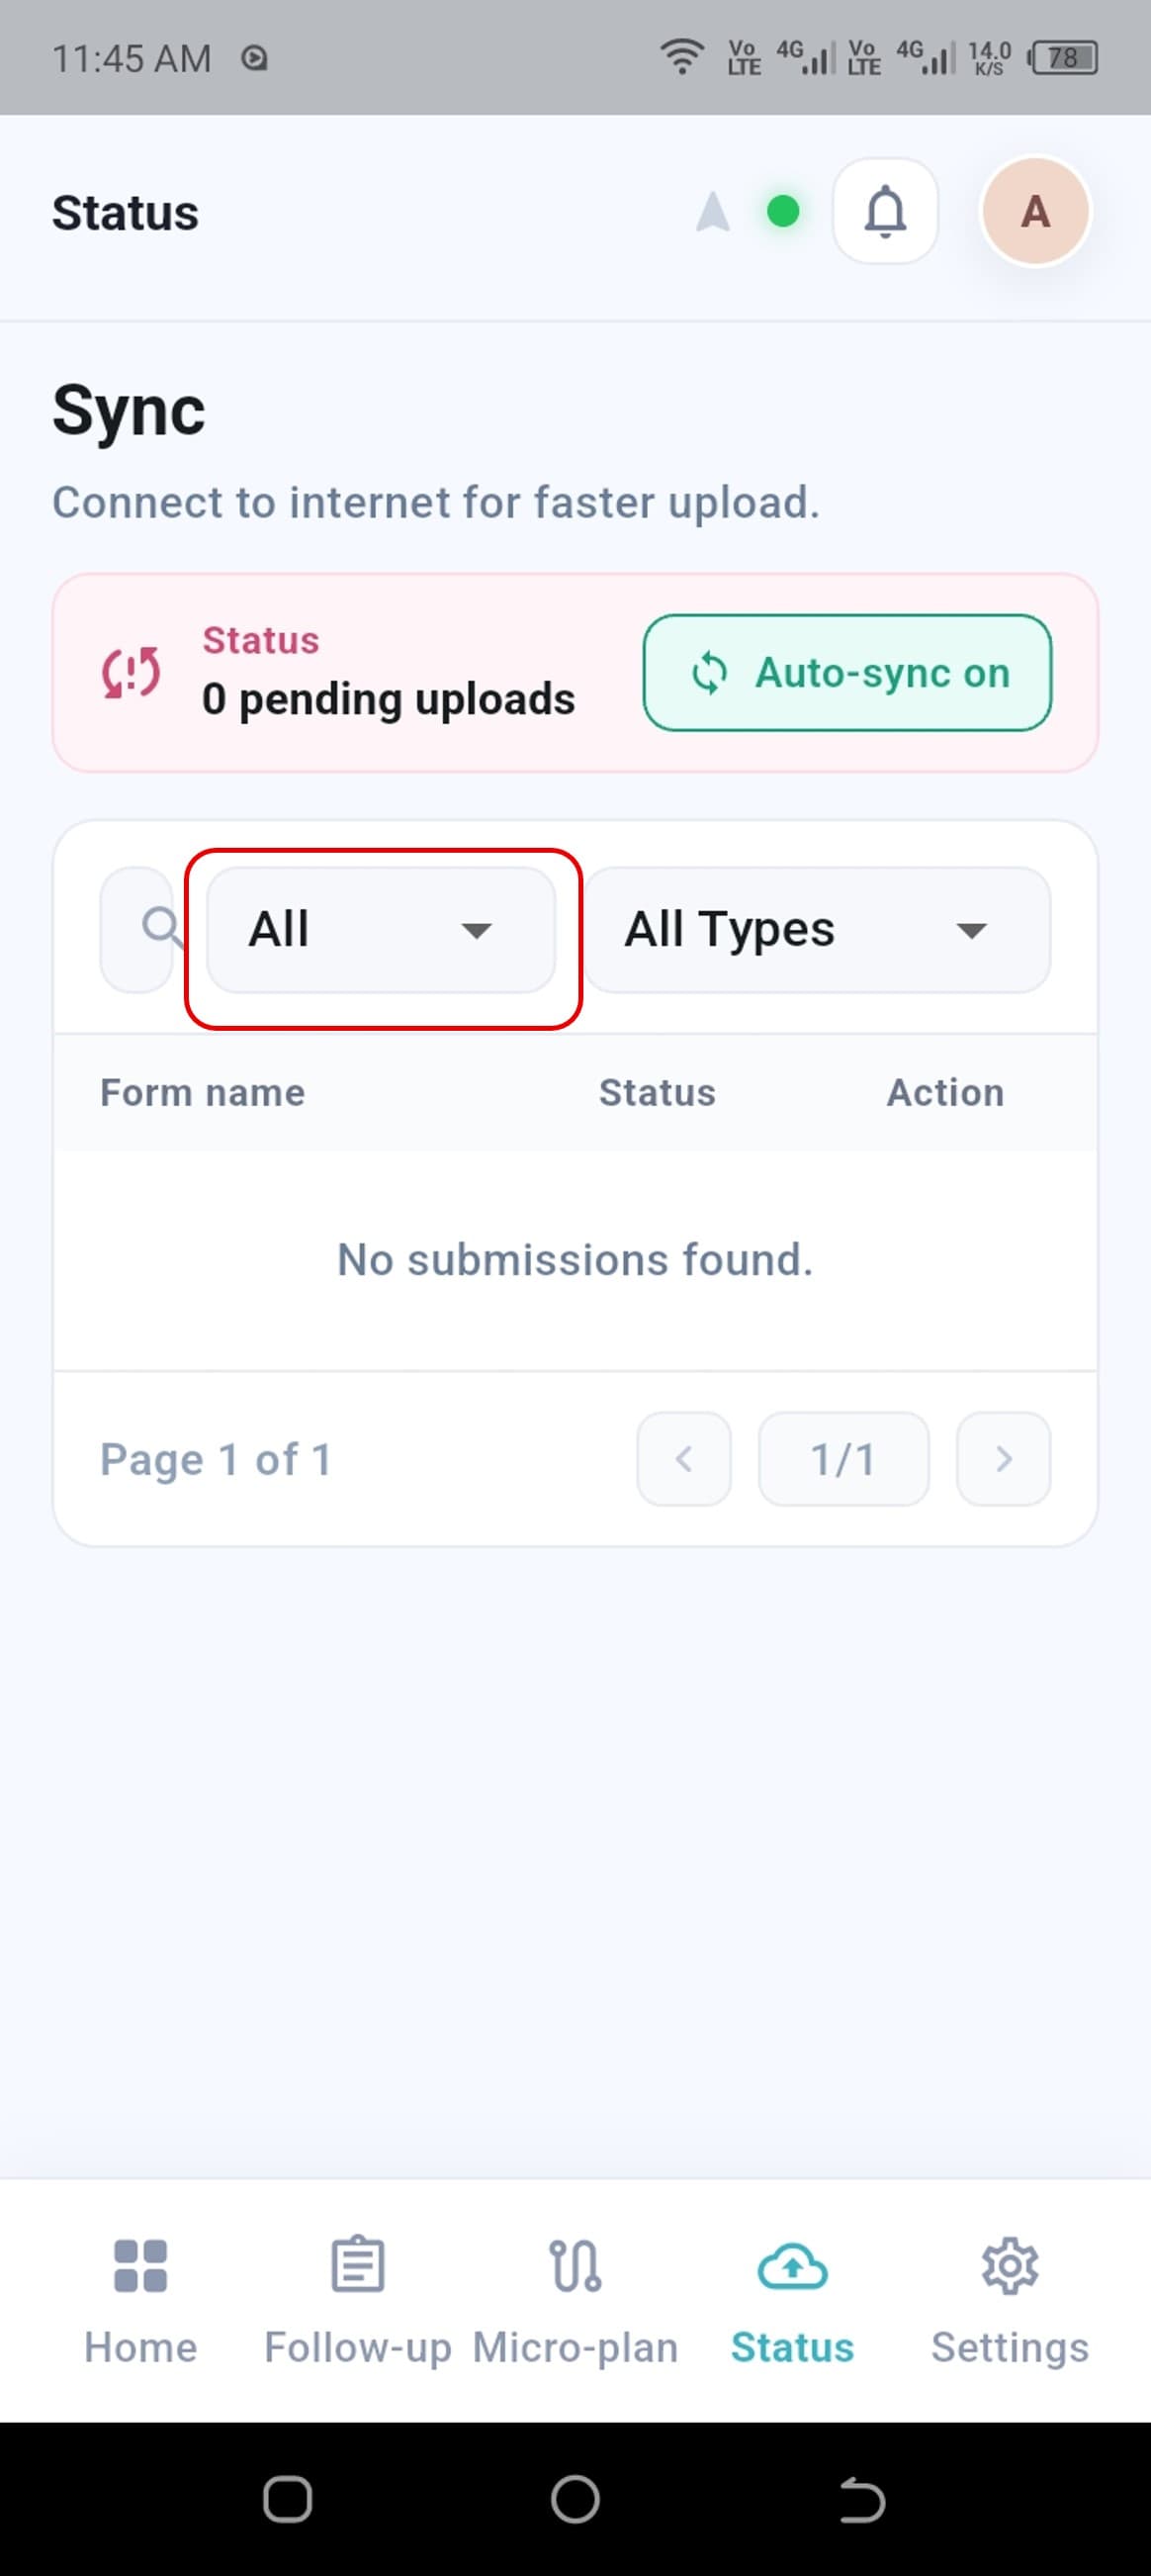
- 1.Status filter: Pending, Synced, or All.
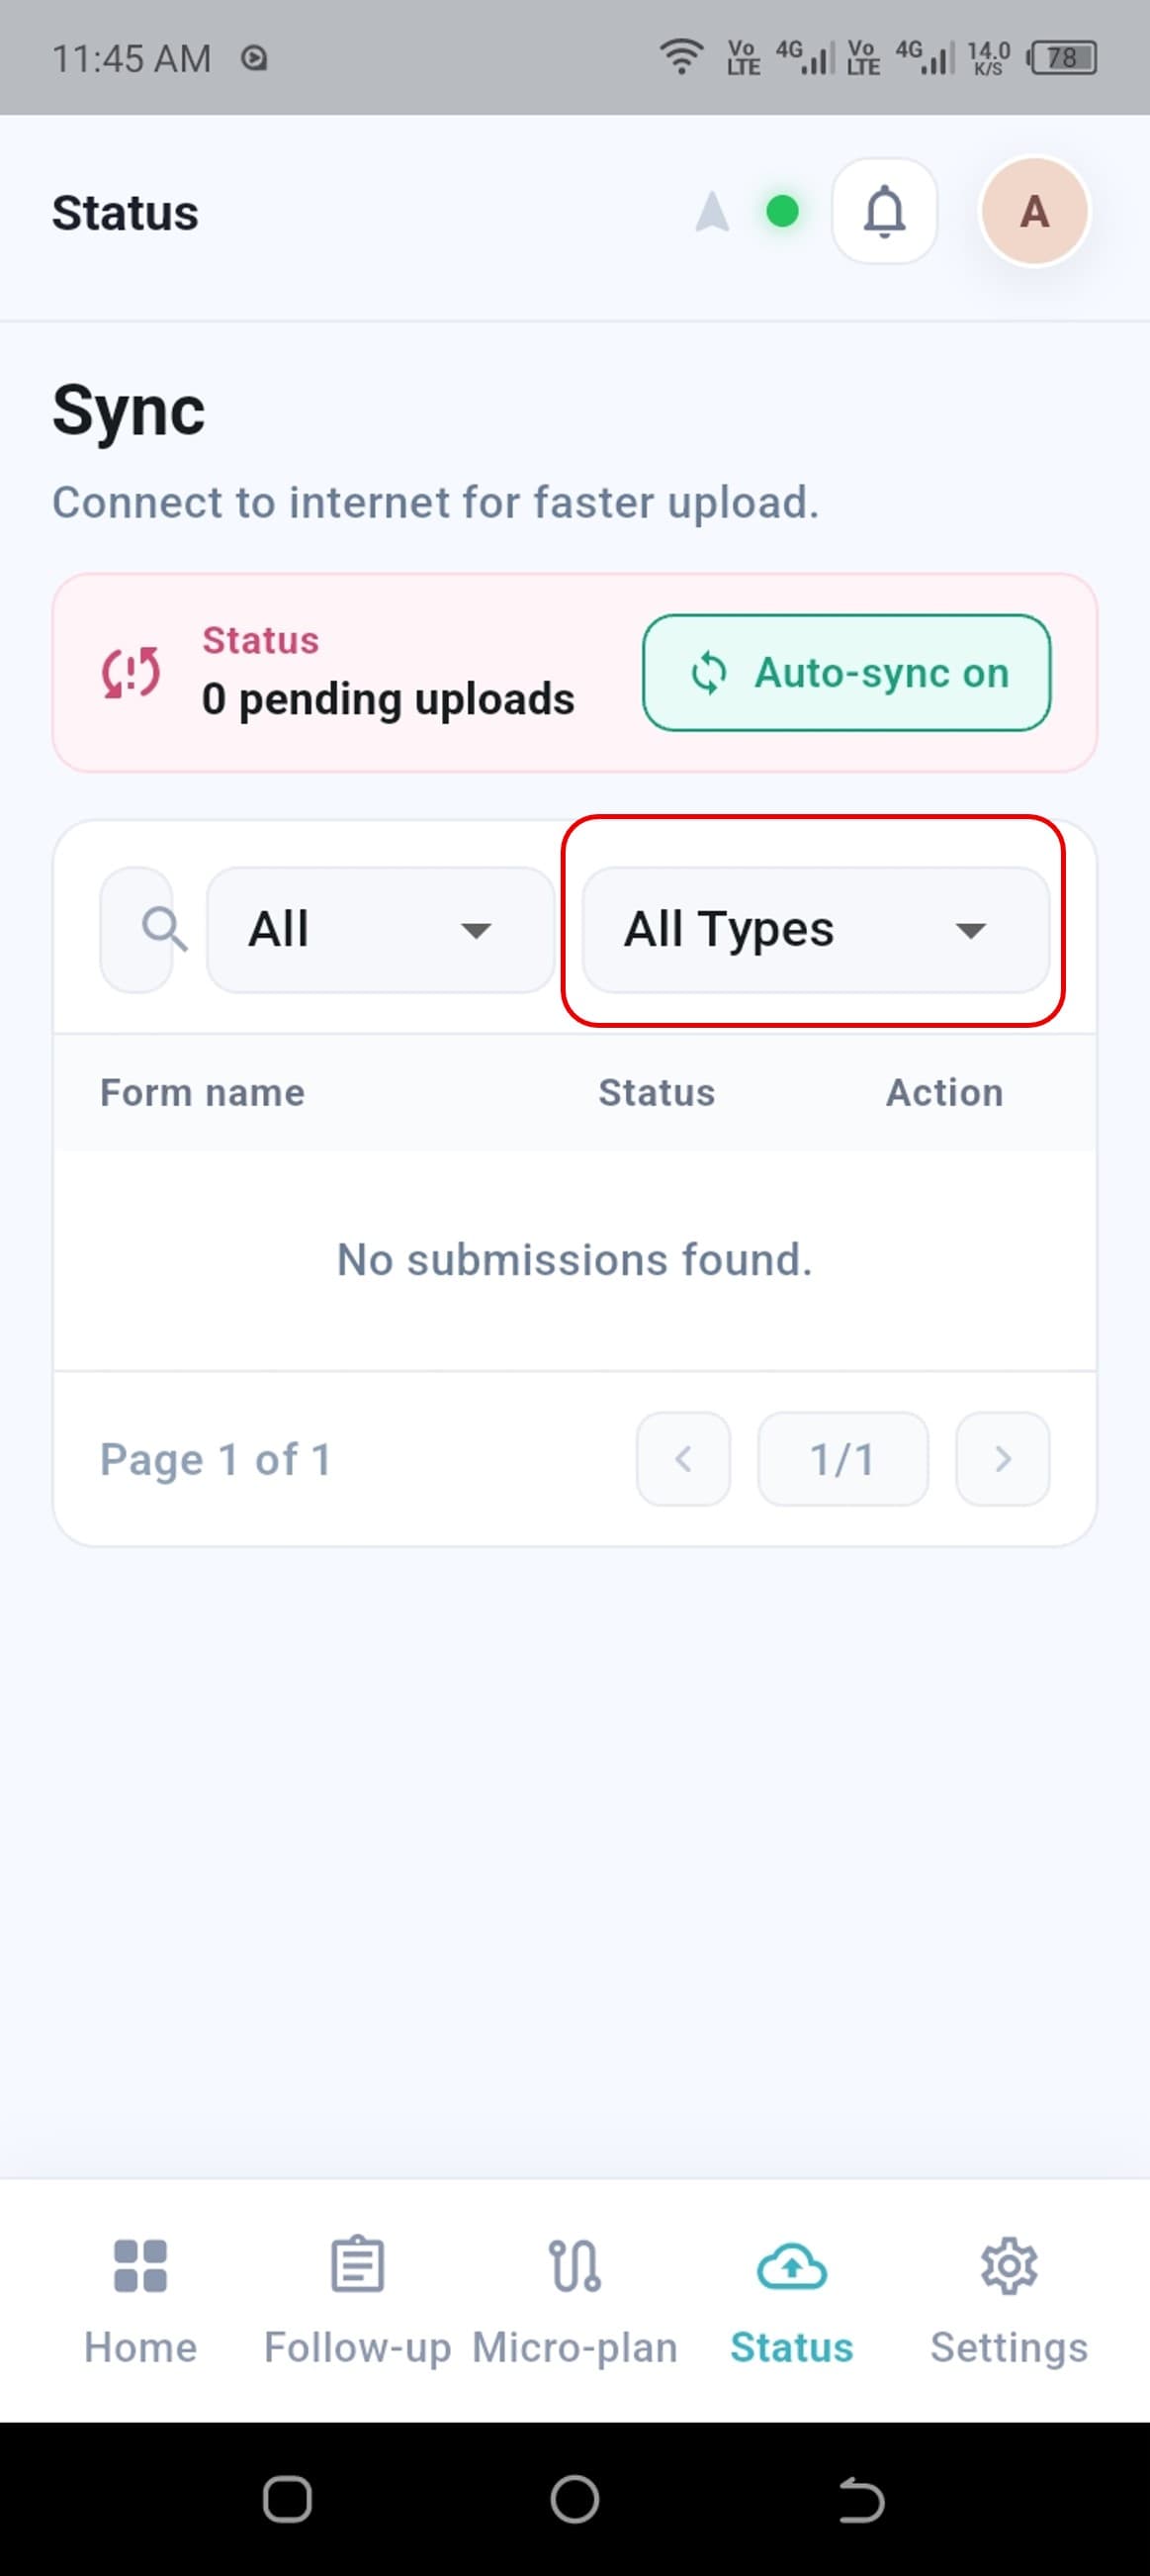
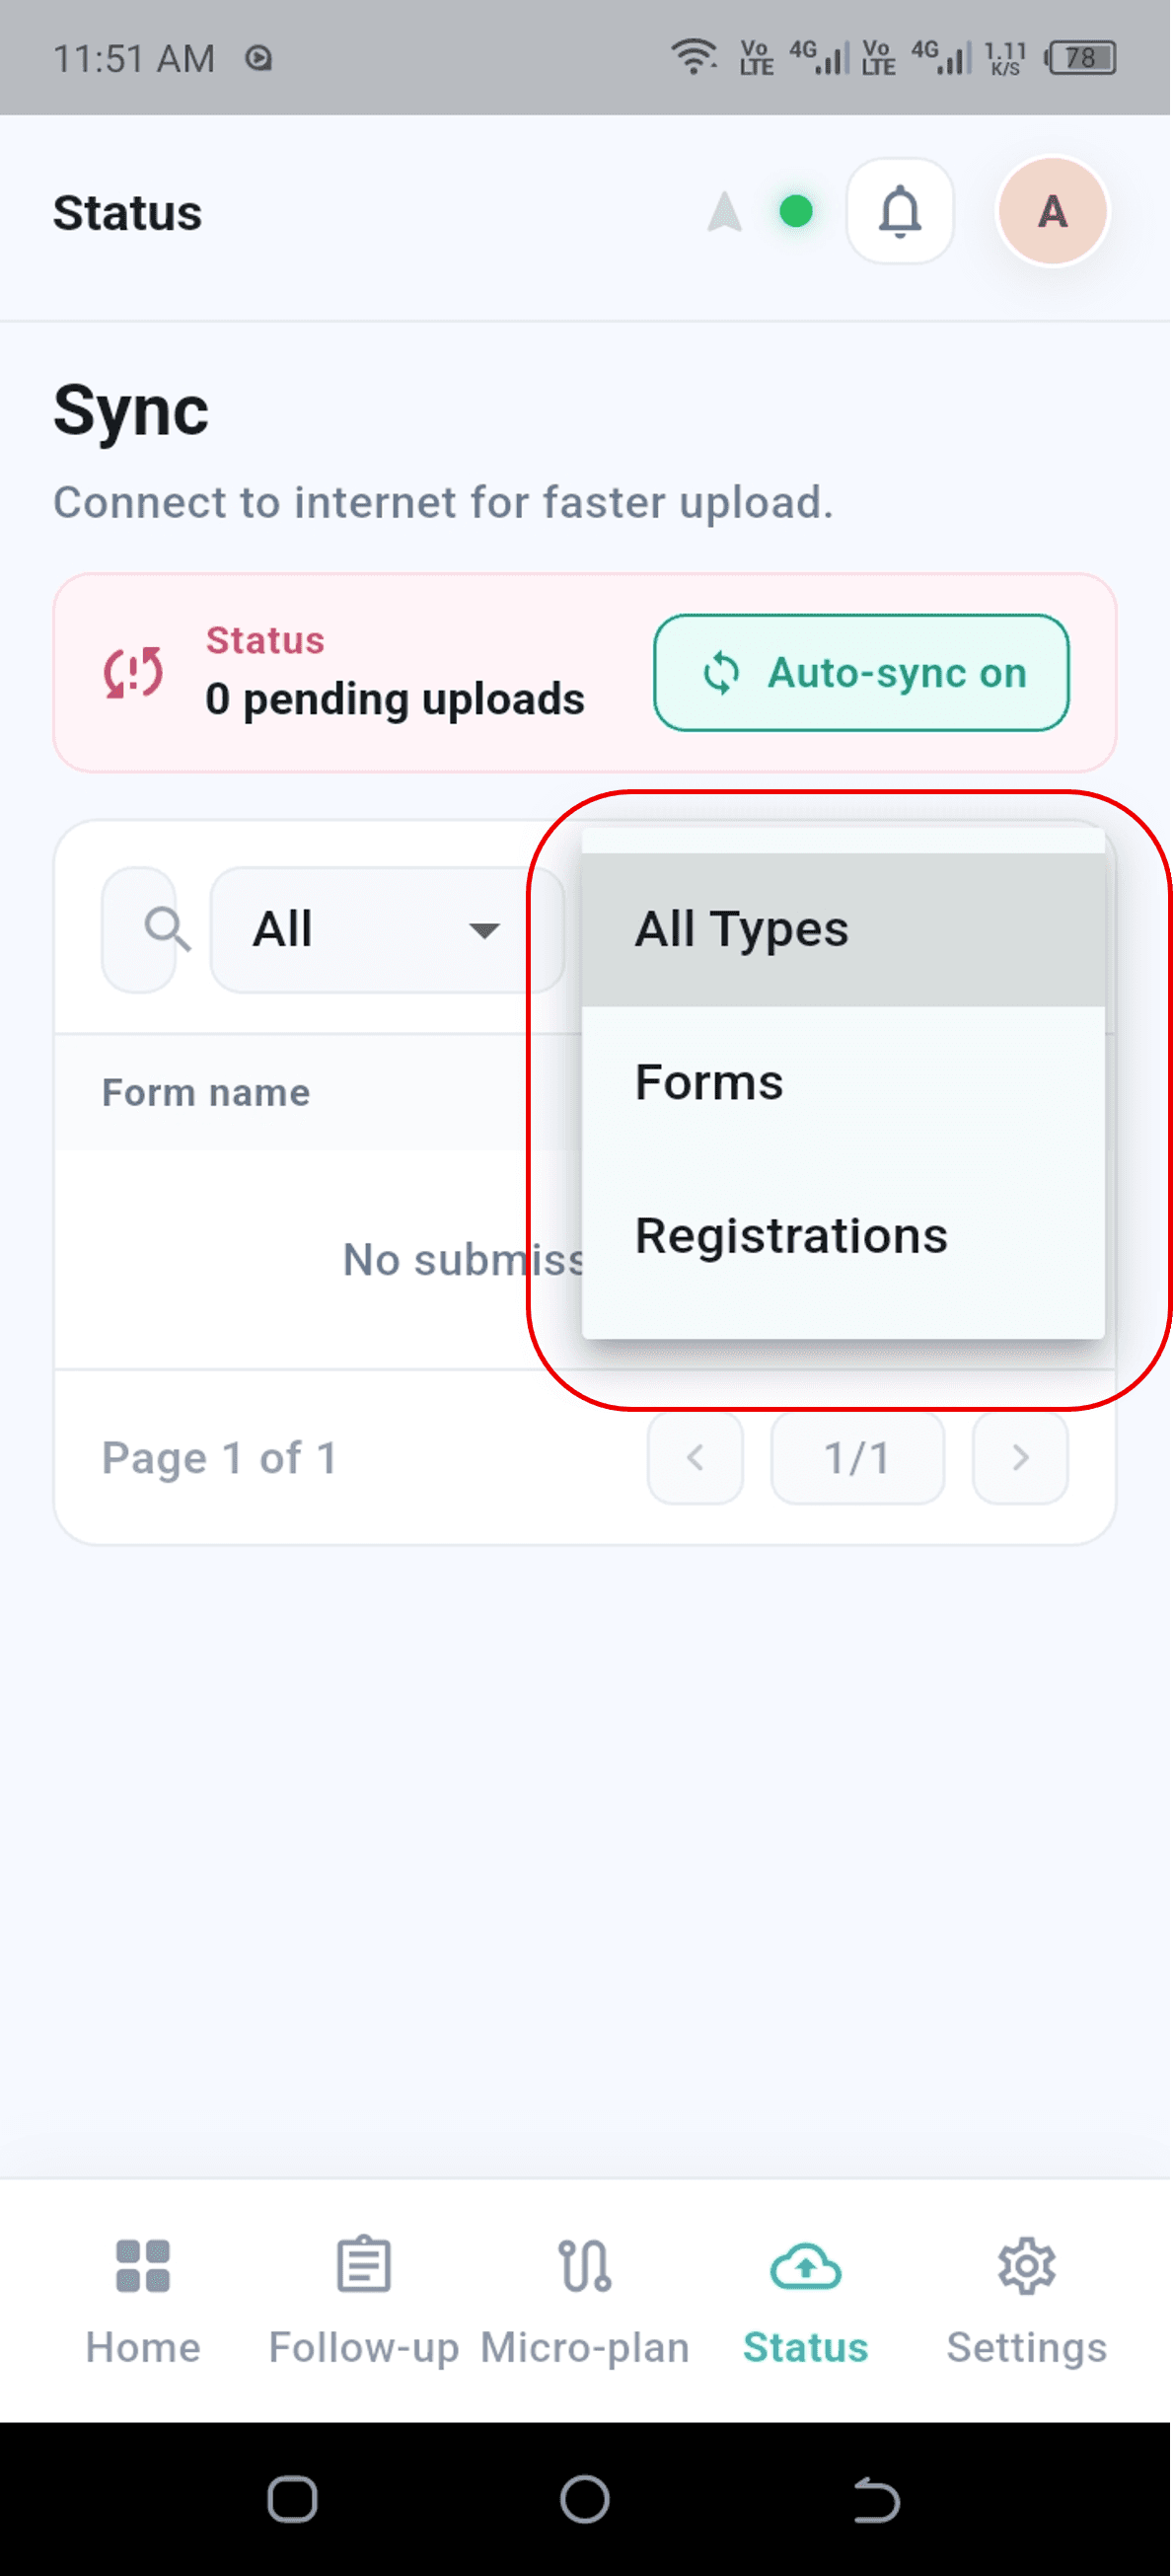
- 2.Type filter: All Types, Forms, or Registration.
- 3.Combine both filters, for example Pending + Registration, to find specific submission records quickly.
Settings
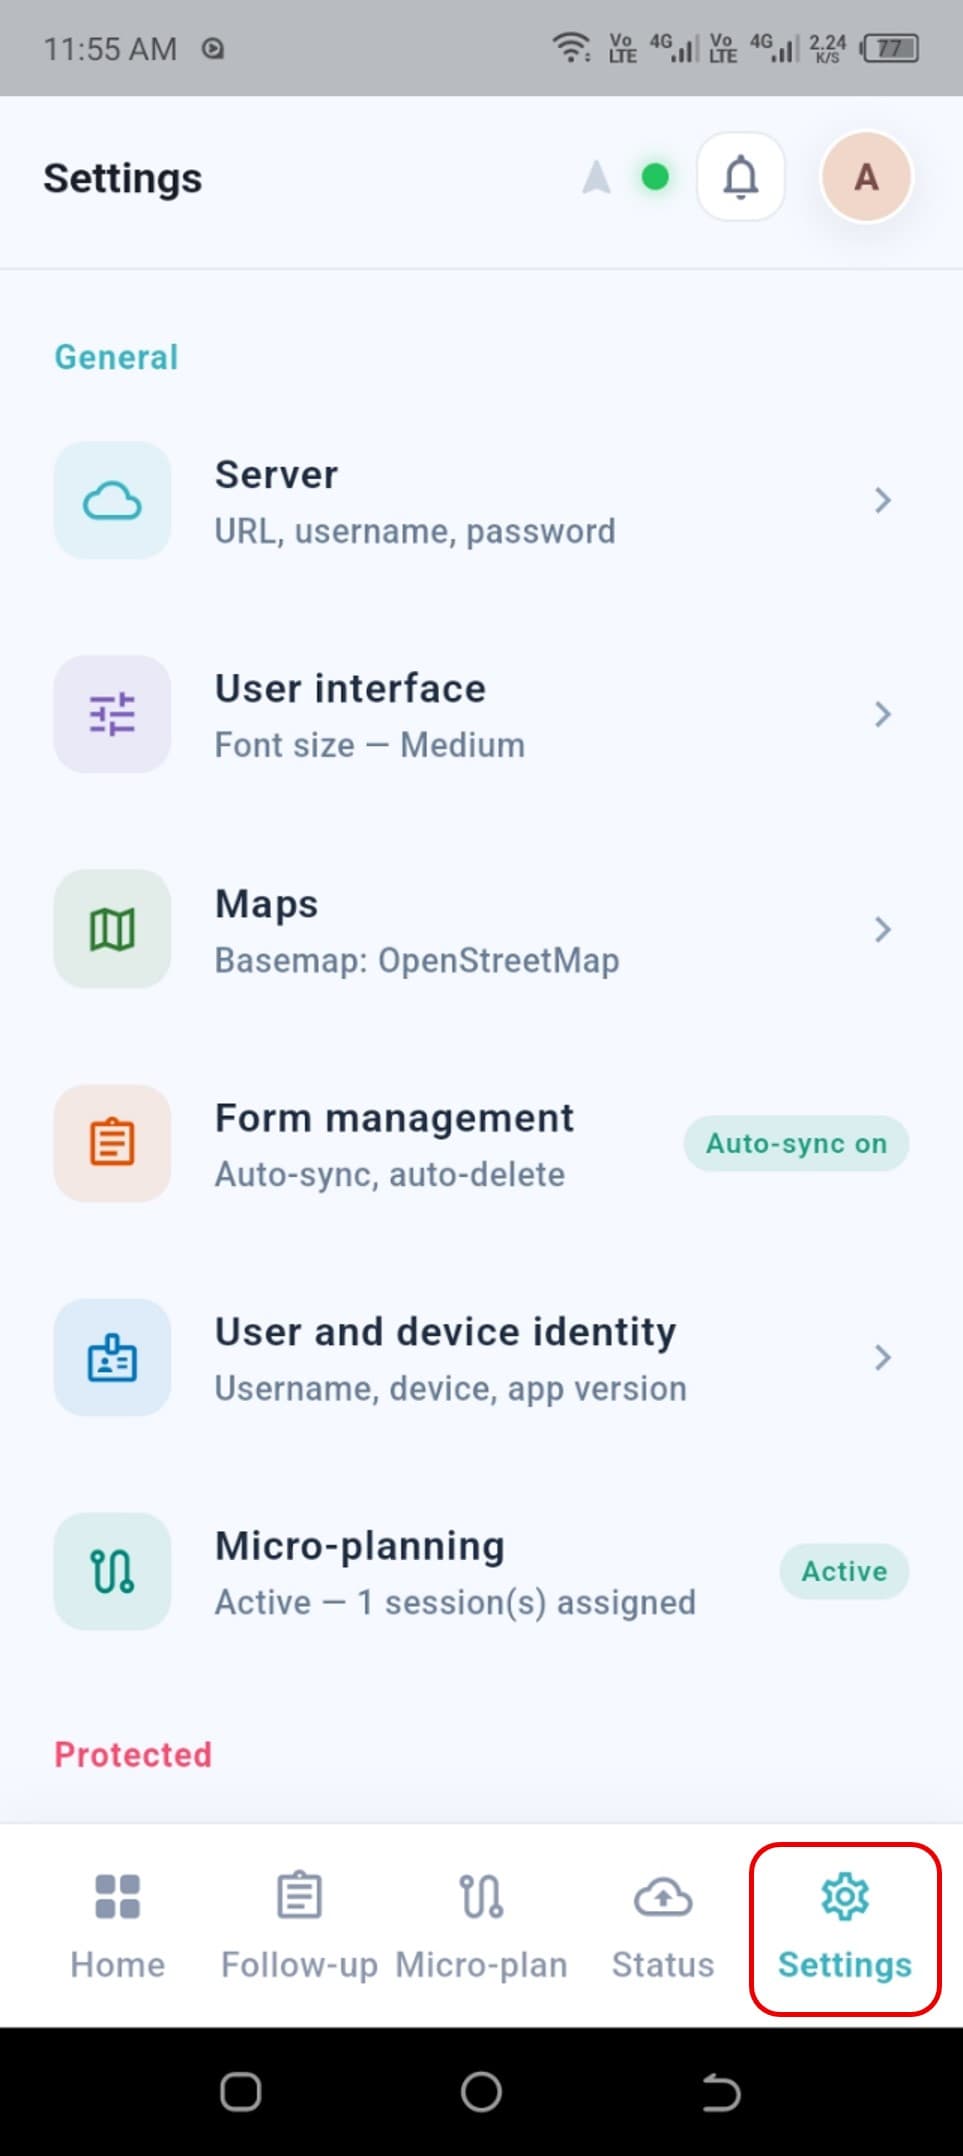
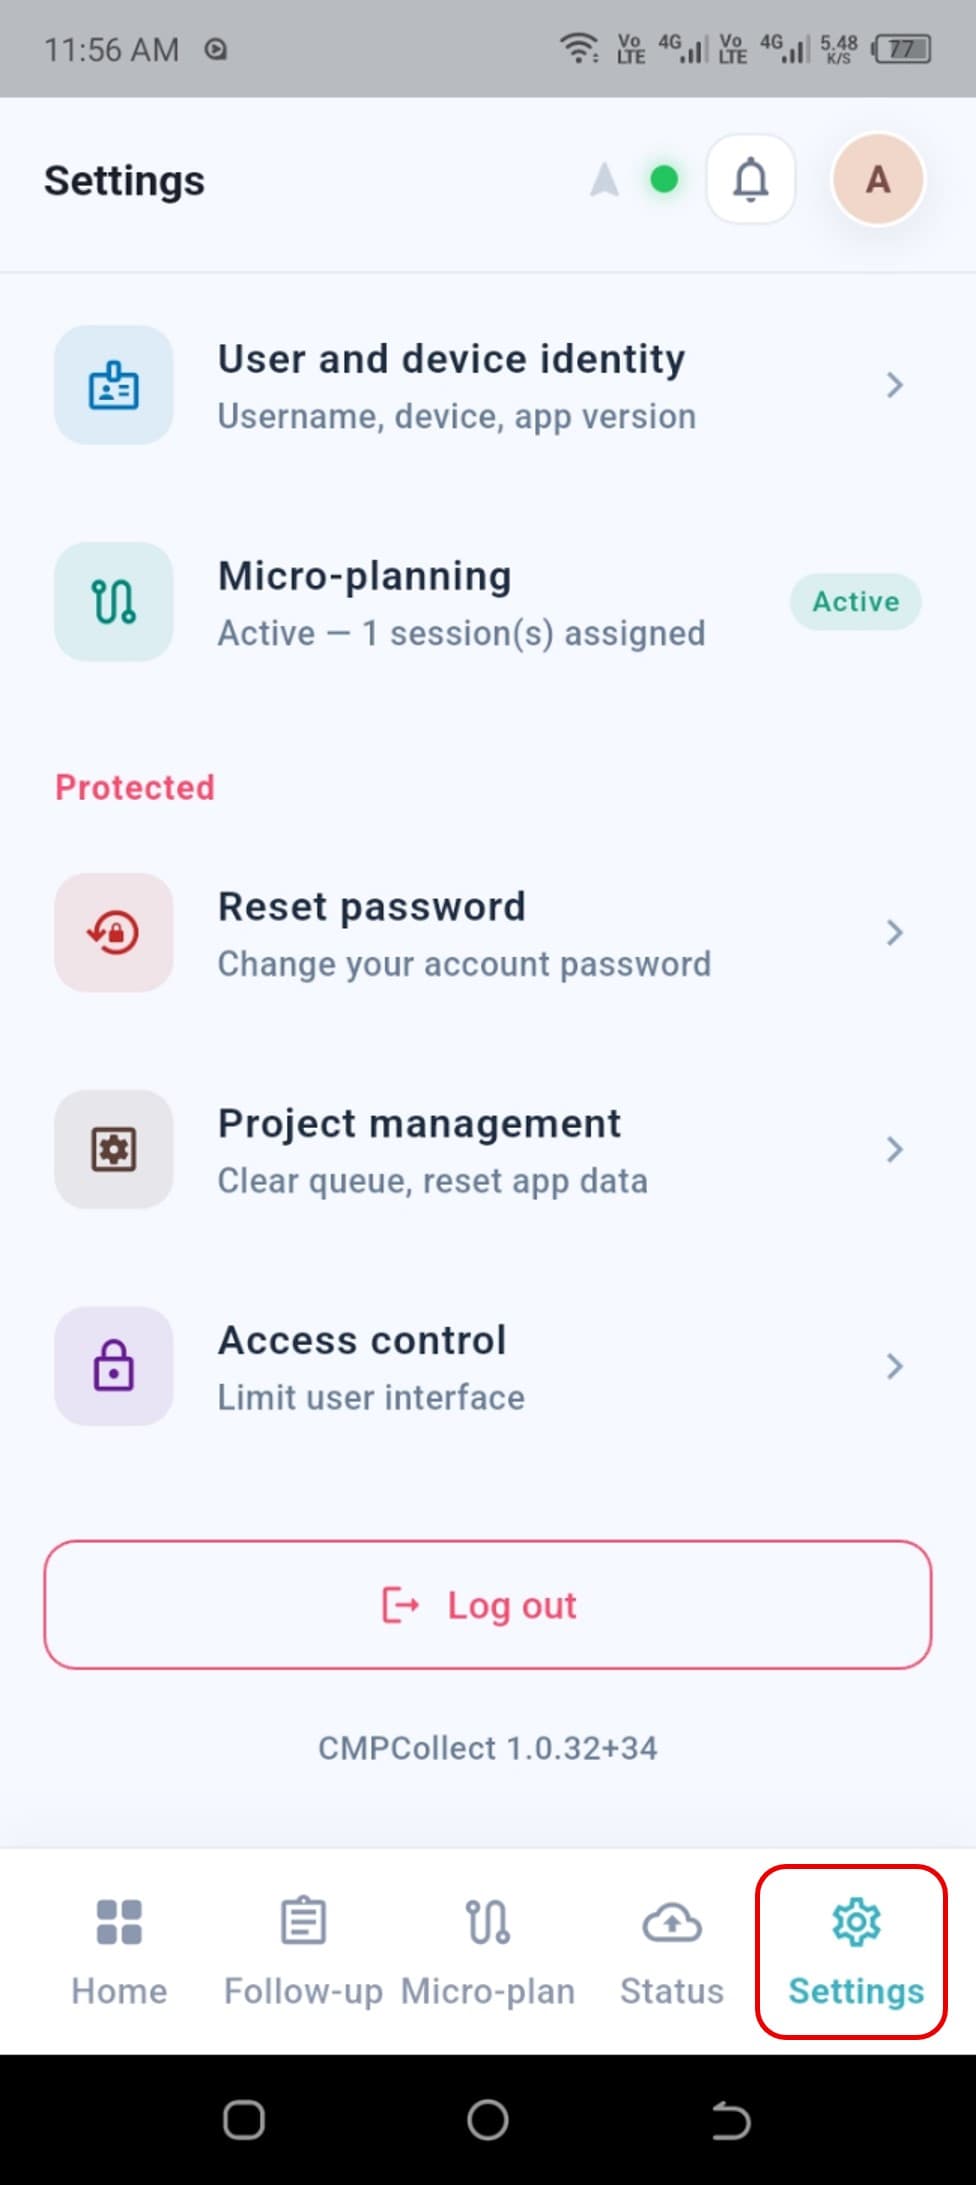
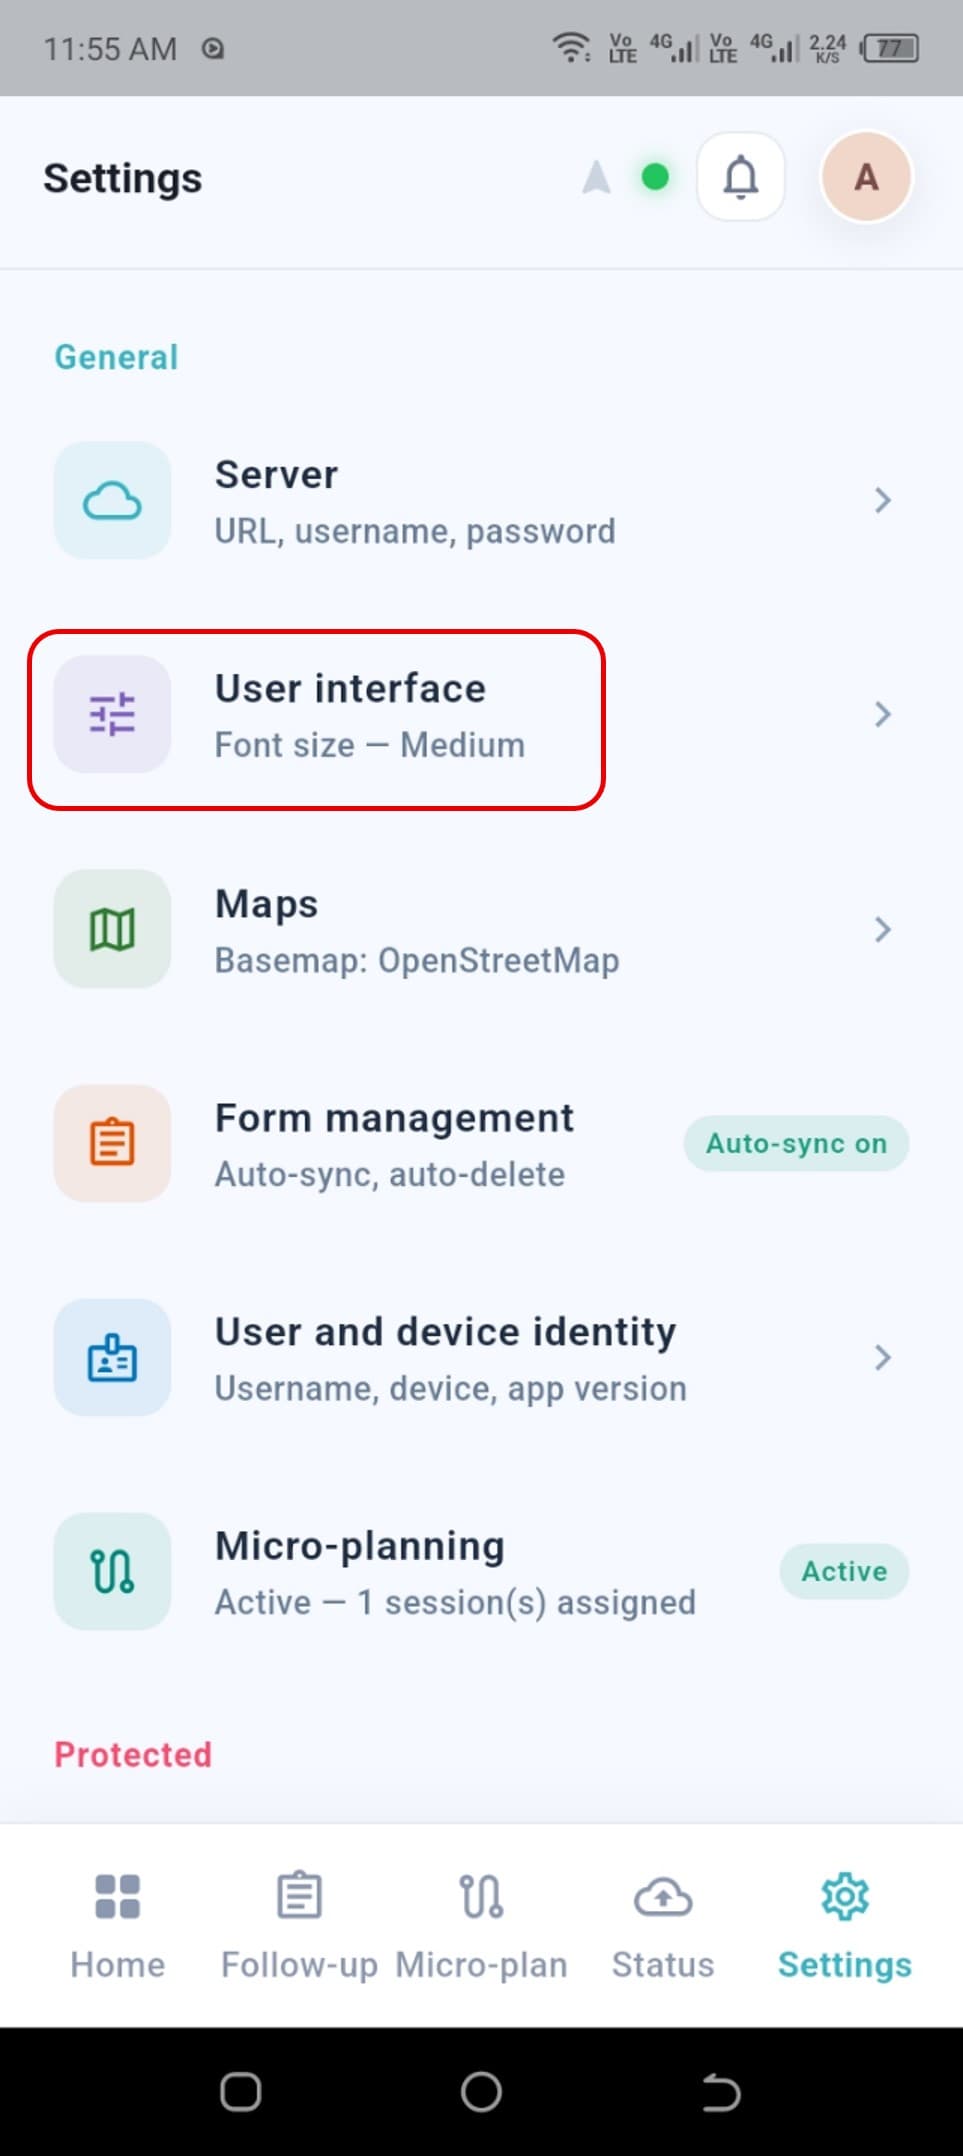
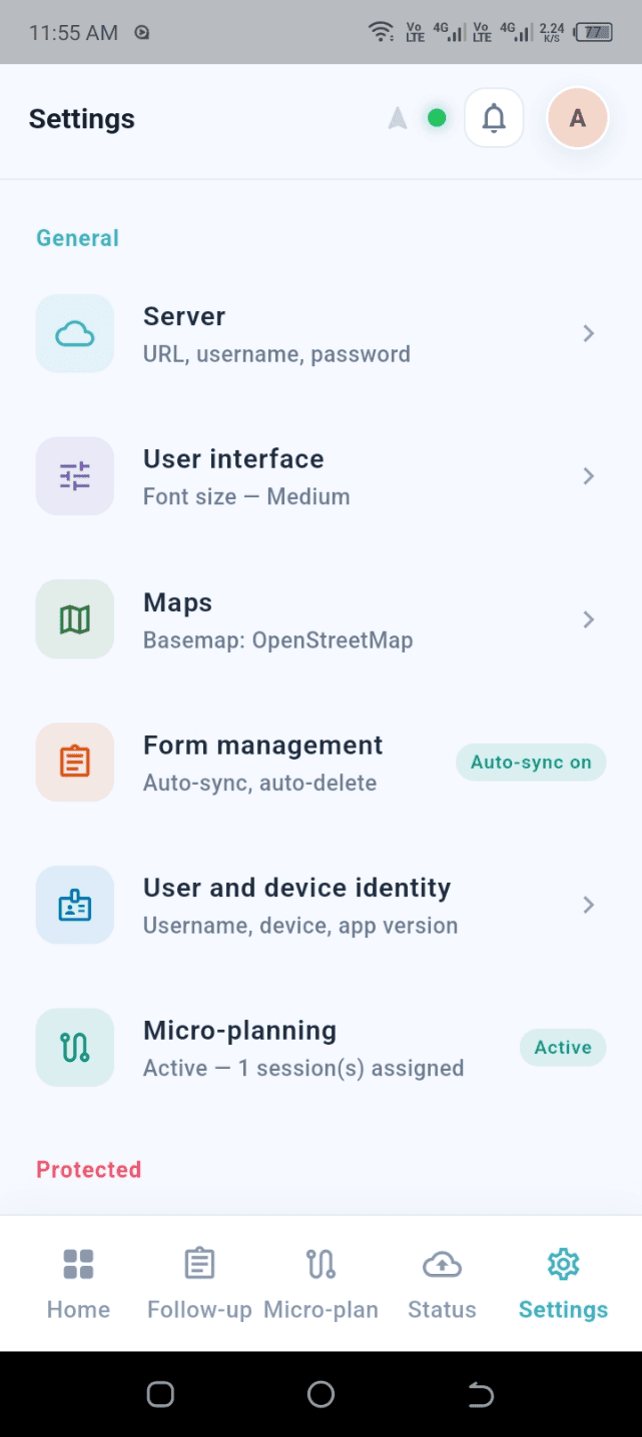
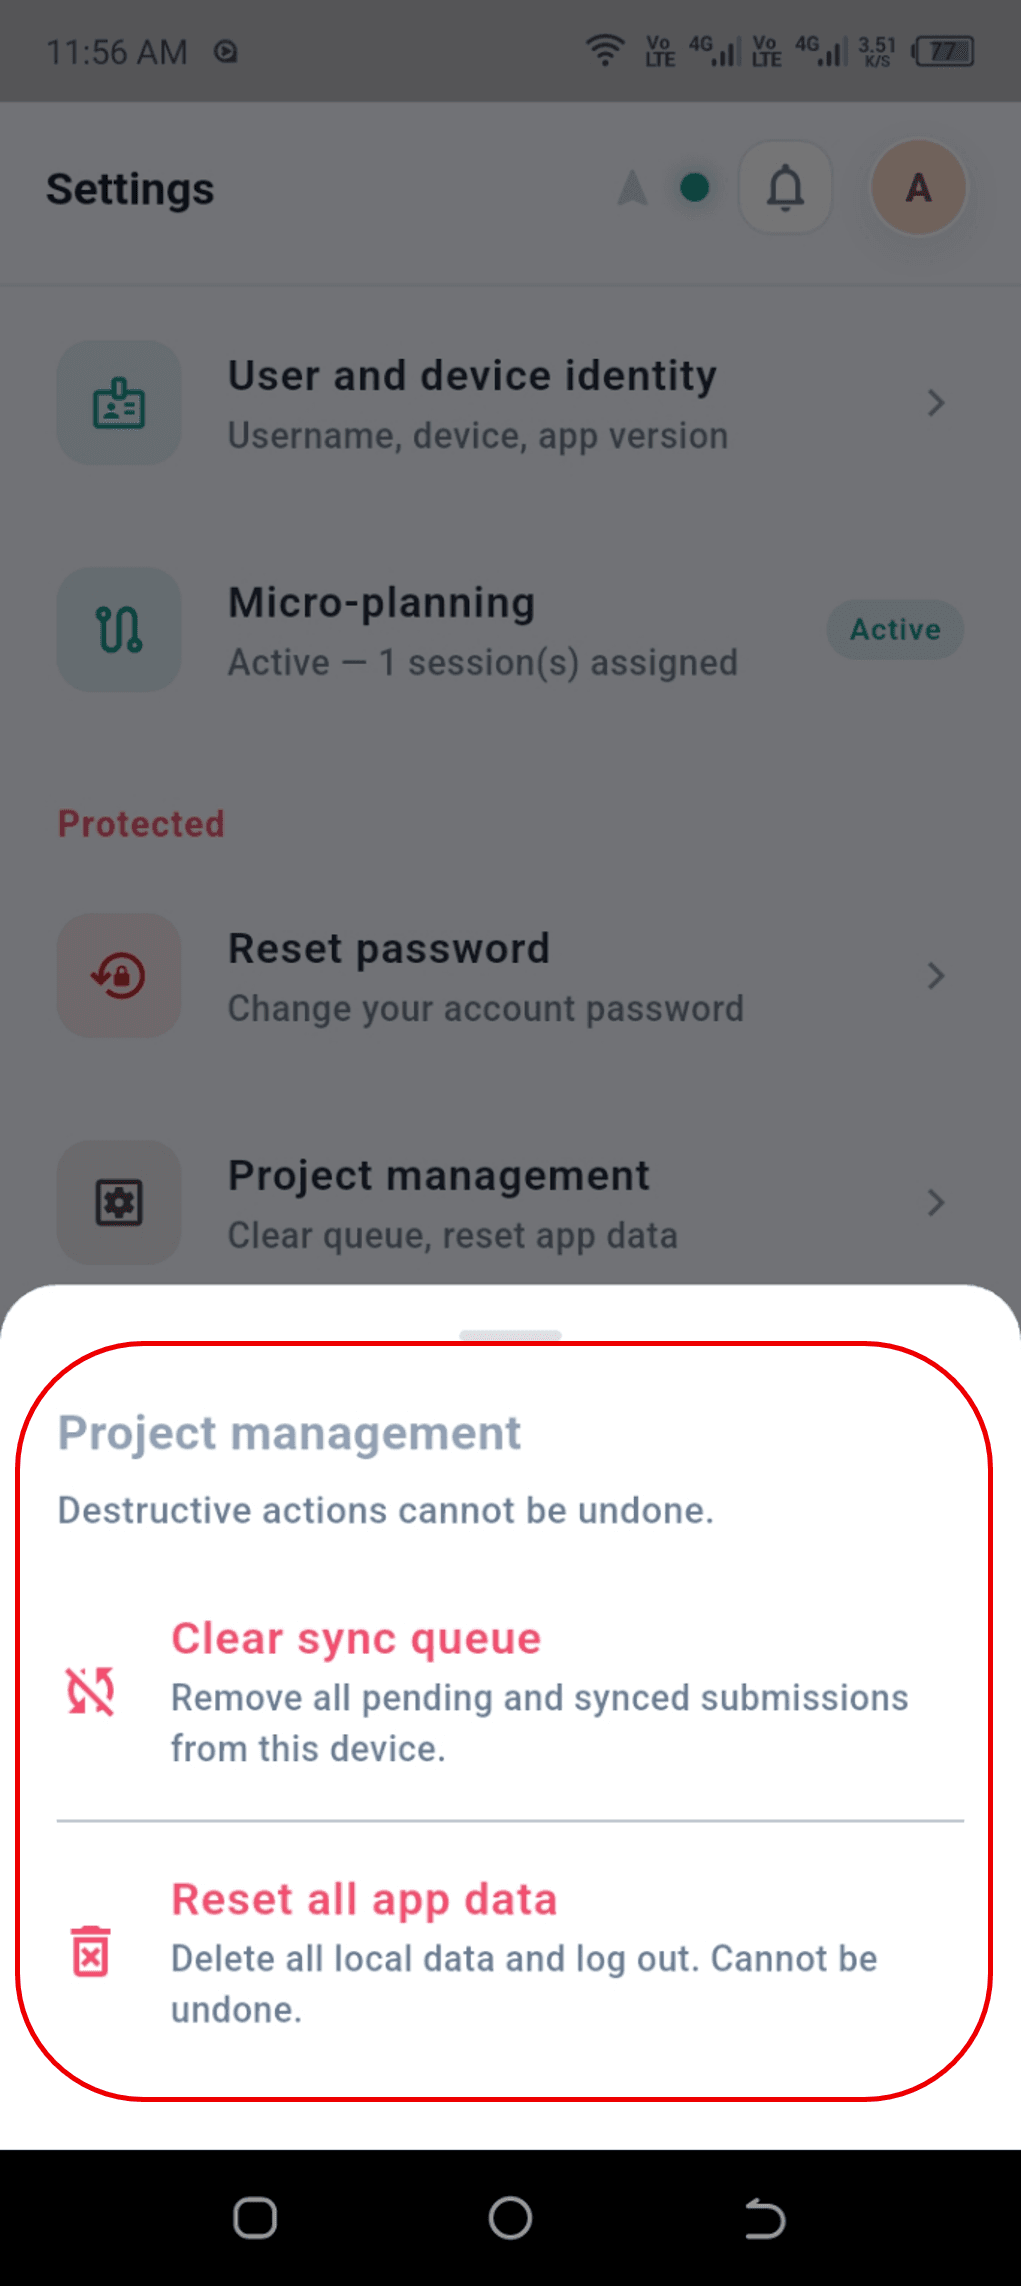
Open the Settings tab from the bottom navigation bar to manage app-related preferences. The page groups preferences into User Interface, Maps, Password Reset, Form Management, and Project Management.
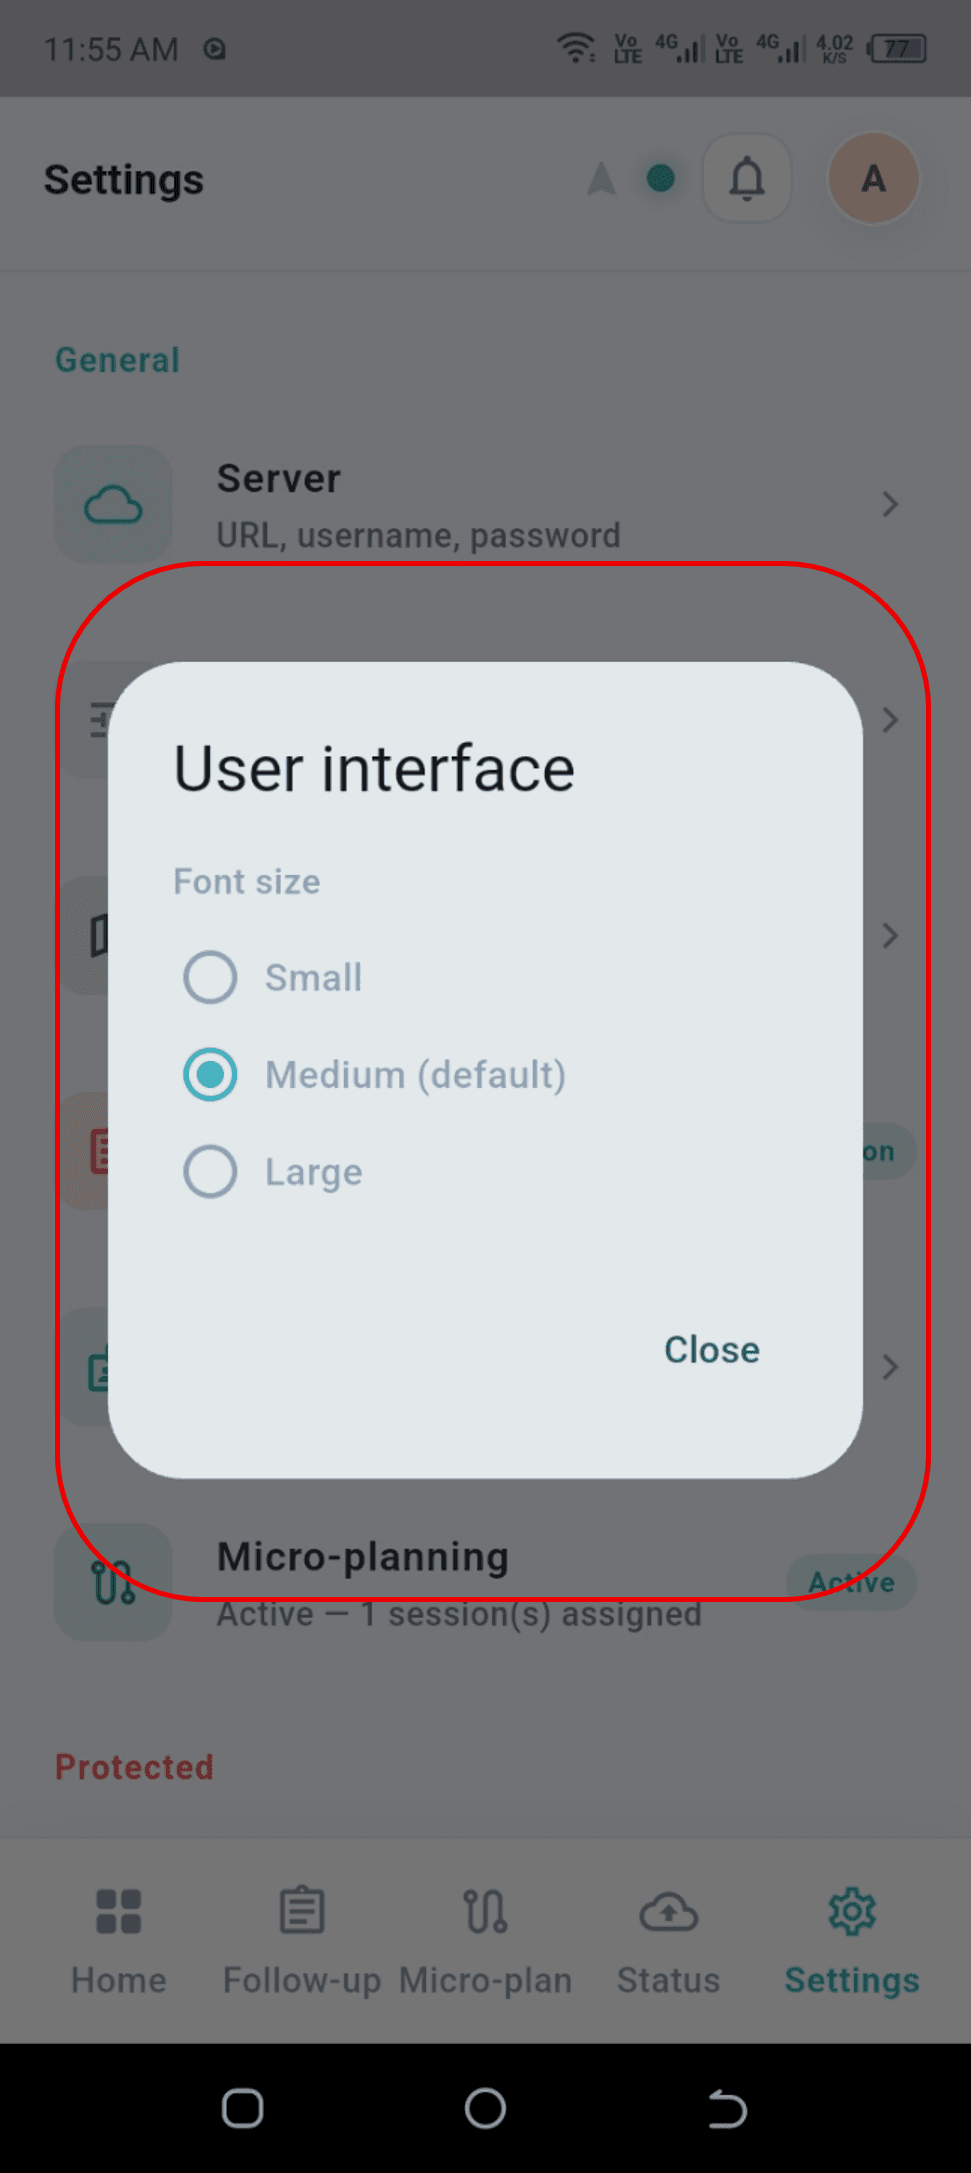
User Interface
User Interface controls how the app looks and behaves, such as theme and display preferences.
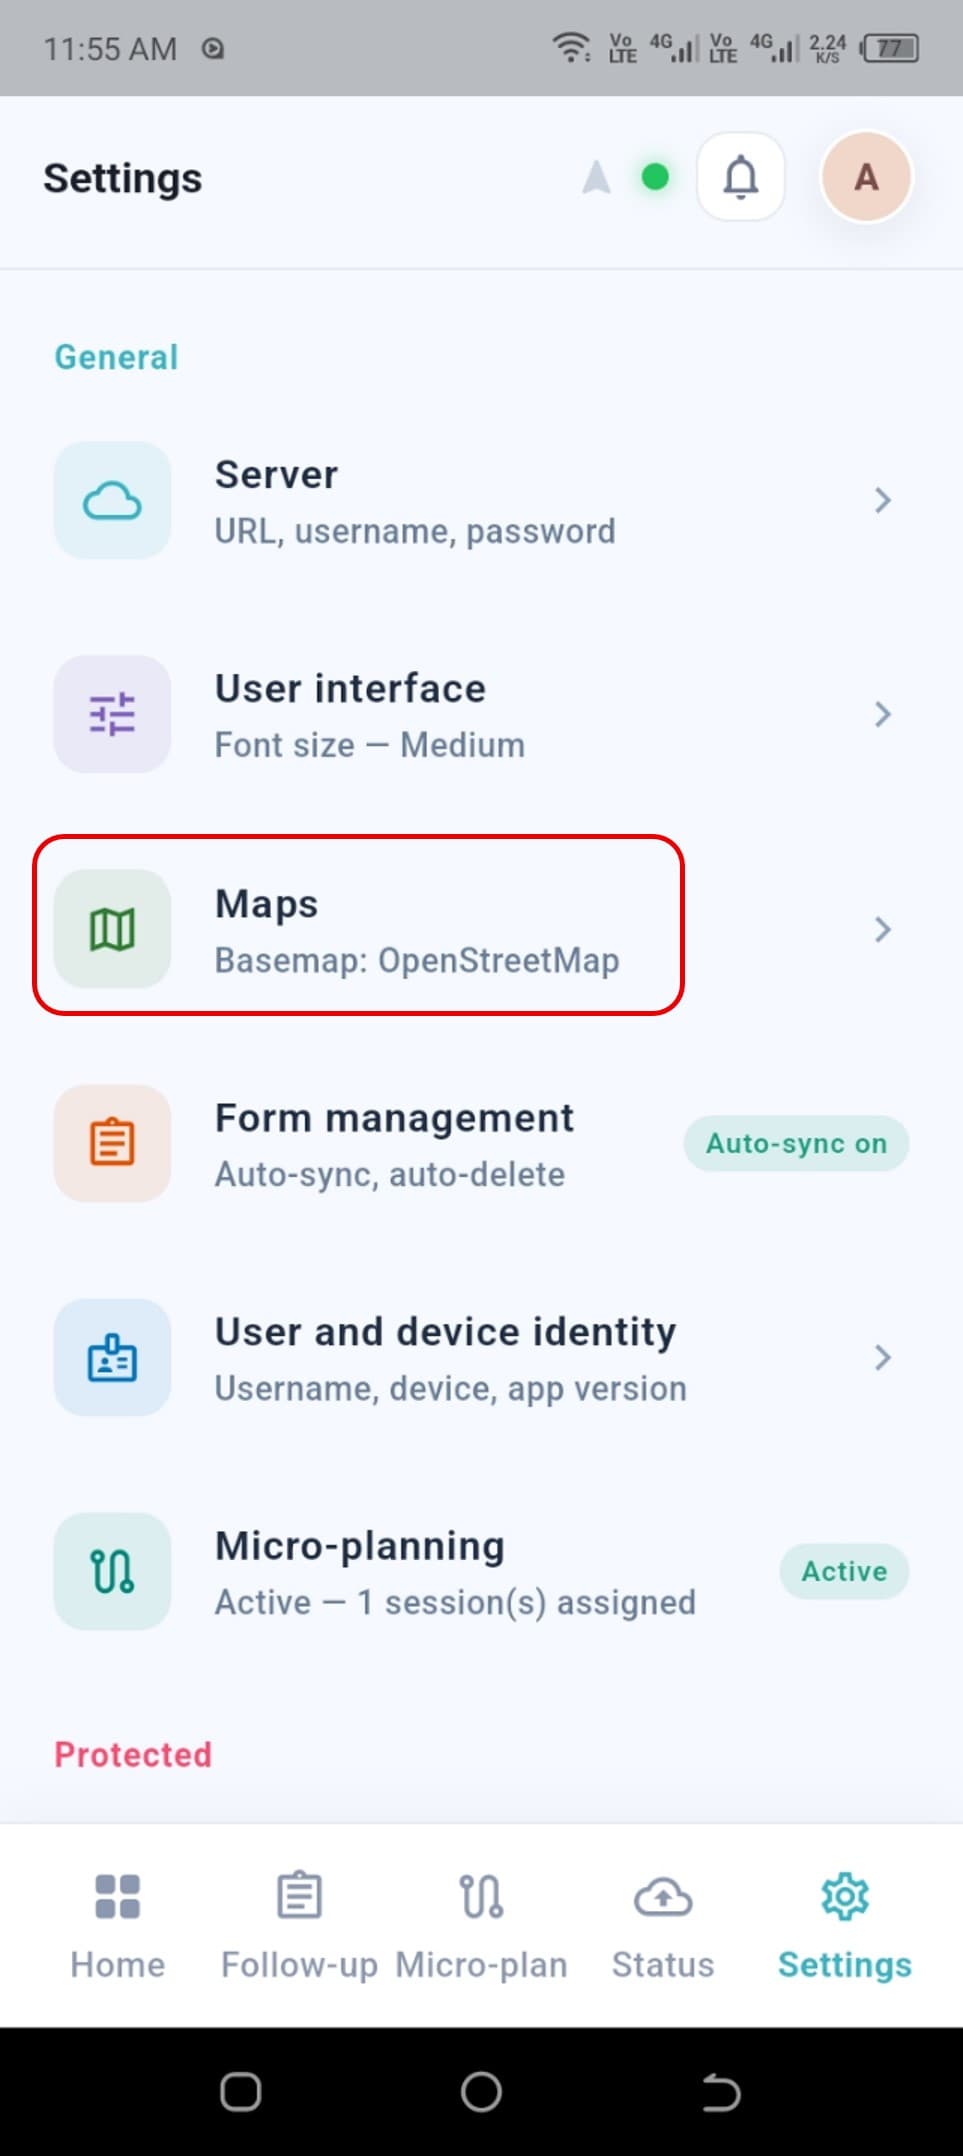
Maps
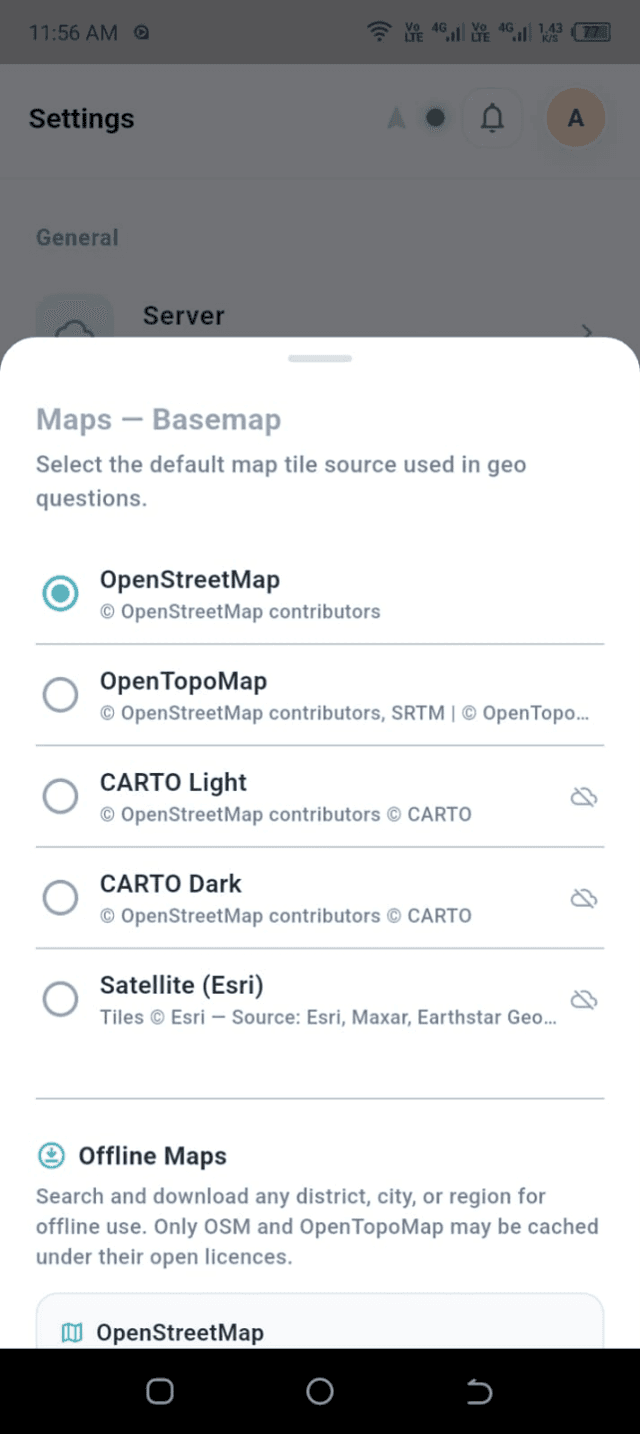
Maps controls map-related preferences used by GIS and microplanning features, such as the base map and offline map behavior.
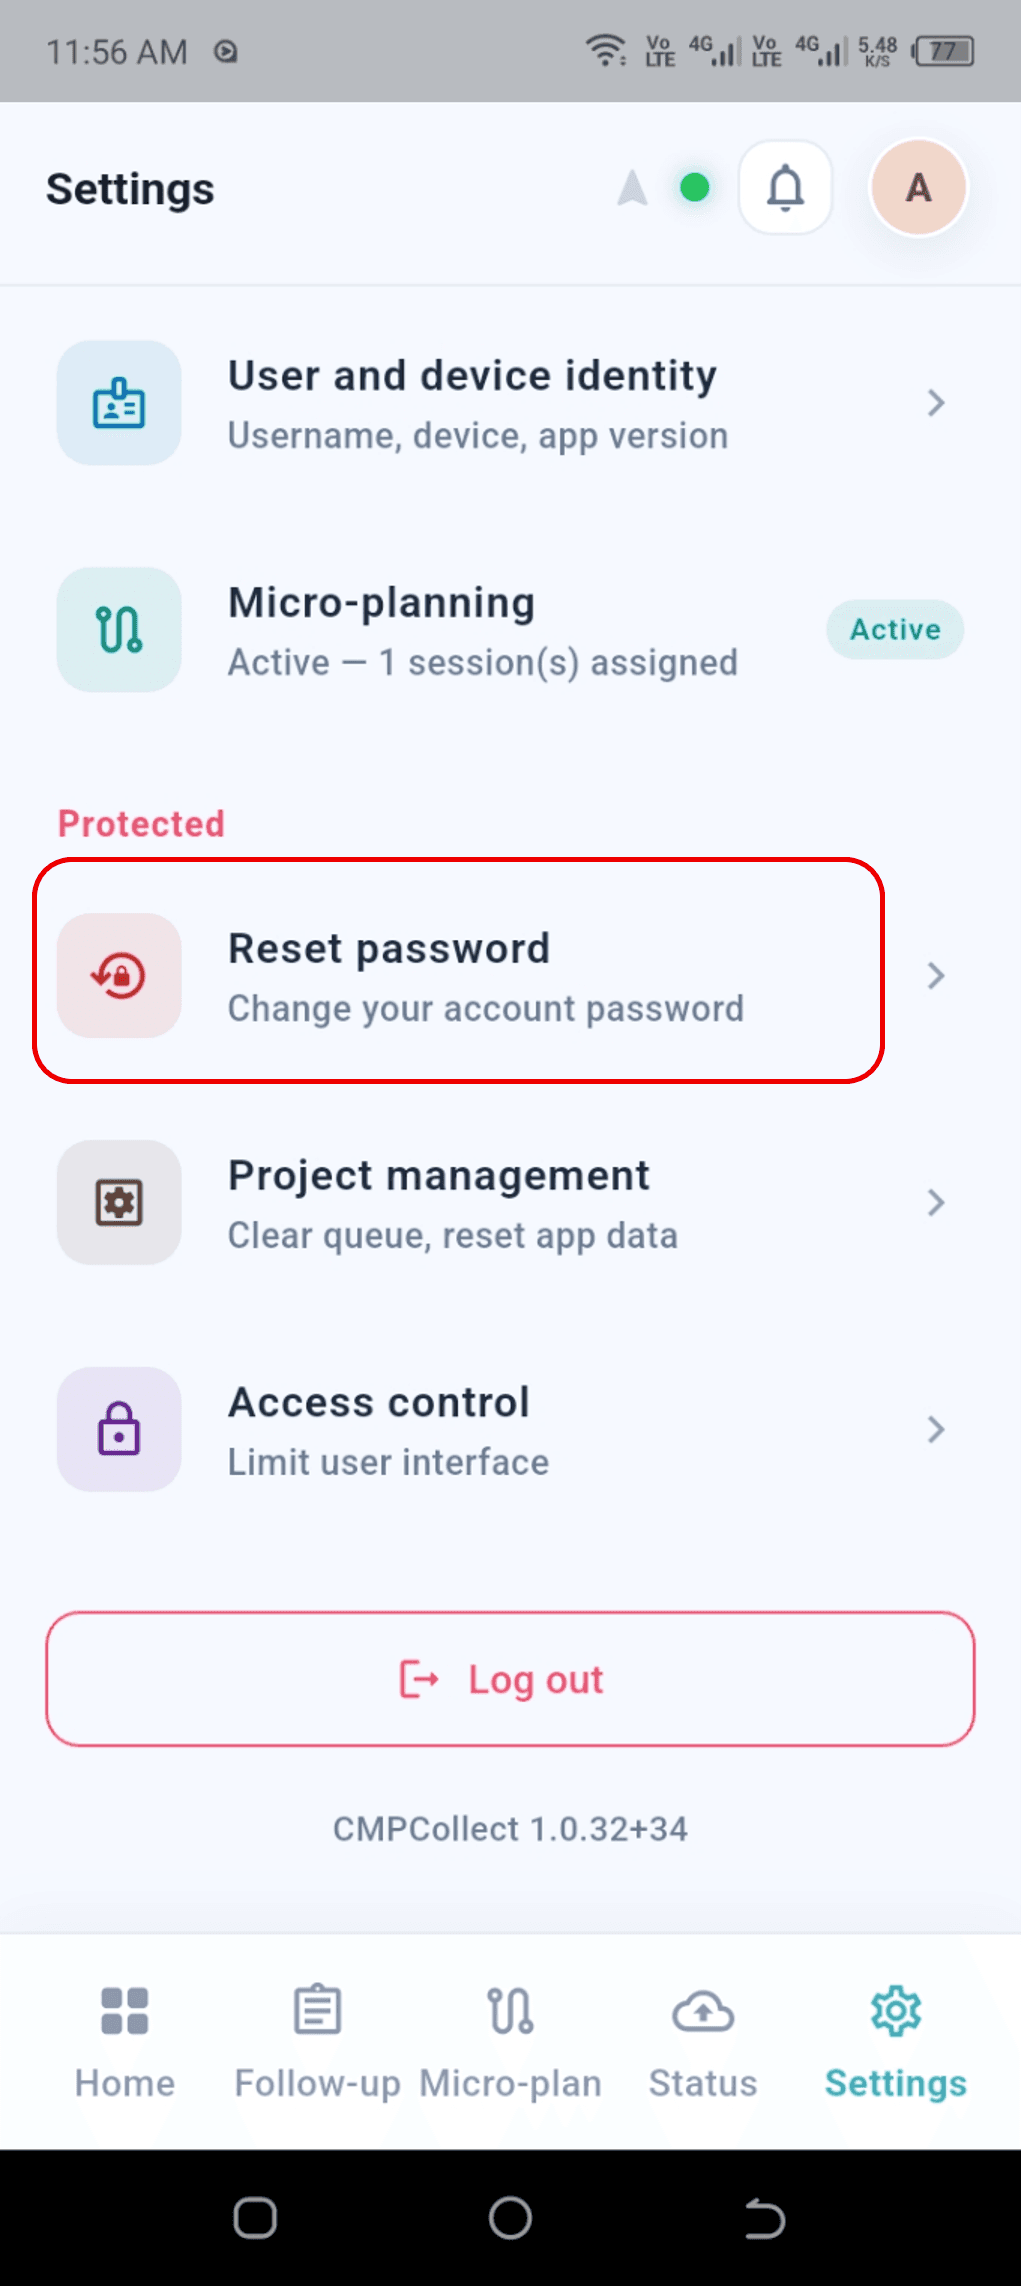
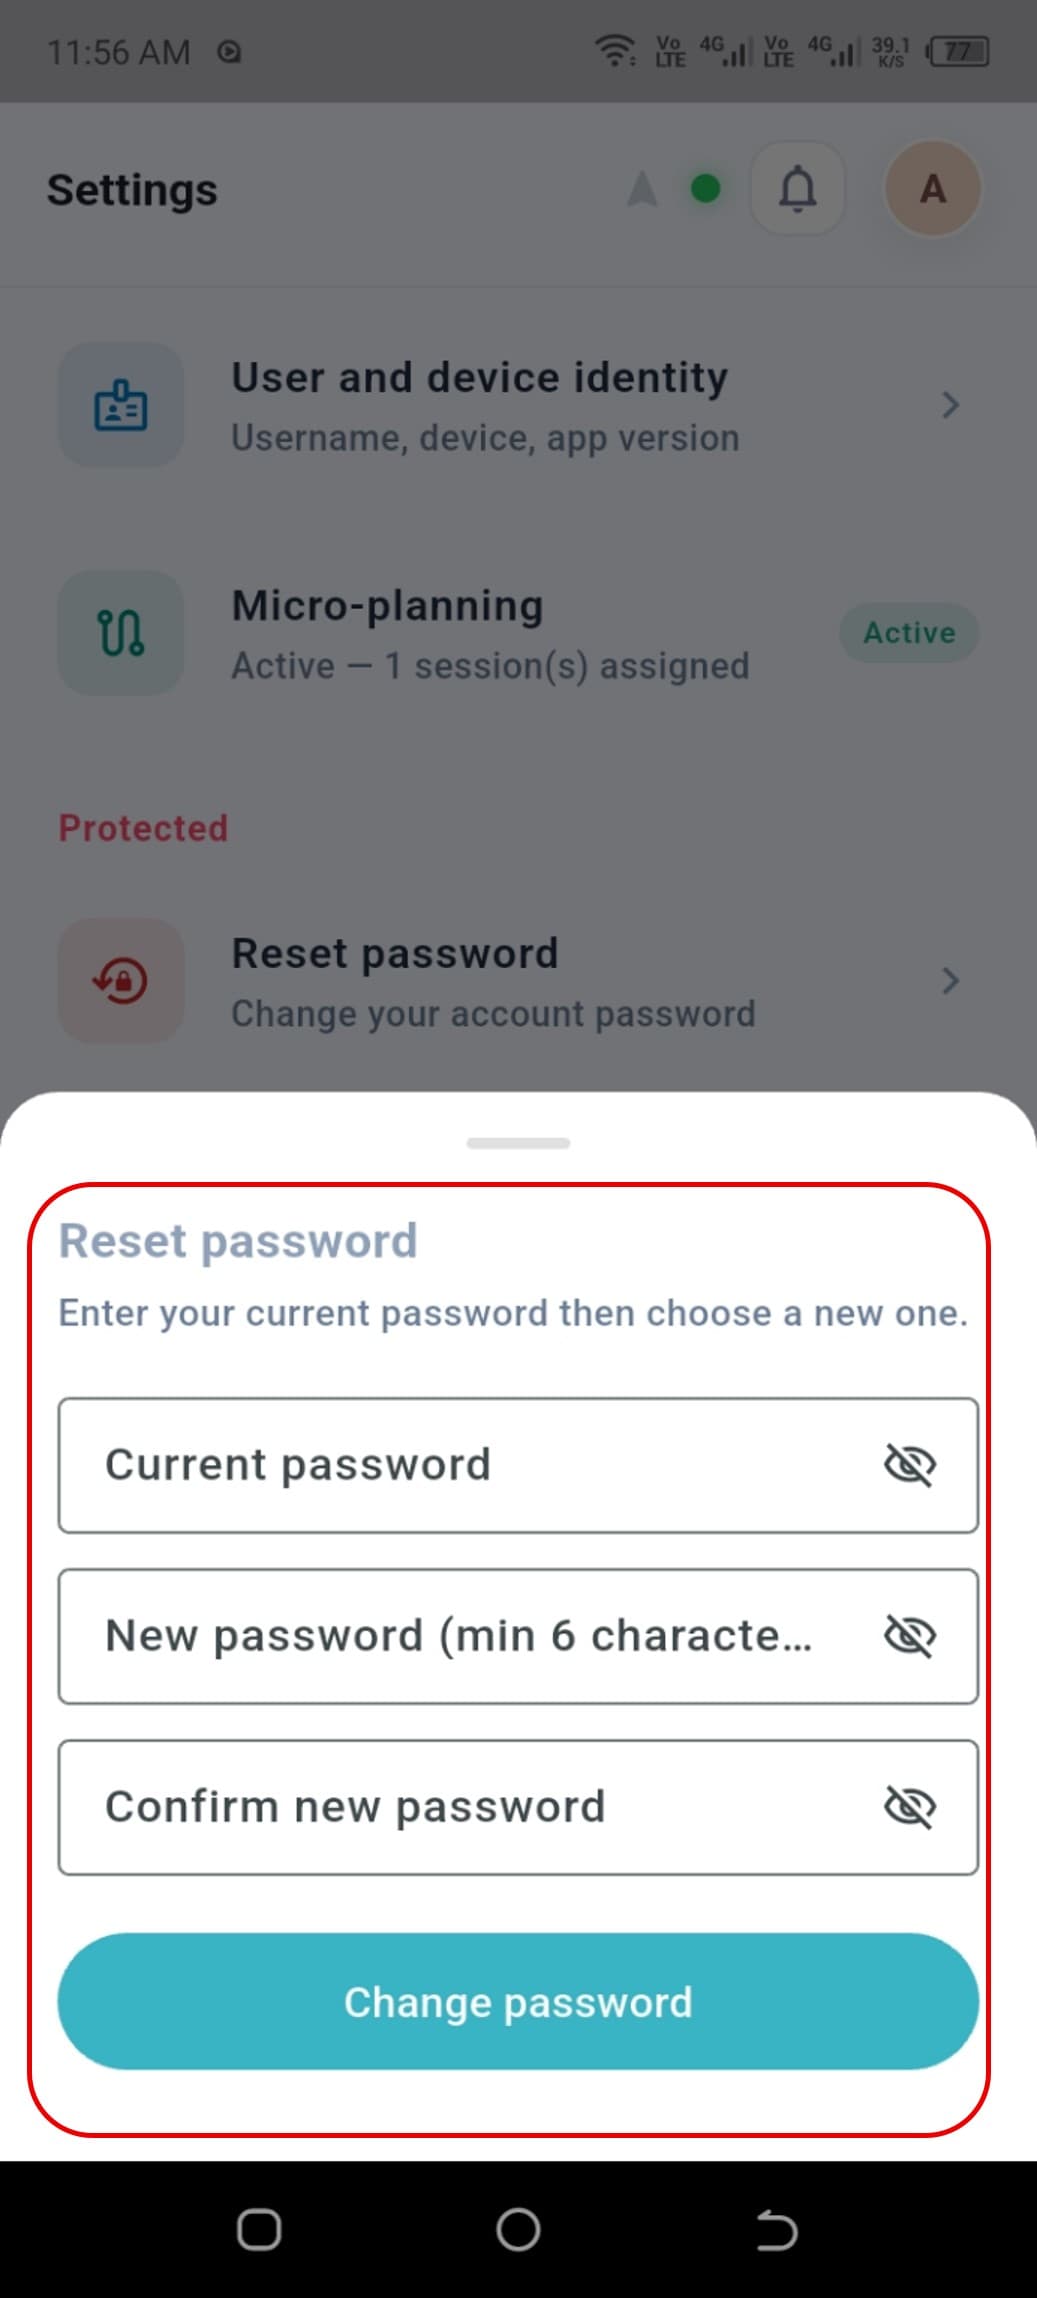
Password Reset
Password Reset lets the signed-in user change the account password from the device.
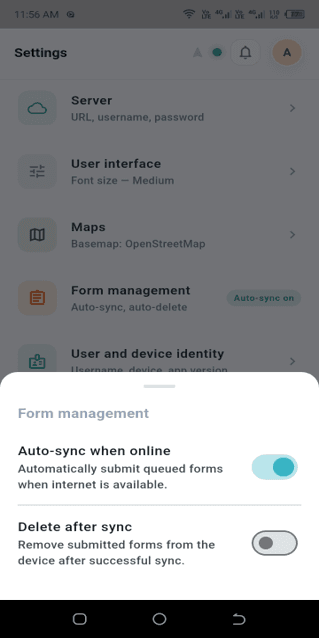
Form Management
Form Management handles downloaded forms — reviewing which forms are available offline and refreshing or removing them.
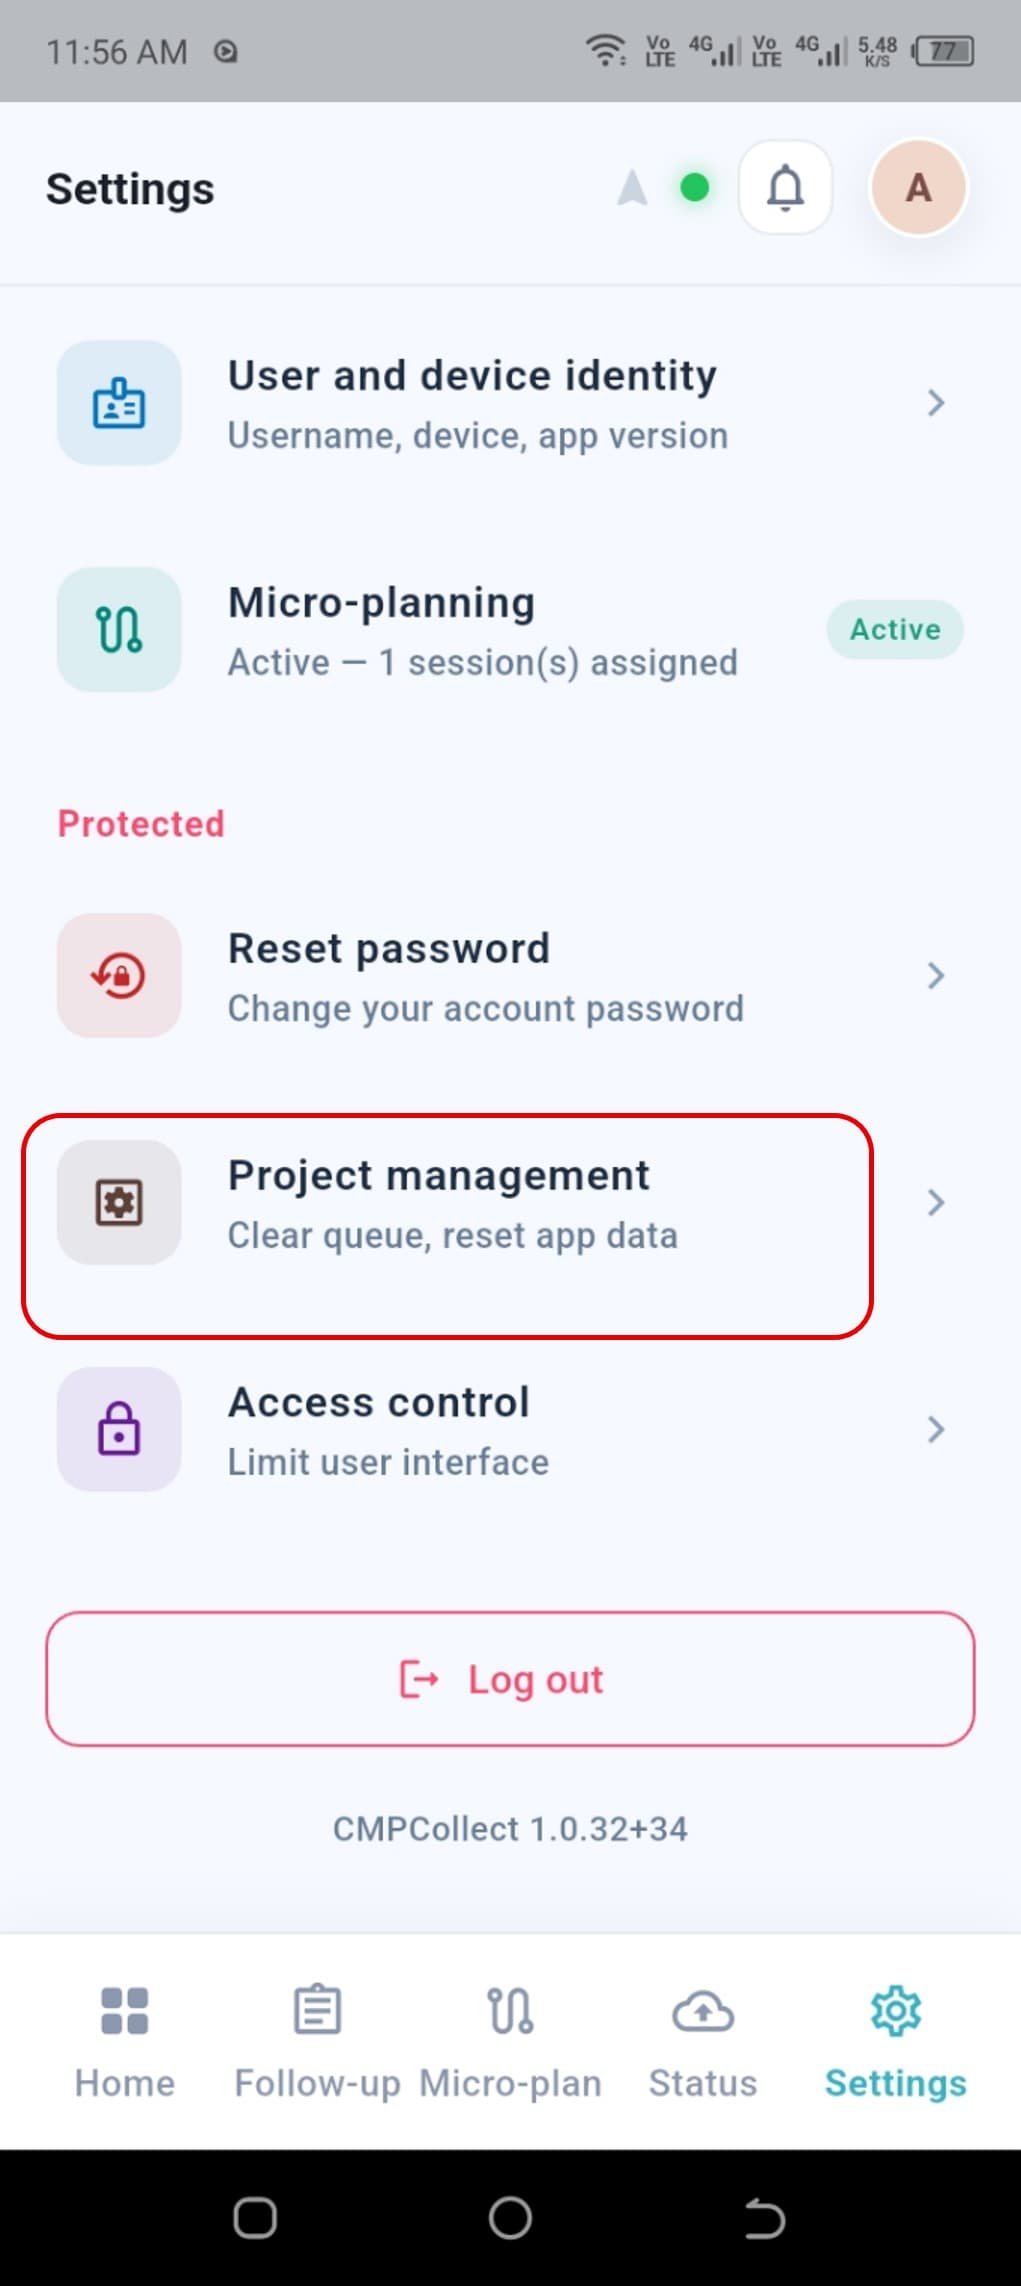
Project Management
Project Management shows the projects assigned to the user and controls project-related preferences on the device.
Tips and best practices
- 1.Select While using the app for microphone, location, and camera permissions during normal field collection.
- 2.Download forms before heading to the field so they are available offline.
- 3.Keep the Notification switch enabled on a registration to receive its follow-up reminders.
- 4.Use Extract from NID to reduce manual typing when the card photos are clear.
- 5.Watch the top app bar for the out-of-area warning while path tracking is active.
- 6.Check the Status page after regaining connectivity to confirm Pending forms have synced.
Continue tutorials
View all
6 steps
Getting started with the platform
Follow the full setup path from account registration through organization, project, form, user, and assignment work.
3 steps
Creating your first project
Create a project inside the organization, connect forms, and prepare the workspace for field activity.
Complete guide
Create your first form
Create forms from scratch or XLSForm, then build a complete questionnaire with data types, options, logic, constraints, groups, repeats, cloning, preview, validation, and save.
7-step guide
Microplanning: areas, assignments, and tracking
Enable microplanning, create or import geographic areas, assign field users, manage boundaries, and monitor progress from the overview dashboard.